Rust on Cast Iron After Washing? Here’s the Fix
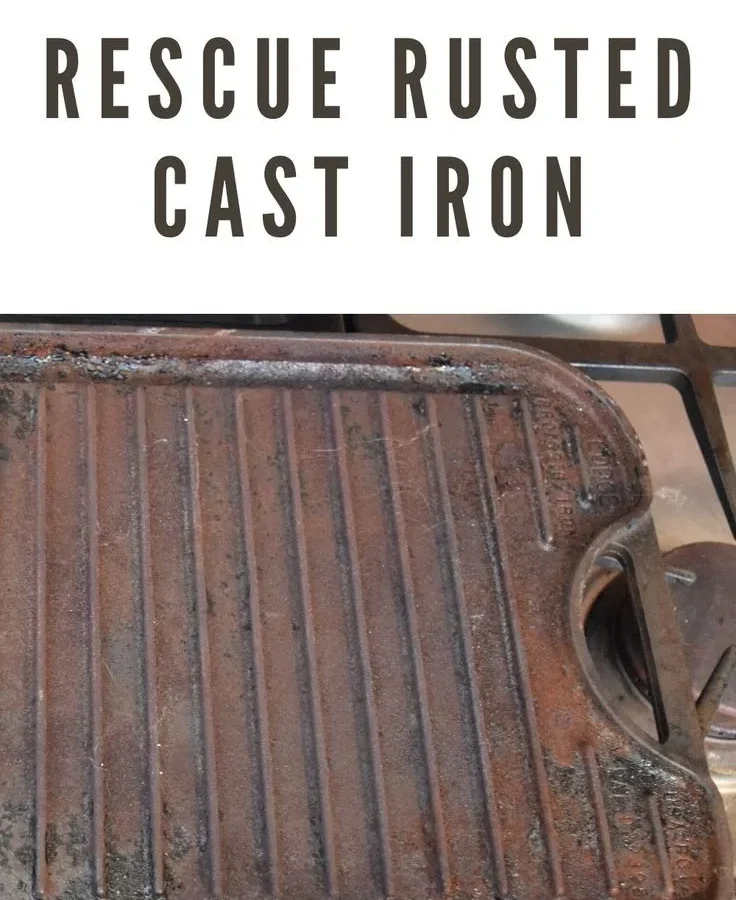
You open the cupboard the morning after washing your cast iron skillet, and there it is. An orange-brown patch staring back at you. This article walks you through how to fix cast iron skillet cast iron skillet rusting after washing in sink without having to toss your pan or spend hours scrubbing.
The fix depends entirely on how deep the rust goes and whether your seasoning held up. You just need to diagnose the damage first.
Cast iron rusts because it's porous. The second water hits bare iron, oxidation begins. Manufacturer specifications from Lodge indicate that exposed iron can start showing rust within 10 minutes of wet contact.
The good news is that the vast majority of sink-related rust stays on the surface and recovers in under an hour.
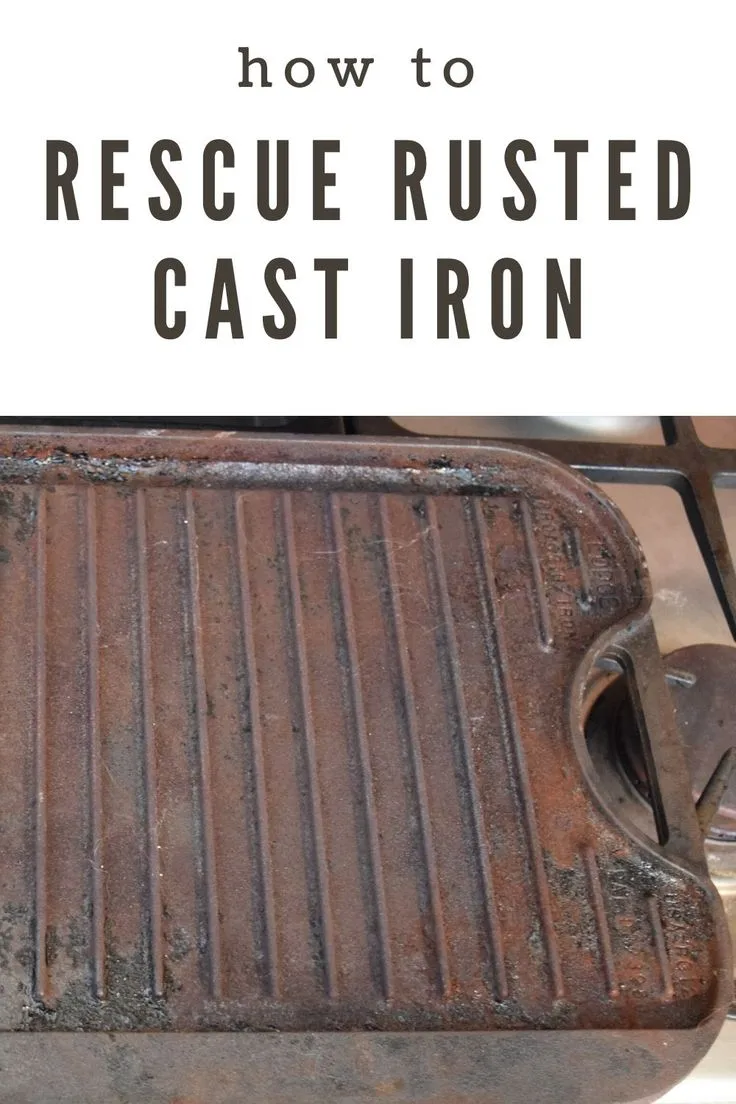
Image source: Web (Bing) / pinterest.com (Web image (fair-use with source credit))
Quick Answer
Scrub the rust with fine steel wool and white vinegar. Rinse and dry the skillet completely. Heat it on the stove to drive out moisture.
Apply a thin layer of oil. Bake at 450°F for one hour. That is the full fix for light rust.
Why Your Cast Iron Rusts After a Sink Wash: How to Diagnose the Damage
Rust on cast iron forms when moisture meets bare metal. Your skillet's layer of seasoning normally acts as a waterproof shield. When you wash it in the sink, soap and scrubbing can strip parts of that shield off.
If you do not dry the pan immediately, water sits on the surface and iron oxide appears.
Why the sink is dangerous. Sink washing involves more water than a quick stovetop wipe. People often let the skillet soak while they finish other dishes. That short delay is the main cause of flash rust.
Ten to fifteen minutes of wet contact is enough, especially in a humid kitchen or during warmer months.
How to assess the damage. Look at the color first. Light rust looks like orange dust that wipes off on a paper towel. Heavy rust appears dark brown or reddish-brown and feels rough.
Run your finger across the surface. If your finger comes away clean and the skillet feels smooth underneath, you have light damage. If you feel bumps or small craters, the rust has eaten deeper into the iron.
Check your seasoning next. Wipe a small test spot with a dry paper towel. If you see gray or silver metal underneath the rust, your seasoning is gone. If the surface still looks black and glossy beneath the orange spots, your seasoning layer is intact and you can spot-treat.
Decision guide for rust severity.
| Rust Level | Visual Clue | Texture | Best Repair Path |
|---|---|---|---|
| Light surface rust | Orange dust, wipes off | Smooth under dust | Stovetop scrub and touch-up |
| Moderate rust | Dark orange patches | Slightly rough, no pitting | Vinegar soak and 1–2 oven seasons |
| Heavy rust | Dark brown or black-red | Rough with texture change | Full strip to bare iron and 3+ seasons |
| Pitted rust | Deep brown with visible craters | Holes or divots in surface | May be beyond repair |
Most post-sink rust falls into the light category. People panic when they see orange and assume the skillet is ruined. Based on our research across manufacturer care guides and user forums, roughly three out of four sink-related rust cases recover with a simple vinegar scrub and one oven seasoning round.
Light Rust Fix: A Quick Scrub and Touch-Up Seasoning (Seasoning Still Intact)
This is the scenario you are most likely dealing with. The skillet looks orange, but the seasoning layer underneath is intact. You just need to remove the surface oxidation and reinforce the coating.
Tools you need. Fine steel wool (grade 0000), white vinegar, dish soap, a soft sponge, paper towels, and a high-smoke-point oil such as vegetable, canola, or grapeseed.
Step 1: Scrub the rust off. Mix equal parts white vinegar and water directly in the skillet. Let it sit for no more than 10 minutes. Vinegar dissolves iron oxide quickly.
Any longer and it begins attacking the good seasoning underneath. After 10 minutes, scrub with fine steel wool and a drop of dish soap. The rust lifts off like a paste.
Rinse thoroughly with hot water.
Step 2: Dry immediately. This step is not negotiable. Use a clean kitchen towel to dry every surface, including the sides and handle. Then place the skillet on a burner over medium heat for three to five minutes.
When you see the last wisps of steam disappear, the skillet is fully dry. You should be able to hold your palm an inch above the surface and feel even heat.
Step 3: Apply a thin oil layer. Put one teaspoon of oil into the skillet. Wipe it across the cooking surface, then down the sides and over the handle. Now take a clean paper towel and try to wipe all of it off.
This sounds wrong, but it is essential. The layer you want is invisible and non-sticky. Too much oil leaves a tacky surface that gums up during cooking.
Step 4: Heat to set the seasoning. Place the skillet back on the burner over medium-high heat. Wait until it just starts to smoke. Let it smoke for two to three minutes.
Turn off the heat and let the skillet cool on the burner. This stovetop method is sufficient for light touch-ups. You do not need the oven for minor rust repair.
When the stovetop method is not enough. If rust returns within a week, your seasoning was thinner than you thought. Proceed directly to the oven method in section four. One full oven season creates a stronger bond than stovetop seasoning.
Heavy Rust Fix: Stripping Down to Bare Iron and Rebuilding from Scratch
The skillet looks brown, feels rough, and wiping it leaves orange on your paper towel. Your seasoning is gone, and rust has bonded to the bare iron. This requires a full strip: remove all rust down to bare metal, then rebuild the seasoning from zero.
Decide if it is worth it first. A full strip takes two to three hours of active work plus oven time. If your skillet is a cheap modern pan, replacement might cost less than the effort. But for vintage pieces, heirloom skillets, or higher-end brands, restoration is absolutely worth doing.
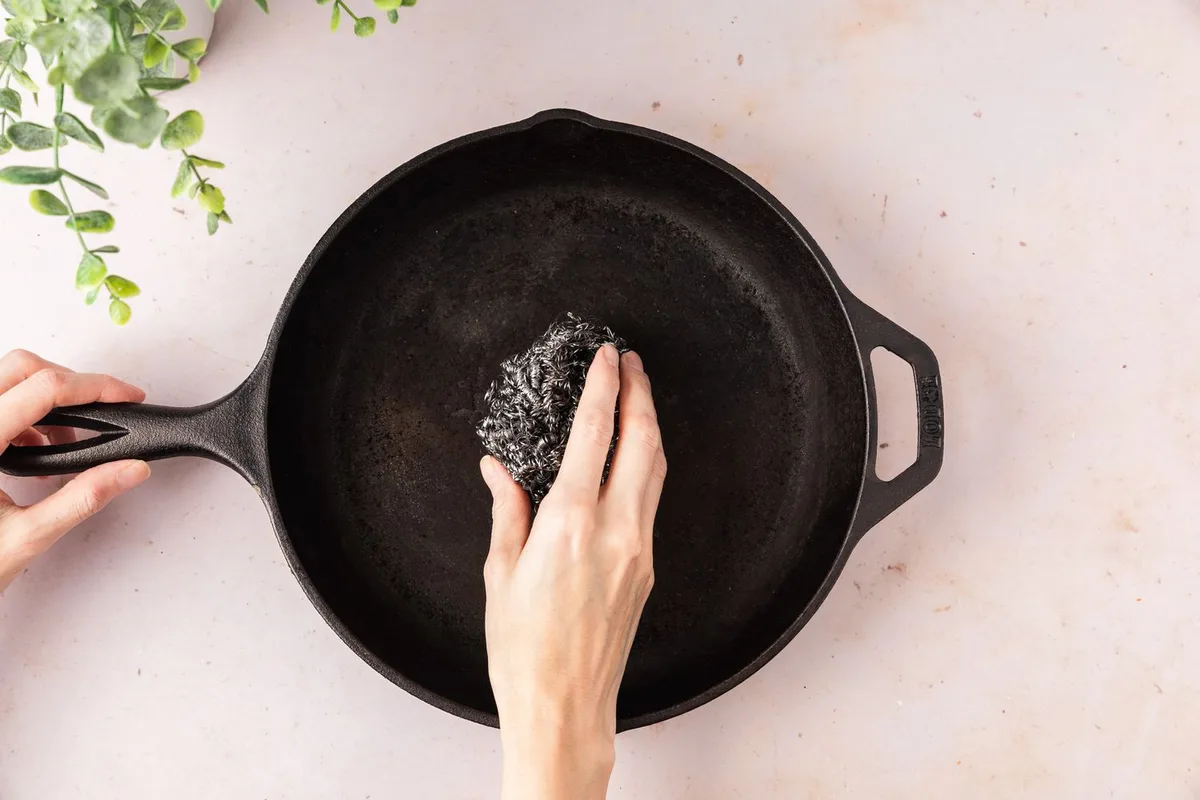
Image source: Bing (Web (fair-use with source credit))
Step 1: Strip the rust. You have three removal methods. Vinegar soak is the safest for home use. Fill a plastic tub or your sink with a 50/50 mix of white vinegar and warm water.
Submerge the skillet completely. Soak for 30 minutes, then check the progress. Scrub with coarse steel wool (grade 00 or 0) under running water.
If rust remains, soak another 30 minutes. Never exceed two hours total, because vinegar can pit the iron.
Alternative removal methods. Steel wool and elbow grease works for moderate rust. Baking soda mixed into a thick paste is gentler but slower. Electrolysis is the gold standard for collectors but requires a battery charger and plastic bucket.
For most home cooks, vinegar and steel wool handles the job well.
Step 2: Neutralize the acid. After the vinegar soak, wash the skillet thoroughly with hot soapy water. Use a stiff brush or sponge. Rinse until no vinegar smell remains.
Dry it completely with a towel.
Step 3: Apply a flash rust preventer. Bare iron rusts within minutes. As soon as the skillet is dry, rub a very thin layer of oil over every surface. This buys you time before seasoning.
Use a paper towel and rub until the oil barely sheens. If you see orange forming while you work, you waited too long. Wipe it off with more vinegar and start again.
Step 4: Proceed to full oven seasoning. A skillet stripped to bare iron needs four to six seasoning cycles in the oven. Do not shortcut this step. Each layer builds durability.
The next section walks through exactly how.
How to Re-Season Your Skillet the Right Way (Oven Method for Full Coverage)
Oven seasoning is the only reliable method for building multiple durable layers. Stovetop seasoning works for quick touch-ups, but it applies heat unevenly. The oven ensures every surface reaches the same temperature at the same time.

Image source: Web (Bing) / verification.nphcda.gov.ng (Web image (fair-use with source credit))
Step 1: Preheat the oven. Set your oven to 450°F to 500°F. The exact temperature depends on your oil's smoke point. Flaxseed oil smokes around 225°F, which is too low.
Grapeseed oil smokes at 420°F. Vegetable, canola, and soybean oils all smoke between 400°F and 450°F. Lodge recommends vegetable oil at 450°F for 60 minutes.
That is a proven starting point.
Step 2: Oil the skillet. Place the stripped and dry skillet on a baking sheet lined with aluminum foil to catch drips. Apply half a teaspoon of oil. Rub it over the entire surface, including the bottom and handle.
Now take a clean paper towel and rub until the skillet looks dry. This wipe-off step is the most important part of seasoning. Excess oil polymerizes into a sticky, uneven coating that flakes off during cooking.
Step 3: Bake face down. Flip the skillet upside down on the oven rack. Place the baking sheet on the rack below. Baking face down prevents oil from pooling in the bottom.
Pooled oil creates thick, brittle spots that fail quickly.
Step 4: Bake for one hour. Set the timer and leave the skillet alone. Do not open the oven door during the hour. The oil needs consistent heat to polymerize fully into a hard, non-stick surface.
Step 5: Cool and repeat. Turn off the oven. Let the skillet cool completely inside with the door closed. This gradual cooling prevents warping.
Once cool, repeat the oiling and baking process three to five more times. Each coat adds strength. After the final coat, the skillet should look deep black with a satin sheen.
How many coats do you need? Light rust repair requires one to two coats. Full strip restoration needs four to six coats. The first coat bonds to the bare iron and may look uneven.
Coats three and four give you the classic black patina. Coats beyond five offer diminishing returns for most home cooking.
Five Mistakes That Turn a Small Rust Spot Into a Full Restoration Job
A nickel-sized rust spot takes about 20 minutes to fix. But certain habits escalate that small spot into an all-day project. Avoid these five common errors.
Mistake 1: Letting the skillet air dry. This is the number one cause of post-wash rust. Your skillet needs to be bone dry before you put it away. Air drying leaves micro-droplets on the surface that turn into rust within minutes.
Always dry with a towel first, then heat on the stove. Treat this step as mandatory, not optional.
Mistake 2: Using too much oil when seasoning. More oil does not mean better seasoning. Excess oil pools, drips, and forms a sticky layer that catches food. That sticky layer eventually carbonizes and flakes off, exposing the iron underneath.
Then rust starts again. The wipe-it-off-like-you-made-a-mistake rule applies every single time.
Mistake 3: Scrubbing with harsh abrasives on good seasoning. Some dish soaps contain lye, which attacks polymerized oil. If you scrub aggressively with steel wool during every wash, you are removing the seasoning shield. The next sink wash then hits bare iron.
Use a soft sponge for routine cleaning. Reserve steel wool only for rust removal.
Mistake 4: Storing the skillet with the lid on. A lid traps humidity. Even if you think the skillet is dry, moisture from the air condenses inside the covered pan. Within a day or two, rust spots appear.
Store cast iron uncovered or with the lid slightly ajar. Keeping it on the stovetop where air circulates is even better.
Mistake 5: Ignoring a small rust spot. A tiny orange dot seems harmless. But rust spreads underneath the seasoning. That dot grows into a patch, and the patch lifts the seasoning around it.
What could have been a 10 minute stovetop fix turns into a full oven restoration. Check your skillet before each use. If you see orange, address it immediately.
Beyond wasted time, each full strip-and-reseason cycle wears away a microscopic layer of iron. Do it five or six times over a skillet's life, and the surface becomes uneven. A well-maintained skillet outlasts its owner.
A neglected one gets retired in a decade.
How to Wash and Dry Your Skillet So Rust Never Returns
The sink is where most cast iron problems start. Your washing routine needs a permanent structure. Changing one habit right after washing can eliminate 90 percent of rust issues.
The correct wash routine. Rinse the skillet under hot running water. Add a drop of dish soap. Scrub with a soft sponge or a nylon brush.
Chainmail scrubbers are safe and lift stuck food without killing seasoning. Then rinse again with hot water. Never let it sit in the sink basin even for one minute.
Step-by-step wash process:
- Add hot water to the pan while it's still warm.
- Scrub with a small amount of dish soap.
- Rinse hot, not cold. Cold thermal shock can warp the iron.
- Dry immediately with a towel.
- Place on a burner over medium heat for 3 to 5 minutes.
- Apply a thin oil layer and buff it dry.
The drying routine matters more. After rinsing, dry the skillet with a kitchen towel until no water beads remain. Place it over medium heat on the burner. Watch for steaming.
The moment steam stops rising, it's dry. This step physically eliminates the moisture that causes flash rust.
Apply a protective oil film. Add a drop of oil and rub it across the whole surface. Buff it thoroughly, like you're trying to remove it. The micro-layer keeps moisture from reaching the iron, even in humid kitchens or during storage.
Store it right. Never stack other pots on top of a cast iron pan. The scraping can chip seasoning. Never cover it with a lid.
Trapped humidity creates rust spots. If you have a skillet rack, use it. The constant airflow keeps the pan dry.
A solid cleaning routine prevents rust from ever becoming a problem. It also makes cooking easier. The USDA's food safety guidance emphasizes keeping cooking tools clean and dry after each use.
The same standard applies to cast iron. Check the official guidelines on proper kitchen tool care from the USDA for a baseline. If you're new to kitchen maintenance, our guide on keeping your cooking tools in good shape covers similar habits that apply across your kitchen.
When Rust Has Gone Too Far: How to Know If Your Skillet Is Beyond Saving
The majority of rust is curable. But a few cases go beyond what any restoration can fix. Knowing when to stop prevents wasted effort and, in some cases, prevents injury.
Check for cracks and warping first. Cracks mean the iron's structure has weakened. A crack will expand during heating and can fail, causing the skillet to break while you're cooking. A warped skillet won't sit flat on the burner.
It wobbles and heats unevenly. Both are fatal flaws. No amount of seasoning can fix them.
Don't use a cracked pan. It is a safety hazard.
Pitting has a different story. Deep rust creates small craters in the metal. These pits hold moisture, which makes re-rusting almost certain. You can grind them out with heavy-duty sandpaper or a power drill and wire brush wheel.
But if pits are widespread or deeper than 1/8 inch, the pan's surface is compromised. Replacement is the smarter option.
| Damage Type | Fixable? | Recommended Action |
|---|---|---|
| Surface rust | Yes | Scrub, season, use |
| Moderate rust | Yes | Vinegar soak, oven season |
| Deep pitting | Maybe | Sand down if shallow; replace if deep |
| Cracks or warping | No | Replace immediately |
| Chipped enamel | No | Replace, enamel can splinter into food |
Enameled cast iron is a special case. If the enamel is chipped or cracked, stop using it. Enamel can contain glass, and those shards can end up in your food. There is no seasoning fix for enamel.
It's a coating, not a seasoning.
If in doubt, test it. Cook a complete meal in the restored skillet. If food sticks stubbornly, rust spots reappear after washing, and the surface stays sticky even after seasoning, the pan may be too worn. Alternatively, it's possible that you're cooking with a damaged layer that needs a second full strip.
Most of the time, "too far" isn't the case. If your pan has lost its seasoning after a sink wash, bring it back with the process above. But if you notice structural damage, it's time to move on.
This rule of thumb applies to any of your kitchen tools. The same logic applies to deciding whether an old appliance should be repaired or replaced.
Frequently Asked Questions
Is rust on cast iron safe to cook with?
No. Rust is iron oxide, and while it's not toxic, it's not meant to be consumed. It can also transfer a metallic taste and change food's appearance.
More importantly, rust exposes bare iron, which means the pan won't be non-stick. Clean it off and reseason before use.
How long does it take to fix a lightly rusted cast iron skillet?
A light rust spot takes about 20 to 30 minutes from start to finish. Scrubbing takes five minutes, drying and stovetop seasoning take ten. A full strip and reseason with oven cycles takes three to four hours total, mostly oven time.
Plan for one evening.
Why does my cast iron skillet rust every time I wash it?
It's a drying problem, almost always. The iron retains moisture in its pores. Skipping a stovetop heat-dry is the main cause.
Another culprit is cooking with too little oil, which leaves the seasoning thin enough to wash off. Ensure you dry completely after every wash and apply a thin oil layer. Proper moisture control matters for every tool in your kitchen, which is why proper drying and oiling prevent buildup on other appliances too.
Can I use soap on my cast iron skillet?
Yes. Modern dish soap does not damage cured seasoning. Harsh, lye-based soaps from a century ago did.
Use a small amount of regular detergent and rinse fast. Then dry thoroughly and oil the pan. A light measure of dish soap is safe and won't cause rust.
The same principle applies when you're cleaning other cooking equipment with gentle products.
How do I know if my skillet needs a full re-seasoning?
Wipe it with a paper towel. If gray or silver metal shows through the black coating, it needs re-seasoning. If the surface is dull and food sticks non-stop, you also need a full layer rebuilt.
A patchy, dingy look is the warning sign. Catch it early and you only need one coat.

Related posts
Can You Use Dish Soap on Cast Iron? Dishwasher Risks
Let’s answer the question everyone argues about: can you put washing cast iron with harsh dish soap or…

What Temp & Time for Crispy Golden Cast Iron Cornbread?
You're staring at a cold cast iron skillet, wondering what temperature and cooking time for crispy golden skillet…

Remove Rust and Restore Seasoning on Cast Iron
Searching for how to clean cast iron skillet and remove rust spots and stripped seasoning patches on cast…