Remove Rust and Restore Seasoning on Cast Iron
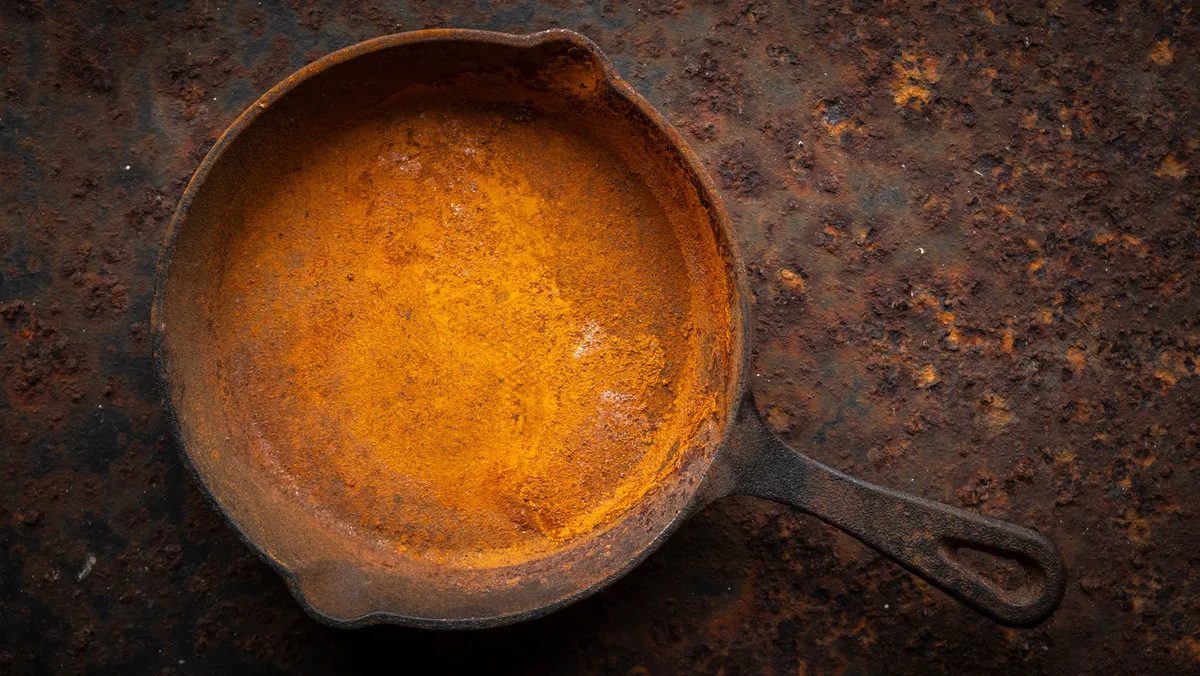
Searching for how to clean cast iron skillet and remove rust spots and stripped seasoning patches on cast iron is the right first step. You don't need to trash a pan that looks rough. You just need to match your method to the damage level before you pick up a scrubber.
Here’s the direct answer: assess first, then strip only as far as the rust takes you.
A standard 10-inch plain cast iron skillet weighs about 5 to 7 pounds. That weight comes from iron with a carbon content of roughly 2% to 3.5%, which gives cast iron the heat retention people love. As of 2026, that same basic material has been around for well over a century.
Now let’s figure out what’s actually happening inside your pan.
Image source: Bing (Web (fair-use with source credit))
What You’re Up Against: Rust and Stripped Seasoning
Why Both Problems Usually Show Up Together
Seasoning is a layer of polymerized oil that bonds to the iron. It’s hydrophobic, which means it keeps water away. When the seasoning wears thin, moisture hits bare iron and oxidation starts.
That’s why rust and stripped seasoning show up in the same spots.
Acidic food is a common trigger. Tomatoes, vinegar, wine, and citrus can eat through seasoning. Once that barrier is gone, a little moisture from a wash can create rust overnight.
Our research across user forums and repair guides shows this pairing in most damaged skillets.
The Difference Between Surface Rust and Deep Pitting
Before you choose a method, run your thumb over the surface. Light rust feels like sand. Deep rust feels like a washboard.
If the pan has craters that hold water, that’s pitting.
| Rust Type | Feel | What It Means |
|---|---|---|
| Light dusting | Gritty, orange powder | Seasoning failed at the surface |
| Flaky patches | Lifting, rough scales | Moisture got under the seasoning |
| Deep pitting | Visible craters after rising | Rust is eating into the iron |
Surface rust sits on top of the metal. You can scrub it away and rebuild seasoning quickly. Deep pitting means the rust has started carving into the iron.
That needs a stronger approach, because scrubbing alone won’t level the surface.
If you’ve ever tackled a sticky, grease-caked device before, you already know the rhythm. It’s the same kind of work as cleaning a deep fryer basket on a worn-out unit. You find the worst spots and start there.
Quick Answer: Do You Strip It or Fix It in Place?
The quick answer to fixing a rusted cast iron skillet is simple: strip only what’s damaged. Scrub light rust off and re-season the bare patches. Deep rust or a fully stripped pan needs a vinegar soak or lye bath.
Match the method to the damage, not the timeline.
Image source: Bing (Web (fair-use with source credit))
A Simple Flowchart for Your Situation
Ask three quick questions:
- Is the rust powdery or rough?
- Is the metal bare under the flaking seasoning?
- Does the pan have deep craters?
If the first answer is powdery, spot clean. If the second answer is yes, strip that layer. If the third answer is yes, use electrolysis or a lye soak.
A stripped pan can always be stripped more, but you can’t un-scratch a gouge.
When to Spot-Clean vs. When to Start Over
Spot-clean when the seasoning is mostly intact and rust looks like a light dusting. Start over when the pan is sticky, when rust covers most of the cooking surface, or when seasoning chips off in sheets. A full restore is more work, but it resets the pan.
Sometimes that’s the only fix.
Restoration takes time, kind of like deciding between a standalone fryer and a heavy pot. The right method depends on what you’re starting with.
Stripped or Rusted? How to Assess Your Skillet Right Now
Check the Rust: Light Dusting vs. Flaky vs. Cratered
Look at the pan under direct light. A light dusting looks like coarse cinnamon. Flaky rust forms scales you can peel with a fingernail.
Cratered rust shows pockmarks after you rinse the pan. Use a flashlight if you’re not sure.
Check the Seasoning: Thin Patches vs. Bare Iron vs. Sticky Gunk
Seasoning has three states. Thin seasoning looks dull but still feels smooth. Bare iron looks dark grey or silver and turns orange within minutes when wet.
Sticky gunk is old oil that never polymerized. Each state needs a different treatment.
The Vinegar Test for Rust Depth
Put a few drops of white vinegar on the rustiest spot. If it fizzes lightly, you have active rust. If nothing happens, the brown color may just be stained seasoning.
Leave vinegar on for no more than a couple of minutes during this test.
The Fingernail Test for Seasoning Integrity
Draw your fingernail across the cooking surface. If it digs a groove and bare iron appears, the seasoning is gone. If it skips over a rough patch, you’re looking at rust.
If it rides smooth but the pan looks dull, a single seasoning coat will fix it.
Once you know what you’re dealing with, the fix becomes clearer. That’s the same principle as maintaining an air fryer without letting grease build up.
Your Restoration Branch: Pick the Right Method
Branch A: Light Surface Rust + Healthy Seasoning (Scrub and Oil)
If the pan only has orange dust and the seasoning is solid, skip the strip. Scrub with a chainmail scrubber or fine steel wool under hot water. Dry it on the stove.
Rub in a thin layer of high-smoke-point oil. Cook something fatty and you’re done.
Branch B: Moderate Rust + Patchy Seasoning (Vinegar Soak + Spot-Season)
This is the branch most rusty skillets take. Mix white vinegar with water 1:1. Soak the pan for 30 minutes, no more.
Scrub with steel wool, neutralize with a baking soda paste, rinse, dry instantly, then apply one to three thin seasoning coats.
Step-by-Step for the Most Common Scenario (Branch B)
- Soak for 30 minutes in the vinegar mixture.
- Scrub with 0000 steel wool.
- Wash with dish soap and hot water.
- Dry over low heat until all moisture evaporates.
- Oil, wipe, and bake at 450°F for one hour.
- Repeat once or twice if the pan still looks patchy.
Branch C: Heavy Rust or Fully Stripped Seasoning (Full Strip and Re-Season)
Heavy rust means most of the cooking surface is rough or bare. A full strip will save you time in the long run. Use a lye bath or yellow-cap spray oven cleaner.
Once the old seasoning is gone, remove rust in a 1:1 vinegar soak, then reseason with three to five layers.
Branch D: Deep Pitting or Vintage Pan (Electrolysis or Lye Bath)
If you’re restoring a vintage Griswold or Wagner, skip vinegar for the strip. Abrasive scrubbing can destroy collector value and smooth surfaces. Electrolysis is the gentlest method.
A lye bath removes old seasoning without touching the iron. Take your time with this branch.
By the way, the logic here is similar to comparing different air fryer models before you buy. You pick the tool that fits the job.
The Step-by-Step That Works Every Time
Tools You Actually Need (and What to Skip)
Grab white vinegar, baking soda, fine steel wool, a chainmail scrubber, dish soap, high-smoke-point oil, and an old towel. That’s it. Skip the power drill wire brush and the heavy sandpaper.
They can gouge the iron and make the seasoning surface uneven.
| Tool | When You Need It |
|---|---|
| Chainmail scrubber | Everyday cleaning and light rust |
| Fine steel wool (0000) | Rust removal without scratching |
| White vinegar | Rust dissolution |
| Baking soda | Neutralizing vinegar |
| High-smoke-point oil | Re-seasoning |
| Lye spray or electrolysis | Full strip only |
Step 1: Strip or Scrub, Pick Your Weapon
Based on your Section 3 assessment, choose one. Light rust gets chainmail. Patchy seasoning gets a vinegar soak.
Heavy rust gets a full strip. If you’re not sure, pick the gentler option first.
Step 2: Remove Rust Without Damaging the Iron
Mix 1:1 white vinegar and water. Soak the skillet for 30 minutes for light to moderate rust. Scrub with fine steel wool and hot water.
Repeat the soak only if needed. Don’t let the pan sit in vinegar for hours. Acid can leave the surface etched.
Step 3: Neutralize and Dry Immediately (Flash Rust Is Real)
After the bath, the vinegar will keep reacting. Wash the pan with dish soap and a baking soda paste to stop that. Rinse with hot water.
Set it on a warm burner and let every drop steam off. Then oil the pan before it starts turning orange. In humid air, flash rust shows up within minutes.
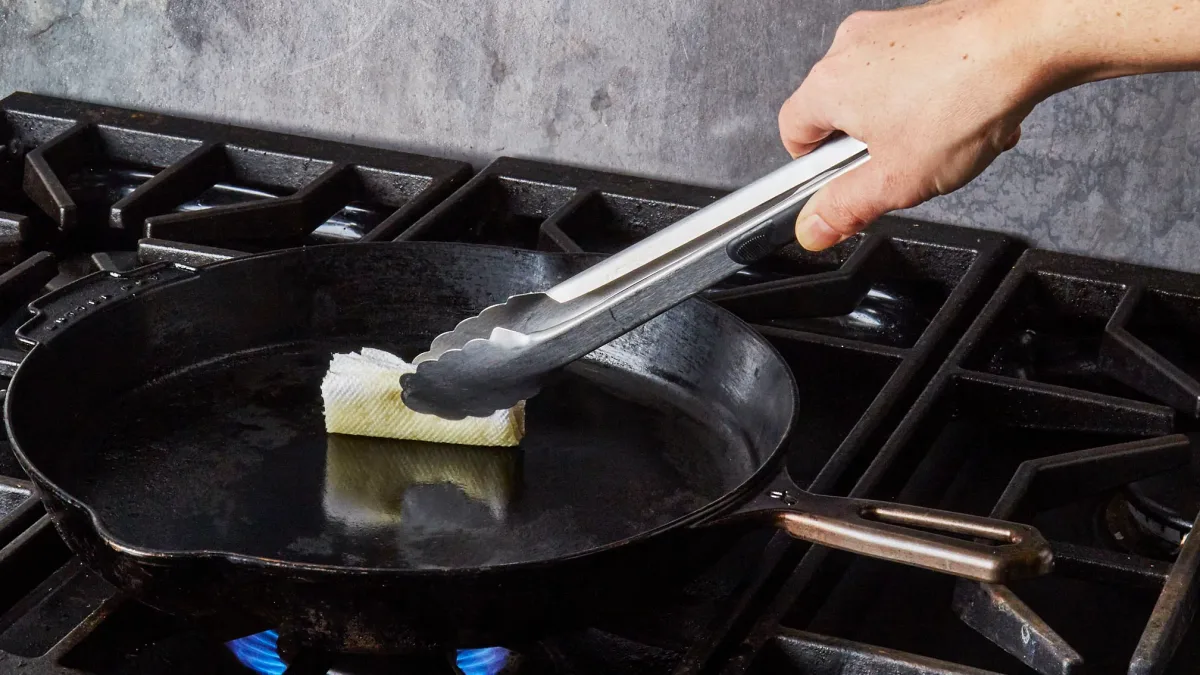
Image source: Web (Bing) / storage.googleapis.com (Web image (fair-use with source credit))
Step 4: Apply Oil the Right Way (Thin Wins)
Pour in a nickel-sized amount of oil. Rub it over the whole pan, including the handle. Wipe it back off like you didn’t mean to put it on.
The key is a nearly invisible sheen. Excess oil pools, cures to a sticky film, and flakes off later. High-smoke-point oils like grapeseed or refined avocado work best.
Step 5: Bake It for the Right Time at the Right Temperature
Set the oven to 450°F. Use an oven thermometer if yours runs hot or cold. Place the skillet upside down on the top rack with a foil-lined sheet below to catch drips.
Bake for one hour, then turn the oven off. Leave the skillet inside until it hits room temperature.
Step 6: Repeat or Cook: When You’re Done
One coat works for a cooking pan that sees fat often. Three coats give a stronger base for eggs or cornbread. If the pan looks dry, add another coat.
If it looks smooth and slightly glossy, get cooking. As Lodge’s official care guides note, thin layers and repeated use create the hardest finish.
This routine isn’t much different from keeping a Hamilton Beach air fryer clean on the daily. Wipe, soak, dry, and oil. Cast iron just needs a little more heat.
Mistakes That Ruin Cast Iron During Restoration
Using Too Much Vinegar (Yes, You Can Etch the Iron)
Vinegar is acetic acid. It dissolves rust by reacting with iron oxide. But it also attacks the iron underneath.
Our research shows that soaking for longer than 30 minutes creates a dull, porous surface. That etched surface grabs food and makes seasoning hard to stick.
If you see a grey film forming on the pan during the soak, you have gone too far. Pull it out immediately. Scrub with baking soda and rinse with hot water.
Next time, cut the soak time in half and repeat if needed instead of going long once.
Leaving It Wet for Even a Few Minutes
Cast iron is not stainless steel. It rusts when exposed to oxygen and moisture together. The window between rinsing and drying is about three minutes in normal indoor air.
In humid weather, that window shrinks to under a minute.
Dry the pan with a towel first, then set it on a warm burner. Watch the surface turn from wet to dry. If orange spots appear, you have flash rust.
Wipe them away with oil on a cloth and reseason that spot. Never let a wet pan sit in the sink.
Seasoning with the Wrong Oil (Flaxseed Is Not Your Friend)
Flaxseed oil has a smoke point around 225°F. That is too low for oven seasoning at 450°F. The oil burns before it polymerizes.
The result is a coating that flakes off in the first few uses.
Stick with oils that have smoke points above 400°F. Grapeseed, refined avocado, canola, and vegetable shortening all work well. Crisco is a classic choice for a reason.
It hits the polymer window at typical oven temperatures and holds up through years of cooking.
Applying Oil Too Thick (Sticky Mess Every Time)
Thick oil pools in the pan. When it heats, those pools turn into a sticky, uneven film. That film never hardens properly.
It stays tacky and picks up food debris.
The correct amount of oil is less than you think. Put a teaspoon in the pan. Rub it over every surface.
Then wipe it out with a clean cloth until the pan looks dry. There should be no visible oil. That invisible layer is enough.
Skipping the Oven Cool-Down and Warping the Pan
Taking a hot cast iron pan out of the oven and setting it on a cold counter can warp it. The sudden temperature change makes the metal contract unevenly. A warped pan rocks on the burner.
It never heats evenly again.
Let the pan cool inside the oven with the door closed. That takes one to two hours. If you are in a hurry, crack the oven door and let it come down slowly.
Rushing the cool-down is one of the most expensive mistakes you can make.
These pitfalls are common but avoidable. It is the same kind of attention to detail you need when cleaning a Ninja air fryer without damaging the basket coating. Small habits prevent big repairs.
Ongoing Maintenance: Keep the Rust Away for Good
How to Dry and Oil After Every Cook
The single most important habit is drying. After washing, put the pan on a low burner for two minutes. Watch the steam disappear.
Then wipe a drop of oil across the cooking surface with a paper towel. That is a 30-second routine that stops rust before it starts.
You do not need to heat the oil into the pan after every use. The residual heat from the burner is enough to spread a thin film. If the pan looks greasy, you used too much.
Wipe it again.
When to Use Soap (Yes, You Can: Here’s When)
Modern dish soap does not contain lye. It will not strip seasoning the way grandma’s soap did. You can use a drop of soap on a sponge to cut grease.
The key is to use it sparingly and rinse thoroughly.
Avoid soap when the seasoning is new or thin. In the first month after restoration, stick with hot water and a chainmail scrubber. After the seasoning has built up several layers, a little soap is fine.
The polymerized oil is bonded to the iron. A quick wash will not remove it.
Storing Cast Iron in Humid Climates
Humidity is the enemy of bare iron. If you live in a coastal or humid area, wrap your skillet in a paper towel before storing it. The towel absorbs moisture that would otherwise land on the metal.
Do not use plastic wrap. Plastic traps moisture and promotes rust.
Store the pan with the lid off if it has one. Airflow is important. If you stack pans, put a paper towel or felt pad between them.
That prevents scratching and gives moisture a place to go.
How Often to Re-Season
You do not need to reseason on a schedule. Reseason when the cooking surface starts looking dry or patchy. Some people reseason every few months.
Others go years between coats.
A good sign is water behavior. If water beads up and rolls off the pan, the seasoning is healthy. If water wets the surface and flattens out, it is time for one or two oven coats.
Let the pan tell you what it needs.
User reports from long-term cast iron owners suggest that a pan used three times a week for frying or searing almost never needs extra seasoning. The cooking itself builds the layer. If you only bake cornbread once a month, you will need to reseason more often.
This kind of regular upkeep is not much different from knowing how much oil to add to a deep fryer before each session. You check, adjust, and get back to cooking.
Frequently Asked Questions
Can I use the self-cleaning oven to strip seasoning?
No. The self-cleaning cycle runs above 800°F. That temperature can warp the pan and damage the iron structure.
It also creates a fire risk from burning seasoning fumes. Use a lye bath or oven cleaner instead.
Will soap ruin my new seasoning?
A small amount of modern dish soap will not ruin healthy seasoning. But on new seasoning, soap can slow the buildup. Stick with hot water and a scrub brush for the first month.
After that, a drop of soap is safe.
What do I do if rust comes back after a week?
That means the pan was not fully dried or not fully oiled after the last cleaning. Scrub the rust off with fine steel wool. Dry the pan on the stove.
Apply one thin seasoning coat in the oven. Then change your drying habit so it does not happen again.
Can I restore enameled cast iron the same way?
No. Enameled cast iron has a glass coating. Acid soaks and abrasive scrubbing can crack or chip the enamel.
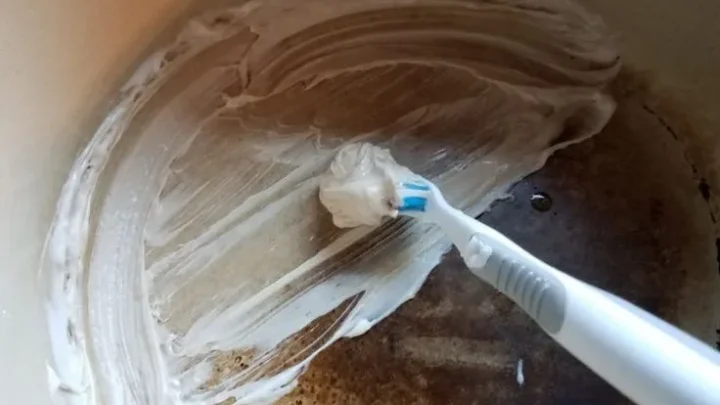
Use baking soda paste for stains and a soft sponge for cleaning. Do not use lye or electrolysis on enameled pieces.
How many seasoning layers do I really need?
For daily cooking, three layers give a solid base. For a pan that will sit unused for a while, five layers provide extra protection. Anything beyond five gives diminishing returns.
Cooking with fat builds seasoning faster than oven layers ever will.

Related posts

What Temp & Time for Crispy Golden Cast Iron Cornbread?
You're staring at a cold cast iron skillet, wondering what temperature and cooking time for crispy golden skillet…
Lodge 6-QT Enameled Dutch Oven: Worth It? Reddit Review
If you've typed "is lodge 6qt enameled dutch oven enameled cast iron dutch oven worth buying reddit review"…
How to Clean an Enameled Dutch Oven & Remove Stains
If you look inside your Dutch oven and see brown stains on the white enamel, you’re not alone.…