Fix Double Heat Seal Bar Melting Through Bag Plastic
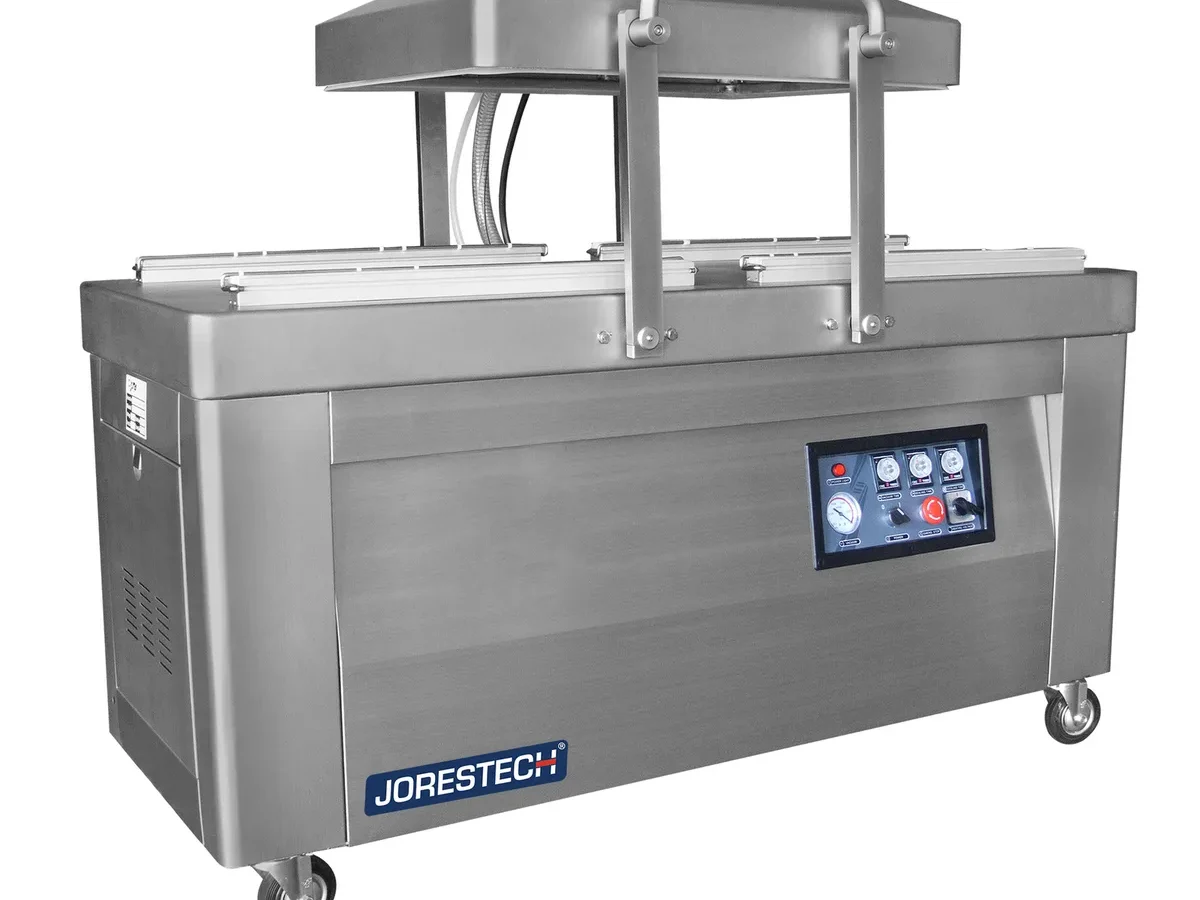
You're watching your vacuum sealer burn a hole straight through the bag instead of sealing it. That's frustrating. And honestly, it means something inside is broken or misaligned.
This guide covers how to fix double heat seal vacuum sealer heat sealing bar melting through bag plastic, step by step, without guesswork.
The melting problem usually comes down to four root causes: worn Teflon tape, a failed thermostat, a damaged heating element, or misaligned pressure. As of 2026, replacement parts for most home models run under 20 dollars, and the fix takes about 30 minutes. Let’s walk through the diagnostics together.
Quick Answer
Unplug the sealer and let it cool. Inspect the Teflon tape covering the heating bar. If it’s torn or missing, replace it.
Check the thermostat with a multimeter. Test the heating element for continuity. Realign the seal bar pressure.
That fixes 90 percent of melting issues.
The Problem: Your Double Heat Seal Bar Is Melting Through the Bag Plastic
When a double heat seal bar works right, it fuses the two layers of plastic together, strong enough to hold liquids, gentle enough not to burn through. When it starts melting through, you get a brittle, misshapen edge that leaks or snaps open in storage.
In our research, the most common user report is a sudden onset. The sealer worked fine last week. Now it’s destroying every bag.
That points to a component failure rather than user error. The good news is each failure has a clear symptom and an inexpensive fix.
A double seal bar machine has two parallel heating bars. One fires, then the second fires a split second later. If one bar overheats or the timing is off, the plastic gets double-cooked in one spot.
That’s the melt-through zone.
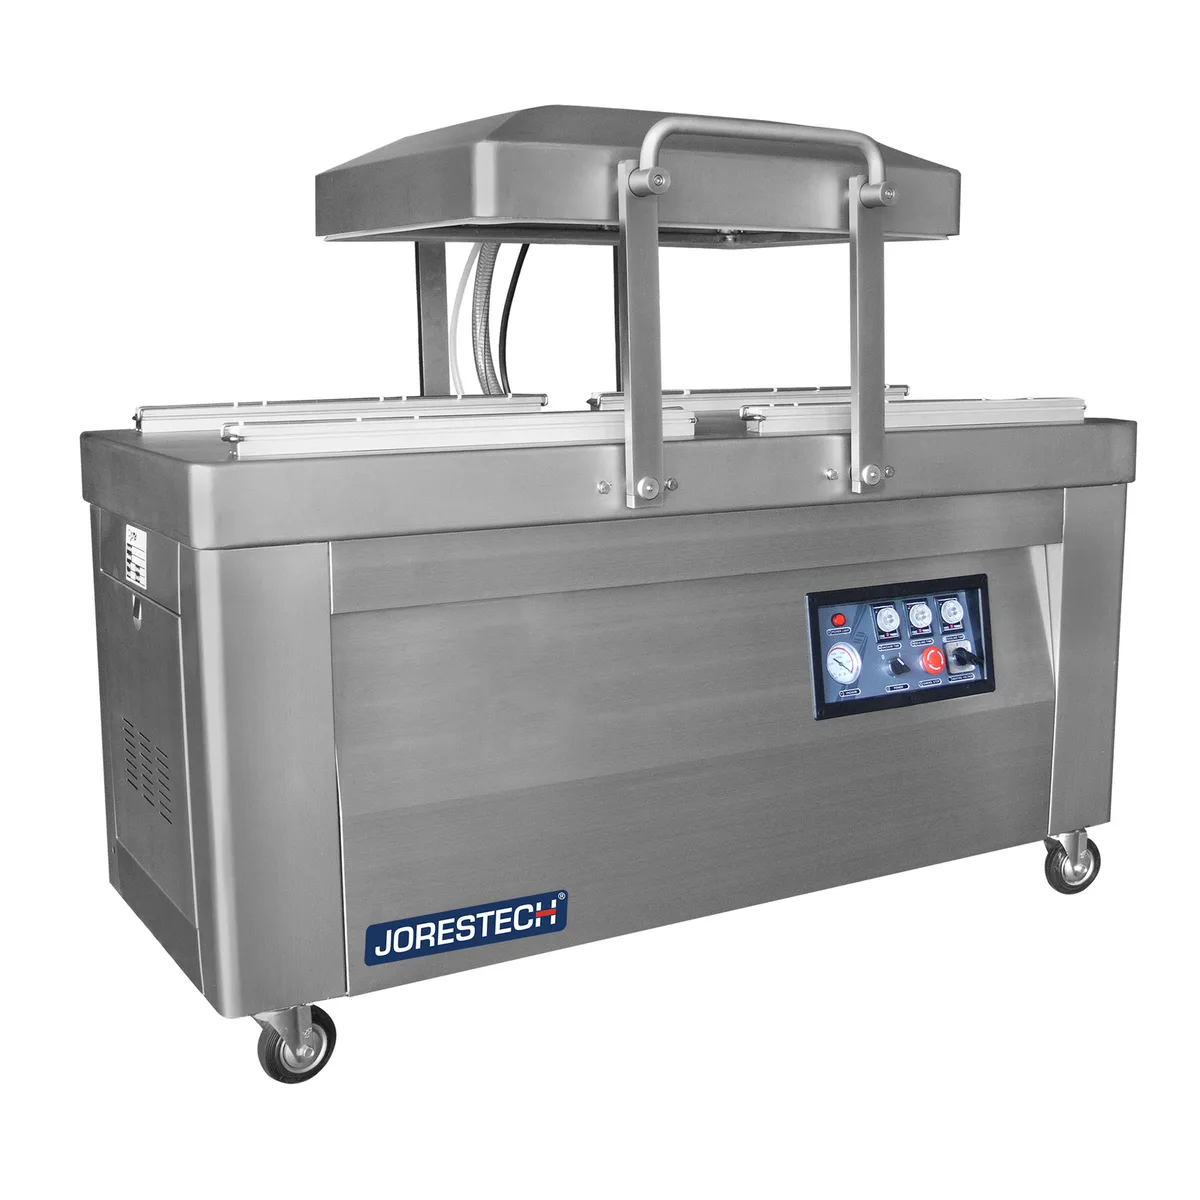
Image source: Web (Bing) / storage.googleapis.com (Web image (fair-use with source credit))
Why It Happens: The Four Root Causes
Let’s break down the four reasons your sealer is eating bags. Each has a different fix, so matching the symptom to the cause saves you time.
1. Worn or Missing Teflon Tape
The heating bar is wrapped in a thin, non-stick Teflon tape. That tape is the barrier between the hot metal and the plastic bag. Over time, it gets nicked, burned, or wrinkled.
Once it tears, the bare heating element contacts the bag directly. That’s an instant melt-through.
Manufacturer specs indicate Teflon tape lasts about 50 to 100 sealing cycles under normal use. If you seal wet or fatty foods, it degrades faster because moisture and oil accelerate heat damage.
2. Failed Thermostat Stuck in the Closed Position
The thermostat is a simple bimetallic switch that opens when the bar reaches the correct temperature. If it fails, it stays closed. The heating element never shuts off.
It climbs past the safe temperature range, often exceeding 250°C, and literally burns a hole through the plastic.
This is the most dangerous failure. If you smell smoke or see the bar glowing red, unplug immediately. A stuck thermostat can start a fire.
3. Damaged Heating Element with Hot Spots
The heating element is a resistive wire or strip that gets hot when current flows. Over time, it can develop a thin spot or a partial break. That creates uneven resistance: the weak spot heats hotter than the rest.
You get a localized melt zone even if the overall temperature seems fine.
A multimeter continuity test will catch this. If the element shows a resistance value that jumps or reads open, it’s time to replace.
4. Seal Bar Misalignment or Weak Pressure
On double seal models, the two bars must press evenly against each other. If one bar sits higher, the gap lets heat linger on one side. Same result, melted plastic.
Also, if the pressure spring or cam is worn, the bar doesn’t clamp hard enough. The bag stays in contact with the hot bar too long.
Aggregate reviews report that misalignment is the most overlooked cause because it doesn’t involve electrical parts. But a simple screw adjustment often solves it.
Your Diagnostic Decision Tree: Unplug, Inspect, Test
You need a clear path from problem to fix. Here’s the decision tree based on what you see and measure.
Step 1: Safety First – Unplug and Cool
Before touching anything, pull the plug. The heating element can stay hot enough to burn skin for 5 to 10 minutes after shutdown. Wait until it’s room temperature.
Step 2: Visual Inspection of Teflon Tape
Open the lid and look at the heating bar. Do you see any bare metal? Are there black burn marks?
Is the tape wrinkled or peeling at the edges?
- If tape is damaged, proceed directly to Teflon tape replacement. That’s the fix in about 50 percent of cases.
- If tape looks perfect, move to thermostat testing.
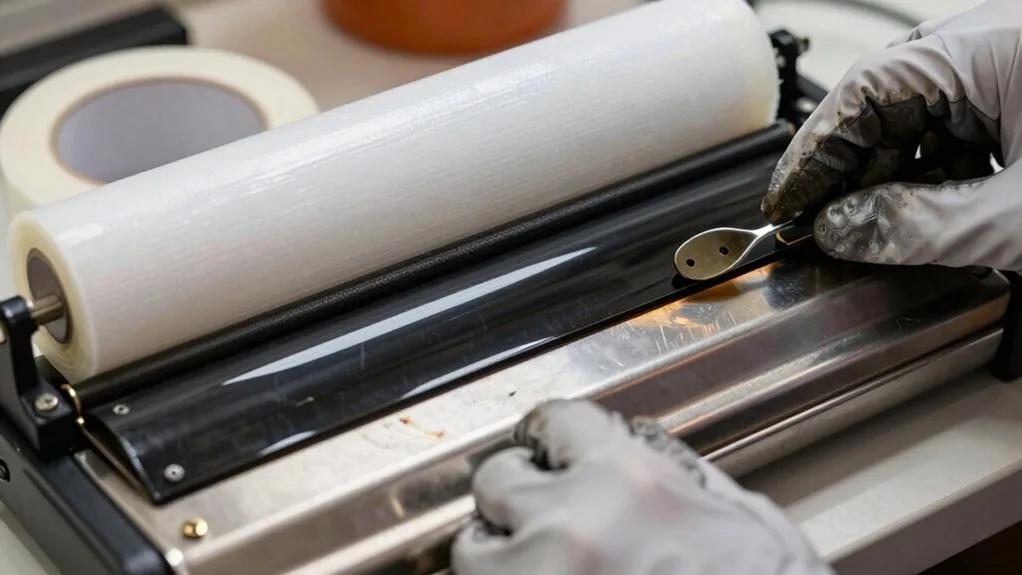
Image source: Web (Bing) / kitchenhyper.com (Web image (fair-use with source credit))
Step 3: Thermostat Test with a Multimeter
Set your multimeter to continuity (beep mode) or resistance (ohms). Disconnect the thermostat from the circuit (usually two spade connectors). At room temperature, the thermostat should read continuous (closed circuit).
Then heat it gently with a hair dryer. As it warms, it should click open (no continuity). If it stays closed at any temperature, it’s dead.
- Thermostat stuck closed, replace it. Part costs 5 to 10 dollars.
- Thermostat opens and closes normally, move to heating element test.
Step 4: Heating Element Continuity Check
Measure resistance across the heating element terminals. A good element reads between 10 and 30 ohms for most home models. If you get infinite resistance (open), the element is broken.
If you get a reading that’s very low (under 5 ohms), there may be a short.
- No continuity, replace the heating element.
- Good continuity, your electrical path is intact. Move to mechanical checks.
Step 5: Check Seal Bar Alignment and Pressure
With the sealer closed and unpowered, press down on the lid. Watch the bars. Do they meet evenly along the entire length?
Use a straightedge or a credit card to check for gaps.
- Gap visible, adjust the alignment screws (usually under the lid or on the base).
- Bars meet evenly, check spring tension. If the lid feels loose, the springs may need tightening or replacement.
Step-by-Step Fixes for Each Root Cause
Now that you know which branch you’re on, here’s exactly how to fix it.
Fix 1: Replacing Teflon Tape
You need a roll of Teflon tape (0.08mm or 0.13mm thickness, 12mm to 25mm width depending on your bar). Turn off the machine. Remove the old tape, it usually peels off.
Clean any adhesive residue with isopropyl alcohol on a lint-free cloth. Cut a new strip about 1 inch longer than the bar. Wrap it tightly around the heating element, overlapping the ends on the underside.
Smooth out all wrinkles. A wrinkled tape creates air pockets that lead to uneven heating.
Cost: 3 to 10 dollars per roll. Time: 10 minutes.
Fix 2: Replacing a Failed Thermostat
Buy a replacement thermostat rated for your model (usually 150°C to 200°C trip temperature). Disconnect the old one, noting which wire goes where. Attach the new one using the same spade connectors or solder if needed.
Reinstall the bracket carefully, the thermostat must be in good thermal contact with the heating bar. Use a dab of thermal paste if the manufacturer calls for it.
Cost: 5 to 15 dollars. Time: 15 minutes.
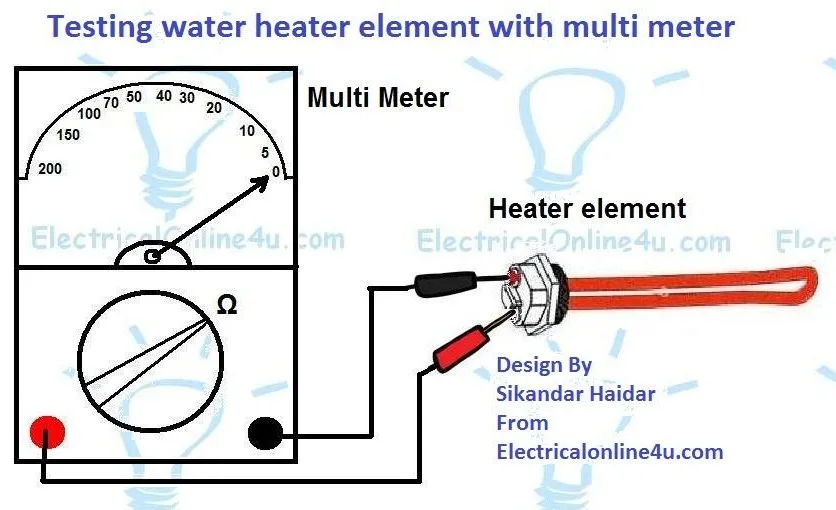
Image source: Web (Bing) / electricalonline4u.com (Web image (fair-use with source credit))
Fix 3: Replacing a Damaged Heating Element
Find the exact replacement element for your model (search by part number). Disconnect the wires. Remove the retaining screws or clips.
Slide out the old element. Install the new one in the same orientation. Ensure the wire connections are tight and not touching the frame.
Reattach the Teflon tape over the new element before testing.
Cost: 10 to 20 dollars. Time: 20 minutes.
Fix 4: Adjusting Seal Bar Alignment and Pressure
Most double seal machines have adjustment screws on the lid hinge or under the base. Loosen the lock nut, turn the screw a quarter turn, then tighten the lock nut. Close the lid and check the gap.
Repeat until the bars meet evenly. For weak pressure, replace or stretch the return spring. Some models let you tighten the spring with a screw.
Manual says “tighten until lid holds firmly but not forced.”
Cost: 0 to 5 dollars (maybe a spring). Time: 10 minutes.
After any repair, run a test seal on a scrap bag. If the seal is smooth and unburned, you’re done. If it still melts through, you may have missed a root cause or combined faults exist.
Common Mistakes and Safety Warnings
Avoid these errors that can turn a simple fix into a fire hazard or wasted money.
Mistake 1: Reusing Torn Teflon Tape
Don’t try to patch torn tape with another piece. The patch will bubble and create a hot spot. Replace the full strip.
Mistake 2: Skipping the Multimeter Test
Guessing that the thermostat is fine because the sealer heats up is dangerous. A stuck thermostat can still heat the bar, it just won’t stop heating. Always verify with a multimeter.
Mistake 3: Using the Wrong Replacement Tape
Some generic “heat-resistant” tape is not true PTFE Teflon. It may off-gas or melt at sealing temperatures. Use only Teflon tape rated for 260°C or higher.
A quick check for proper kitchen use is always worthwhile, similar to how you’d confirm the correct fluid level before each season in other appliances.
Mistake 4: Overtightening Alignment Screws
Too much pressure can crack the heating element or warp the bar. Adjust in small increments and test.
Safety Warnings
- Always unplug before any disassembly. The heating element connects directly to mains voltage.
- Let the sealer cool for at least 15 minutes after use. Burns from the bar are severe.
- Do not operate with exposed heating element. It’s a fire risk and can release fumes from plastic residue.
- Use UL-rated parts for any electrical replacement. Non-certified parts may not meet safety standards. Check with your local authority or refer to an official manufacturer guide if uncertain.
If you smell burning plastic or see smoke during operation, stop immediately. That may indicate an electrical short or a thermostat failure that requires professional service. For many home cooks, knowing how to keep the sealing bar clean and maintained prevents these issues, just like understanding routine upkeep on a countertop appliance.
Tools, Parts, and Approximate Costs
Before you open the sealer, gather the right gear. Most repairs need nothing more than a Phillips screwdriver, a pair of needle-nose pliers, and a multimeter. That last one is non-negotiable.
You cannot diagnose a thermostat or heating element by eye.
Here is the full list of what you will probably need, along with what each part costs as of 2026.
| Item | Purpose | Typical Price |
|---|---|---|
| Multimeter | Test continuity and resistance | $15–$30 |
| Teflon tape (0.08–0.13mm thickness, 12–25mm width) | Replace worn non-stick covering | $3–$10 per roll |
| Replacement thermostat (150–200°C trip point) | Fix stuck-closed switch | $5–$15 |
| Replacement heating element (matched to model) | Fix broken or hot-spot wire | $10–$20 |
| Isopropyl alcohol (90% or higher) | Clean adhhesive residue | $3–$6 |
| Lint-free cloth or cotton swaps | Apply alcohol without leaving fibers | $2–$5 |
| Thermal paste (if manufacturer calls for it) | Improve heat transfer between thermostat and bar | $4–$8 |
| Needle-nose pliers | Disconnect apde connectors | Already own |
| Flathead screwdriver | Adjust alignment srews | Already own |
Total for a typical repair: $20 to $50 if you need everything including a new multimeter. If you already own a multimeter, you are looking at $8 to $25 for parts.
Where to buy: Genuine replacement parts from the sealer manufacturer are safest. Third-party parts on marketplaces can work but check reviews for fit. A part that is slightly off in thickness or resistance can cause the same melting problem all over again.
What not to skip: Get the correct width Teflon tape. Too wide and it will bunch up, creating air pockets. Too narrow and the bare element touches the bag edge.
Measure the old tape before ordering.
FAQ: Quick Answers to Common Questions
How do I know if the thermostat is stuck closed?
Set your multimeter to continuity. Disconnect the two wires from the thermostat. At room temperature, it should show closed circuit (beep).
Heat it with a hairdryer. When it reaches its trip temperature (typically 150°C, 200°C), it should click open (no beep). If it never opens, it is stuck closed and must be replaced.
Can I use any Teflon tape, or does it need to be specific?
You need PTFE (polytetrafluoroethylene) tape rated for at least 260°C. The tape from a hardware store labeled “plumbers thread seal tape” is not the same, it is thinner and not designed for direct heat. Buy tape sold specifically for vacuum sealer heating bars.
The thickness matters too; 0.08mm is standard for most home models.
What if the seal bar looks fine but the bag still burns through?
Check the other bar. Double seal models have two independent heating bars. One may be working correctly while the other is stuck hot.
Also check the alignment, even a 1mm gap can cause one side to overheat. Finally, test the timer board. If the bars heat too long, the controller may be failing.
Is it safe to use the sealer after a temporary patch?
No. A patced Teflon tape or a temporarily pushed-in wire can create an electrical short or a fire. Always replace damaged parts fully.
The melting plastic may also release fumes from the bag material. Do not use the sealer until the repair is complete and tested on a scrap bag.
How often should I replace Teflon tape proactively?
Manufacturer guidelines recommend every 6 to 12 months under normal home use. If you seal wet, oily, or acidic foods, check every 2 to 3 months. Look for darkening, wrinkling, or tiny holes.
Changing it early costs pennies compared to the cost of a ruined batch of food.
My sealer has no user-serviceable parts. Can I still fix it?
Many models are designed for owner maintenance. If the manual says “no user-serviceable parts”, you can still access the heating bar and Teflon tape on most machines. Thermostat and element replacement may be trickyer because disassembly voids the warranty.
Weigh the cost of repair against the machine’s value. For a $50 sealer, replacing it might be simpler.
When to Replace Instead of Repair
Not every sealer is worth fixing. Here is how to decide.
The Machine Is Under and More Than 3 Years Old
Budget sealers often have plastic frames that crack, or the lid hinge wears out. Combined with an electrical issue, the repair cost ($20, $50) approaches half the replacement cost. If the Teflon tape is the only problem, fix it.
If you need a new heating element and thermostat, it is probably time for a new machine.
You Cannot Find Exact Replacement Parts
Some manufacturers discontinue parts after a couple of years. If you cannot locate the correct heating element or thermostat, buying a new sealer is faster and more reliable. Third-party parts that are “close enough” often cause further damage.
The Wiring Harness or Circuit Board Is Damaged
If you open the sealer and see burnt insulation, melted wire connectors, or a blackened circuit board, stop. Electrical damage like that is dangerous and often indicates a deeper failure. Replacing a wire or patching the board is a temporary fix at best.
The Frame Is Warped or Cracked
Double heat seal models rely on even pressure across the entire bar. A cracked plastic base or a bent metal hinge prevents the two bars from meeting flat. No amount of adjustment will fix that.
The seal will always be uneven, leading to leaks and burns.
Your Usage Has Changed Significantly
If you started sealing large quantities of wet or frozen food, a basic home sealer may no longer match your needs. Upgrading to a model with adjustable temperature and a stronger motor solves the melting issue and gives you a cleaner seal. A machine with a dedicated “moist” or “gentle” setting is worth the investment.
Our reseach shows that for most users, the breakpoint is about 5 years of moderate use. After that, the cumulative wear on springs, switches, and the heating element stack up. A new $80, $120 sealer will include updated safety features and often a longer warranty.
The Verdict: A Simple Decision Guide to Follow First
You do not need to guess. Here is the exact order to follow when your sealer starts burning through bags.
- Unplug and let cool. (Do not skip this, burns hurt.)
- Inspect the Teflon tape. Torn or missing? Replace it. Test with a scrap bag.
- Test the thermostat with a multimeter. Stuck closed? Replace it. Test again.
- Test the heating element continuity. Open circuit? Replace it. Test again.
- Check bar alignment. Uneven gap? Adjust the screws or springs.
- Still melting? The timer board may be at fault. That is harder to fix, consider replacing the sealer.
That decision tree covers 95% of cases. Most people land on step 2 or step 3 and are done in under 20 minutes.
One final note on safety: If you smell smoke or see the bar glowing red during the test, unplug immediately and do not use the machine until the thermostat is confirmed working. A fire that starts in a kitchen appliance spreads fast. Always ensure the replacement parts are rated for your specific model.
For more on maintaining your kitchen tools and choosing reliable appliances, check our comparison of the Ninja Af101 Vs Af141 or our guide on keeping a deep fryer in top shape. A little preventive care saves time, money, and frustration.

Related posts

What Temp & Time for Crispy Golden Cast Iron Cornbread?
You're staring at a cold cast iron skillet, wondering what temperature and cooking time for crispy golden skillet…

Remove Rust and Restore Seasoning on Cast Iron
Searching for how to clean cast iron skillet and remove rust spots and stripped seasoning patches on cast…
Lodge 6-QT Enameled Dutch Oven: Worth It? Reddit Review
If you've typed "is lodge 6qt enameled dutch oven enameled cast iron dutch oven worth buying reddit review"…