Crispy Wok Beef in Carbon Steel: Temp & Time
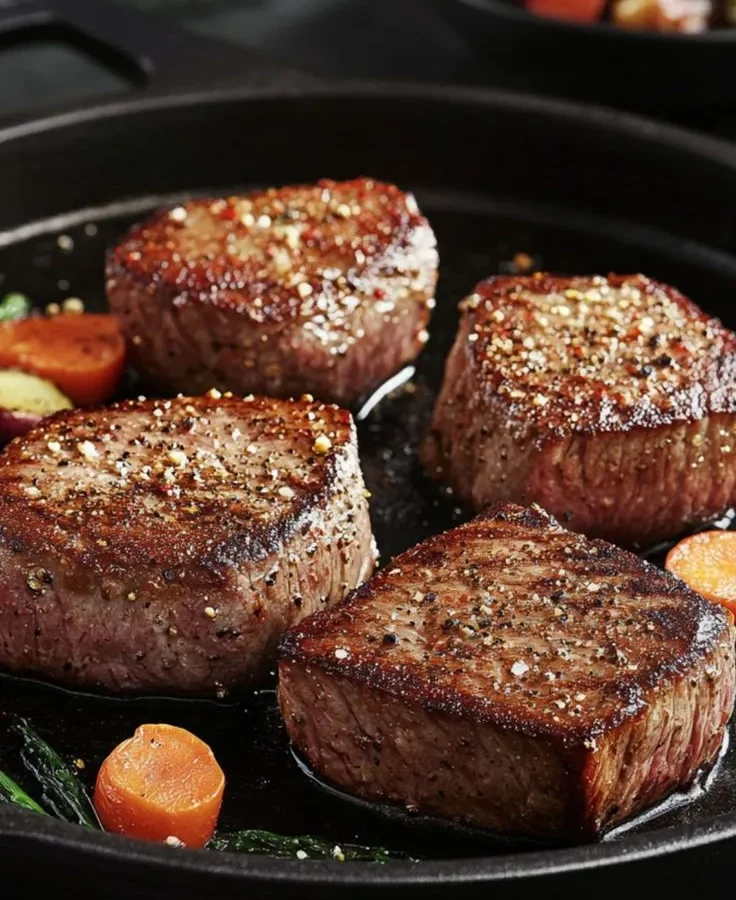
If you've ever asked what temperature and cooking time for crispy wok-style beef stir fry in carbon steel skillet, you already know the frustration. You follow a recipe exactly, but the beef turns gray and rubbery instead of crispy and charred. That's because most recipes skip the most important part: your stove, your pan, and your beef all change the answer.
Manufacturer specifications for carbon steel cookware from brands like de Buyer and Matfer Bourgeat recommend a preheat that reaches 450 to 550 degrees Fahrenheit for proper searing. That target matters more than a fixed number on the dial. The real question is how to get there on your specific setup.
Let's walk through it step by step.
Quick Answer
Heat your carbon steel skillet to 450 to 550 degrees Fahrenheit. Preheat for 2 to 5 minutes on high heat. Sear your beef in a single layer for 60 to 90 seconds per side.
Total cooking time per batch is about 2 to 3 minutes. Adjust based on your stove type and beef cut.
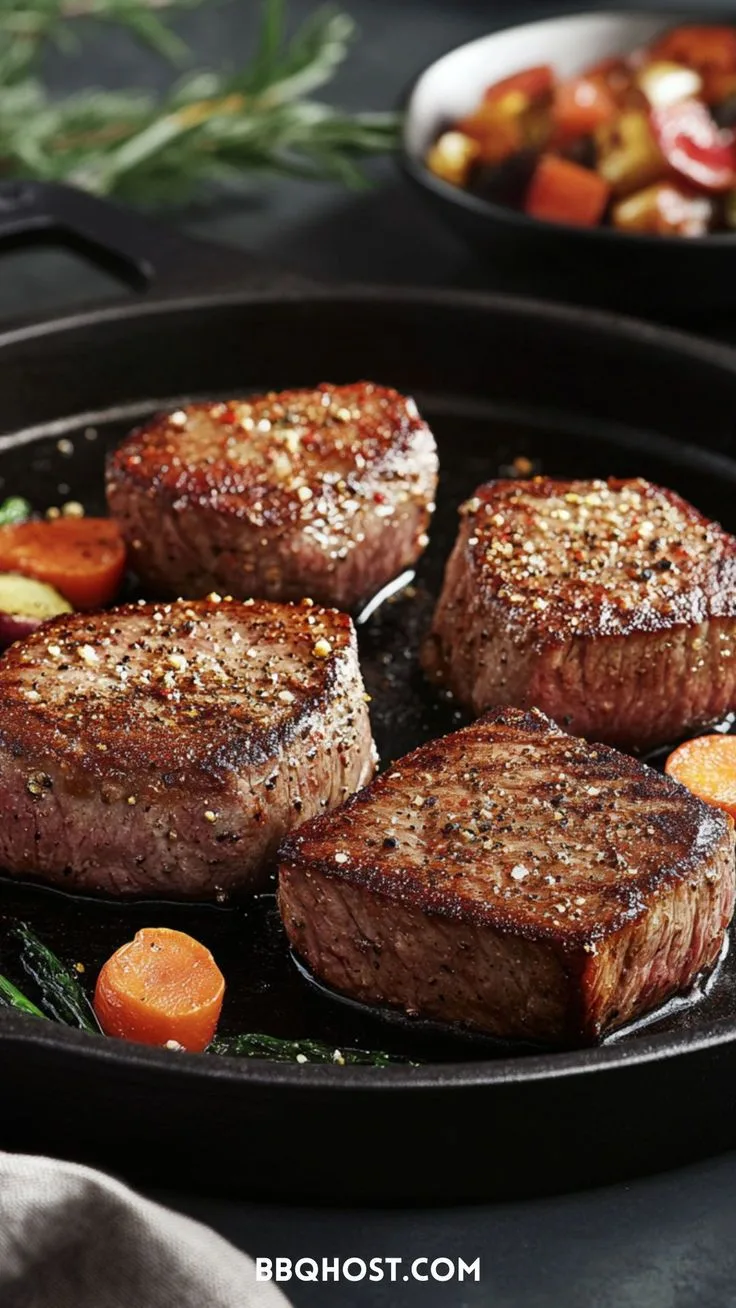
Image source: Web (Bing) / pinterest.com (Web image (fair-use with source credit))
The Real Problem: Why Your Beef Turns Gray Instead of Charred
The short answer is heat. Or rather, the lack of it.
Your carbon steel skillet needs to be screaming hot before the beef hits the pan. We're talking 450 to 550 degrees Fahrenheit. That's the temperature range where the Maillard reaction kicks in.
That chemical process creates the brown, crispy, flavorful crust on your meat.
So why does beef turn gray? Three main reasons.
First, the pan isn't hot enough. If you add beef to a warm pan instead of a blazing hot one, the meat releases moisture before it can brown. It steams in its own juices.
Gray, tough, sad beef.
Second, overcrowding. When you dump too much beef into the pan at once, the temperature drops dramatically. The pan can't recover fast enough.
Again, steaming instead of searing.
Third, moisture on the beef. If your beef is wet from rinsing or from a marinade, that water has to evaporate before browning can start. Evaporation takes energy away from browning.
The result is a soggy, pale surface.
The fix for all three is straightforward. Preheat your pan properly. Cook in batches.
Pat your beef dry before it hits the pan.
But here's where it gets tricky. The exact preheat time changes based on your stove. Gas burns hotter and more evenly.
Electric and induction take longer. That's why you can't just follow a single recipe blindly.
As of 2026, most residential gas stoves in the US deliver 12,000 to 18,000 BTUs per burner. That's enough to get a 12-inch carbon steel skillet to 500 degrees in about 2 minutes on high. Electric and induction stoves take closer to 4 or 5 minutes.
The key is to use a thermometer. An infrared thermometer is the best tool for the job. It tells you the exact surface temperature of your pan.
No guessing. No recipe that says "medium-high" and hopes for the best.
If you don't have a thermometer, use the water droplet test. Flick a few drops of water onto the pan. If they dance and sizzle immediately, you're close.
If they evaporate on contact, you're there.
But a thermometer is better. It removes the guesswork entirely.
Now, about the beef itself. Not all cuts are equal. Flank steak, skirt steak, and hanger steak are the best choices for stir-fry.
They have good marbling and stay tender when cooked quickly. Sirloin and ribeye work too, but they cost more.
Slice against the grain. This is non-negotiable. Slicing against the grain shortens the muscle fibers, making the beef easier to chew.
Slice it about a quarter-inch thick. Not too thin or it will overcook instantly. Not too thick or it won't cook through in 90 seconds.
Velveting helps too. That's a Chinese technique where you marinate the beef in soy sauce, Shaoxing wine, cornstarch, and a pinch of baking soda. It tenderizes the meat and helps it stay juicy.
Plus, the cornstarch creates a thin coating that browns beautifully.
But velveting adds moisture to the beef. That means you need to be extra careful about draining it before it hits the pan. Otherwise, you're back to steaming.
The USDA Food Safety and Inspection Service recommends cooking whole cuts of beef to 145 degrees Fahrenheit with a 3-minute rest. Your crispy beef will hit that temperature easily with the short sear times we're talking about here. Food safety is covered, so you can focus on texture.
The core lesson is this: temperature matters more than anything. Get the pan hot enough, and the rest follows. Miss the temperature, and no amount of technique will save you.
If you're curious how this compares to other ways of getting crispy results, different approaches to crispy food may surprise you. An air fryer uses circulating hot air. A deep fryer submerges food in oil.
A carbon steel skillet gives you direct contact heat. Each has its own strengths.
Before You Start: The Critical Variables That Control Your Time and Temp
Before you fire up the stove, let's talk about what changes the numbers.
There are six variables that affect your temperature and cooking time. Ignore any of them, and you'll be guessing instead of cooking.
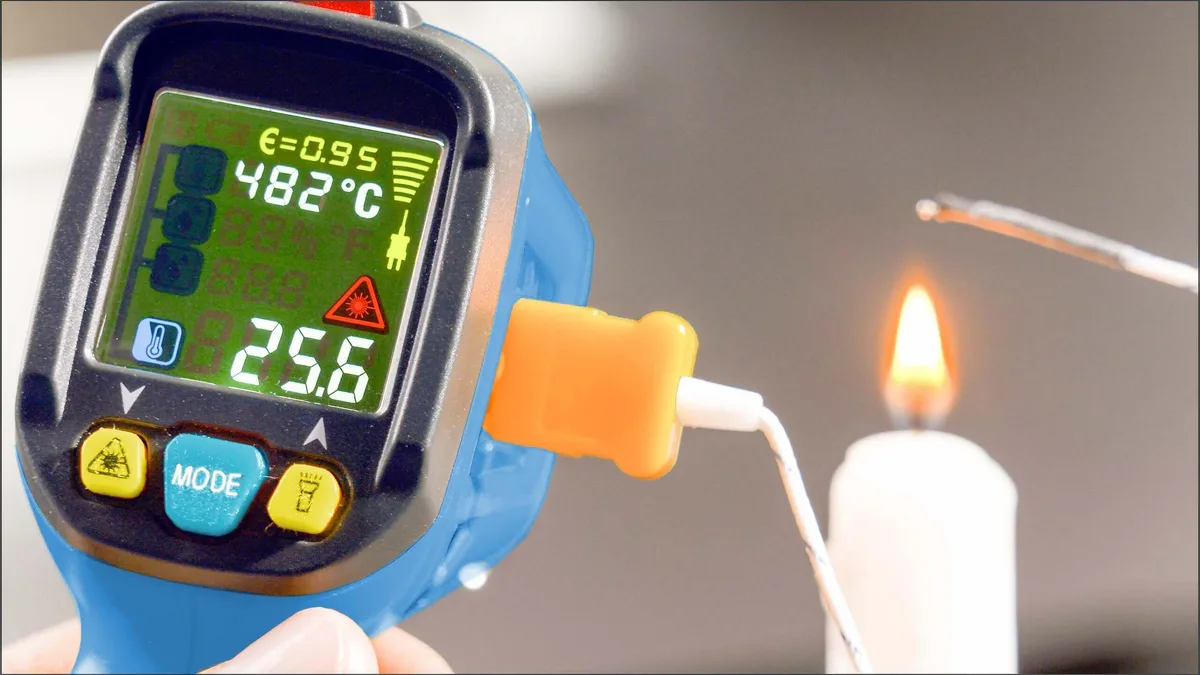
Image source: Web (Bing) / pancontrol.at (Web image (fair-use with source credit))
Your stove type. This is the biggest variable. Gas stoves deliver instant, adjustable heat. Electric coil stoves heat slowly and cool slowly.
Induction stoves heat fast and are very precise. Smooth-top electric stoves cycle on and off, which makes temperature control harder.
Gas stoves can hit 500 degrees in 2 to 3 minutes. Induction stoves can do it in 1 to 2 minutes. Electric stoves take 4 to 5 minutes.
Plan accordingly.
Your pan's seasoning. A well-seasoned carbon steel skillet is naturally non-stick. That means less oil needed and better browning. A fresh pan or one with patchy seasoning will stick.
Sticking means you lose the crust when you try to flip the meat.
If your seasoning is thin, use a bit more oil. If it's thick and slick, you can use less. The oil also helps transfer heat from the pan to the beef.
Your beef cut and thickness. Thin slices cook faster and brown more easily. Thick slices need more time and risk overcooking on the outside before the inside is done. Aim for quarter-inch slices across the board.
Flank steak and skirt steak are forgiving. They stay tender even when cooked quickly. Tougher cuts like round steak need velveting or they'll be chewy.
Moisture content. Wet beef steams. Dry beef sears. This is one of the most common mistakes.
Pat your beef dry with paper towels before you season it. If you velvet the beef, drain off the excess marinade. Don't skip this step.
Oil smoke point. Different oils burn at different temperatures. Peanut oil, avocado oil, and grapeseed oil have high smoke points, 450 to 500 degrees. They're perfect for this job.
Olive oil and butter burn too easily.
Use enough oil to coat the bottom of the pan. A tablespoon is usually enough for a single batch. Too little oil, and the beef sticks.
Too much, and it fries instead of searing.
Batch size. This is the most overlooked variable. A 12-inch skillet can handle about one pound of beef per batch. If you try to cook two pounds at once, the temperature drops, and you get steamed beef instead of crispy beef.
Cook in single layers. Leave space between each piece. If the pieces overlap, they trap steam.
That's the enemy of crispiness.
So how do you figure out your specific settings? Here's a simple approach.
Get your pan hot. Then add a drop of oil. Does it shimmer immediately?
Good. Does it smoke? That's too hot.
Let it cool slightly. Does it just sit there? Not hot enough.
For gas stoves, medium-high is usually the sweet spot. For induction, set it to 7 or 8 out of 10. For electric, crank it to high but give it time to come up to temperature.
The exact numbers will vary. That's why a thermometer is so helpful. Without one, you're relying on visual cues.
With one, you know exactly where you are.
Once you know your pan preheats to 450 to 500 degrees in 3 minutes on your stove, you can repeat that every time. Consistency is the goal.
One more thing: let the pan recover between batches. After you remove the first batch of beef, give the pan 30 to 60 seconds to come back up to temperature before adding the next batch. Otherwise, the second batch will cook at a lower temperature and won't brown as well.
Manufacturer specs from carbon steel makers confirm that these pans work best when you let them fully preheat. The thermal mass of the steel needs time to absorb the heat before you add food. Rushing the preheat is a common mistake that leads to sticking and poor browning.
Pick Your Path: A Decision Tree for Temperature and Timing
This is where we get practical. Here's a decision tree based on your stove type and pan condition.
If you have a gas stove with 12,000+ BTUs:
- Preheat on medium-high for 2 to 3 minutes
- Target pan temperature: 500 to 550 degrees Fahrenheit
- Sear time per side: 60 to 90 seconds
- Total batch time: 2 to 3 minutes
- Oil: peanut or avocado oil
- Notes: Gas gives you the best control. Adjust the flame quickly if the pan gets too hot.
If you have an induction stove:
- Preheat on setting 7 or 8 for 1 to 2 minutes
- Target pan temperature: 475 to 525 degrees Fahrenheit
- Sear time per side: 60 to 90 seconds
- Total batch time: 2 to 3 minutes
- Oil: grapeseed or canola oil
- Notes: Induction heats fast. Keep an eye on the pan. It can go from perfect to burning in seconds.
If you have an electric coil stove:
- Preheat on high for 4 to 5 minutes
- Target pan temperature: 450 to 500 degrees Fahrenheit
- Sear time per side: 90 to 120 seconds
- Total batch time: 3 to 4 minutes
- Oil: canola or vegetable oil
- Notes: Electric coils take longer to heat and cool. Be patient during preheat. Don't rush it.
If you have a smooth-top electric stove:
- Preheat on high for 4 to 5 minutes, but watch for cycling
- Target pan temperature: 450 to 500 degrees Fahrenheit
- Sear time per side: 90 to 120 seconds
- Total batch time: 3 to 4 minutes
- Oil: canola or vegetable oil
- Notes: Smooth tops cycle on and off. The pan temperature will fluctuate. Work with the hot cycles.
If you have an outdoor propane burner:
- Preheat on high for 1 to 2 minutes
- Target pan temperature: 550 to 600 degrees Fahrenheit
- Sear time per side: 30 to 60 seconds
- Total batch time: 1 to 2 minutes
- Oil: peanut or avocado oil
- Notes: Outdoor burners are much hotter than kitchen stoves. Move fast. Have everything ready before you start.
If your pan seasoning is thin or new:
- Use more oil, about 1.5 to 2 tablespoons
- Lower the target temperature by 25 degrees
- Increase sear time by 15 to 30 seconds
- Notes: A fresh pan needs more oil to prevent sticking. The seasoning will thicken over time.
If your pan seasoning is thick and well-established:
- Use less oil, about 1 tablespoon
- Higher temperature is fine, up to 550 degrees
- Standard sear times apply
- Notes: A well-seasoned pan is the best tool for this job. It releases food easily and conducts heat well.
If your beef is velveted:
- Drain off excess marinade before cooking
- Same temperature targets apply
- Sear time may be 15 to 30 seconds longer
- Notes: The cornstarch coating browns beautifully but can burn if the pan is too hot. Watch carefully.
If your beef is not velveted:
- Pat dry thoroughly
- Higher temperature is better, toward the top of your range
- Standard sear times apply
- Notes: Without the protective coating, the beef dries out faster. Cook it quickly.
Here's a quick reference table:
| Stove Type | Preheat Time | Target Temp | Sear Per Side | Total Batch |
|---|---|---|---|---|
| Gas (12K+ BTU) | 2-3 min | 500-550°F | 60-90 sec | 2-3 min |
| Induction | 1-2 min | 475-525°F | 60-90 sec | 2-3 min |
| Electric Coil | 4-5 min | 450-500°F | 90-120 sec | 3-4 min |
| Smooth-Top | 4-5 min | 450-500°F | 90-120 sec | 3-4 min |
| Outdoor Burner | 1-2 min | 550-600°F | 30-60 sec | 1-2 min |
Use this table as a starting point. Adjust based on your specific stove and pan. The key is to measure the pan temperature with an infrared thermometer and dial in your settings.
Choosing the right vessel for high-heat cooking matters more than most people realize. The vessel comparisons between different cookware types show why carbon steel outperforms nonstick for this job. Nonstick pans can't handle the high temperatures needed for wok-style charring.
Step-by-Step: How to Get That Crisp, Wok-Style Sear Every Time
Here's the exact process to follow. No guesswork. No vague instructions.
Step 1: Prep your beef. Start with flank steak, skirt steak, or hanger steak. Trim any large pieces of fat or silver skin. Pat the beef dry with paper towels.
Slice against the grain into quarter-inch thick strips. If the strips are long, cut them in half. You want pieces that fit in a single layer in your pan.
Step 2: Velvet the beef (optional but recommended). In a bowl, combine 1 tablespoon of soy sauce, 1 tablespoon of Shaoxing wine, 1 tablespoon of cornstarch, and a pinch of baking soda. Add the beef and toss to coat. Let it sit for 15 to 30 minutes.
Don't skip the baking soda. It tenderizes the meat.
Step 3: Prepare your aromatics and sauce. While the beef marinates, prep everything else. Mince garlic and ginger. Slice scallions.
Chop vegetables. Mix your sauce. Stir-fry happens fast.
You won't have time to chop mid-cook.
Step 4: Preheat your pan. Place your carbon steel skillet on the stove. Turn the heat to the appropriate setting based on your stove type. Wait for the pan to reach 450 to 550 degrees Fahrenheit.
Use an infrared thermometer to check. If you don't have one, use the water droplet test.
Step 5: Add oil. Pour in 1 to 2 tablespoons of high-smoke-point oil. Swirl the pan to coat the bottom evenly. The oil should shimmer immediately.
If it smokes, the pan is too hot. Let it cool for 30 seconds before adding the beef.
Step 6: Add the beef. Lay the beef strips into the pan in a single layer. Do not overlap them. Leave a little space between each piece.
If you have more beef than fits in one layer, cook it in batches. This is critical.
Step 7: Sear undisturbed. Let the beef cook for 60 to 90 seconds without touching it. The heat creates a crust. Moving the beef too early breaks that crust.
You'll see the edges start to brown and lift away from the pan naturally.
Step 8: Flip and sear the other side. Use tongs or a spatula to flip each piece. Cook for another 60 to 90 seconds. The second side browns faster because the pan is already hot.
Watch for the same browning cues.
Step 9: Remove the beef. Transfer the cooked beef to a plate or bowl. Don't leave it in the pan. It will continue to cook and may overcook.
Let it rest while you cook the vegetables.
Step 10: Cook the aromatics and vegetables. Add a little more oil to the pan if needed. Add garlic, ginger, and scallions. Stir-fry for 30 seconds until fragrant.
Then add your vegetables. Cook them until they're crisp-tender. This usually takes 2 to 4 minutes depending on the vegetable.
Step 11: Add the sauce. Pour your sauce into the pan. Let it bubble and thicken for 30 to 60 seconds. This is where the flavor comes together.
The sauce coats the vegetables and thickens slightly.
Step 12: Return the beef. Add the cooked beef back to the pan. Toss everything together. Coat the beef with the sauce.
This takes about 30 seconds. Don't let the beef sit in the sauce or it will lose its crispness.
Step 13: Serve immediately. Transfer everything to a plate or bowl. Serve right away. Crispy beef waits for no one.
The longer it sits, the less crispy it gets.
Here's the thing about this process: each step builds on the last. Skip the preheat, and the beef steams. Overcrowd the pan, and the temperature drops.
Add the sauce too early, and the crust softens.
Follow the process exactly, and you'll get crispy, charred, wok-style beef every time.
The same principles apply to adapting cooking methods for other kitchen tools. Understanding how heat transfers from pan to food is a skill that translates across all your cooking equipment.
The Sauce Timing Trap: How Not to Kill Your Hard-Won Crust
You did everything right. Your pan was hot. Your beef was dry.
You seared it in a single layer. It came out perfectly crispy and charred.
Then you added the sauce, and everything went soft.
This is the sauce timing trap. It's one of the most common mistakes in stir-fry cooking. It ruins more crispy beef than any other single error.
The problem is simple: sauce contains water. Water softens crusts. When you add sauce to the pan while the beef is still in it, the moisture migrates into the crispy exterior.
That crust you worked so hard to create turns soggy in seconds.
The solution is also simple: add the sauce at the very end. Here's how.
Cook your beef in batches. Remove it from the pan. Cook your aromatics and vegetables.
Then add the sauce to the pan by itself. Let it bubble and reduce for 30 to 60 seconds. The sauce thickens and concentrates in flavor.
Now, add the beef back to the pan. Toss it in the sauce for 15 to 30 seconds. That's enough time to coat the beef without softening the crust.
Serve immediately.
If you want extra insurance, take one more step. Reduce your sauce separately in a small saucepan while you cook everything else. Then pour the reduced sauce over the finished dish at the table.
The crust stays completely intact.
This works especially well for thicker sauces that need more time to reduce. Oyster sauce, hoisin sauce, and soy-based sauces all benefit from separate reduction.
Another trick is to use less sauce. A common mistake is drowning the beef in sauce. You don't need much.
A few tablespoons is enough for a pound of beef. The sauce should coat the beef lightly, not pool around it.
Here's a quick checklist for sauce timing:
- Cook beef, remove from pan
- Cook aromatics and vegetables
- Add sauce to the pan, reduce for 30 to 60 seconds
- Return beef, toss quickly
- Serve immediately
That's it. Five steps. The beef stays crispy.
The flavor is there. No soggy crust.
One more note: if you're using a cornstarch slurry to thicken your sauce, add it at the end too. Mix cornstarch with cold water, stir it into the sauce, and let it bubble for 30 seconds. Then toss the beef in.
The slurry helps the sauce cling to the beef without getting watery. But again, timing is everything. Add it too early, and the sauce thickens before the beef goes back in.
Add it too late, and the sauce is thin.
Practice makes perfect here. After two or three tries, you'll know exactly when to add the sauce for your stove and your pan.
Also consider the cleaning aspect. A sticky, burnt-on sauce residue can be tough to clean. If you add the sauce last and serve immediately, there's less residue to deal with.
This keeps your pan's seasoning in better shape. A routine of proper maintenance routines for high-heat cookware will extend the life of your pan.
The bottom line: sauce kills crispness. Keep them separate until the final seconds of cooking. Then toss, serve, and enjoy.

Related posts
Is the Lodge Carbon Steel Skillet Worth Buying?
Searching "is lodge carbon steel skillet carbon steel skillet worth buying reddit review" probably means you want real…
How to Fix a Gummy Carbon Steel Skillet
You pull out your carbon steel skillet for a quick stirfry, and there it is: a sticky, gummy…
Vinegar & Tomato Sauces in New Carbon Steel: Safe?
Can you put cooking vinegar or tomato sauces in newly seasoned carbon steel in a carbon steel skillet…