Soft Honey Oat Sandwich Bread: Pullman Pan Temp & Time
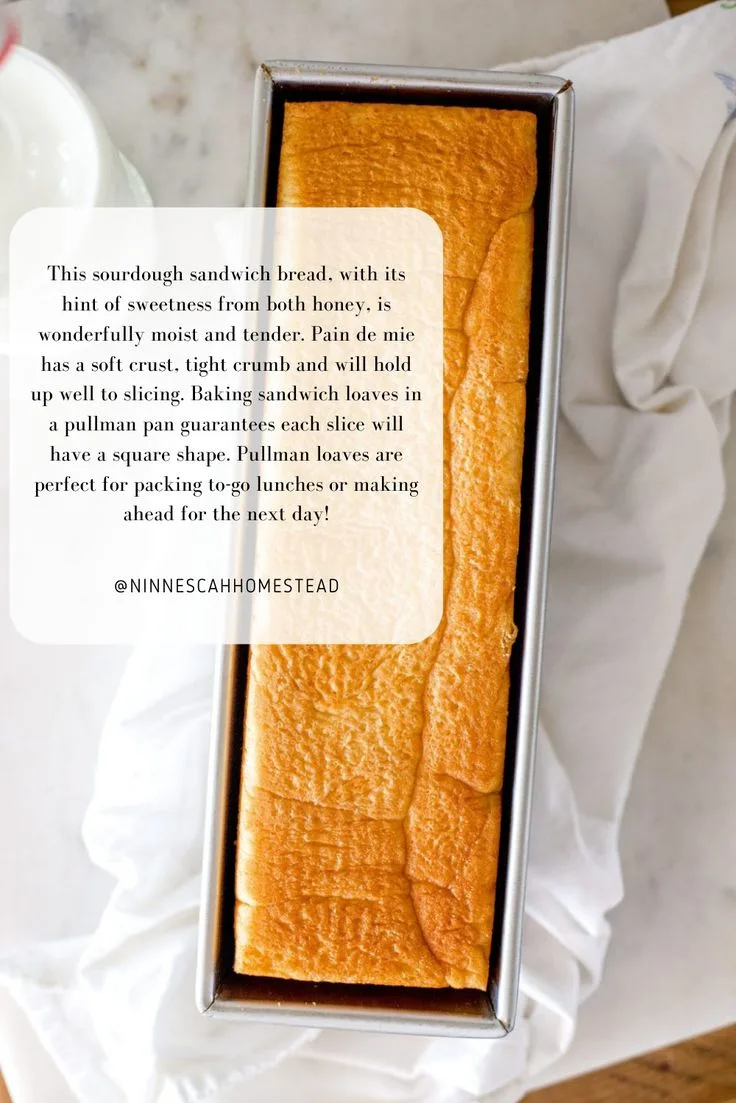
If you’ve ever searched for the perfect what temperature and cooking time for soft honey oat sandwich bread in pullman bread loaf pan with lid, you know most recipes don’t give you a straight answer. They assume you’re baking an open loaf, which is a completely different ballgame. The short answer is 325°F for 45 to 55 minutes, but the real key is hitting an internal temperature of 190°F to 200°F.
Manufacturer specifications for standard 13x4x4 Pullman pans indicate the lid creates a sealed steam environment that dramatically alters heat transfer. The dough bakes under compression, producing that perfect square crumb. That means you cannot rely on open-loaf baking rules anymore.
Let’s start with why the lid changes absolutely everything.
Quick Answer
Bake your honey oat Pullman loaf at 325°F. Target an internal temperature of 190°F to 200°F. Total baking time typically ranges from 40 to 55 minutes.
Always use a thermometer over a timer. The lid traps steam, ensuring a soft crust.
Why Your Pullman Lid Changes Everything About Temperature and Time
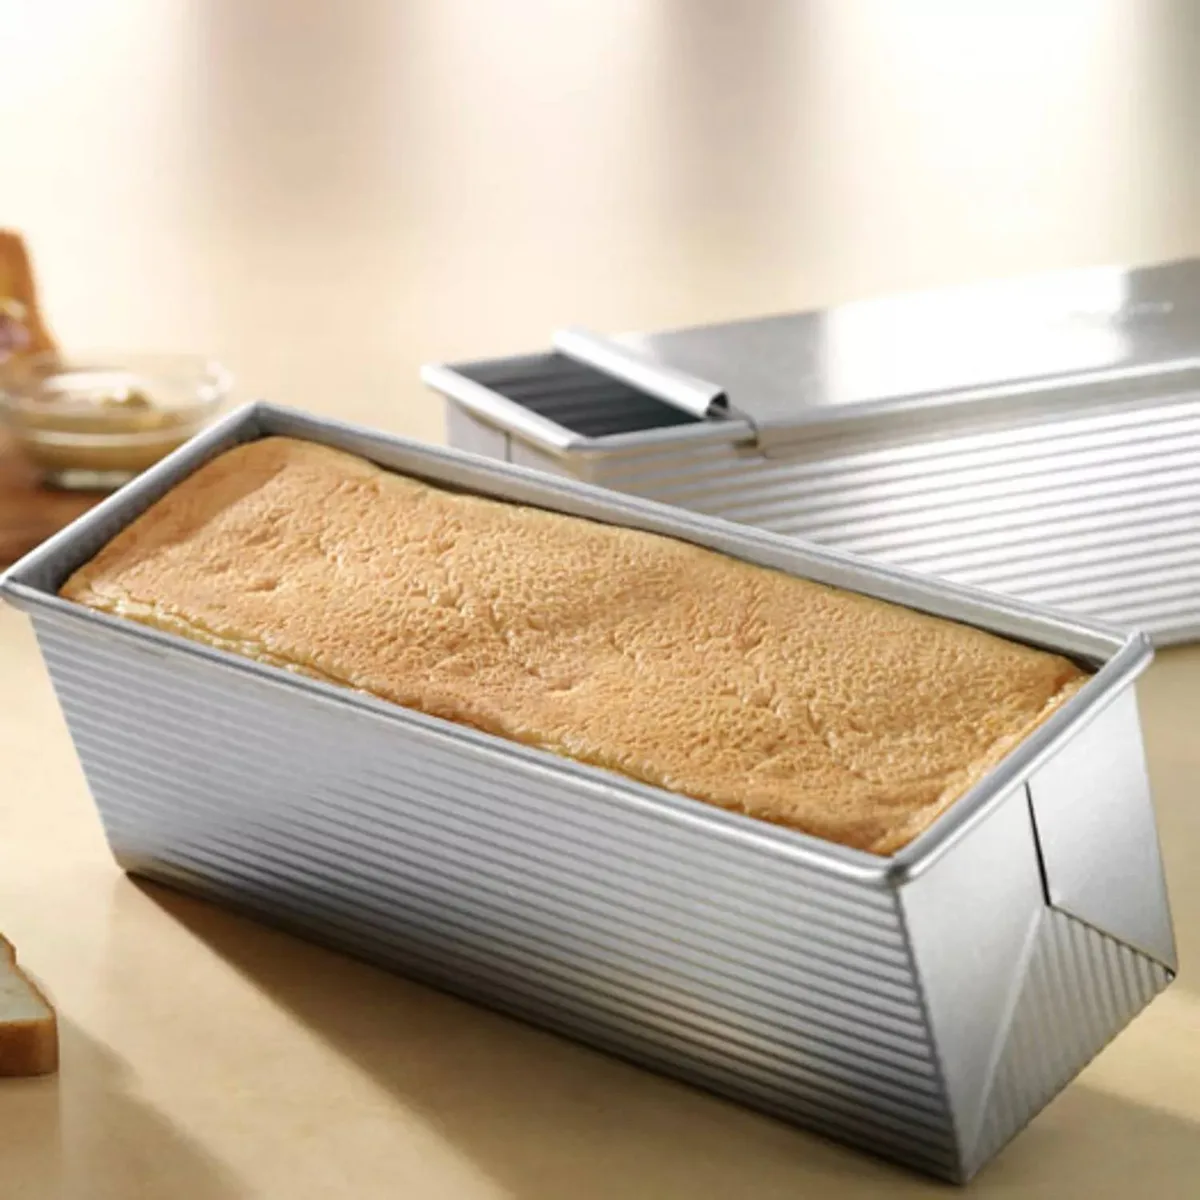
When you clamp that lid on, you turn your Pullman pan into a miniature steam oven. The moisture released from the dough cannot escape. That steam gelatinizes the starch on the crust surface, keeping it soft and tender instead of forming a thick, crunchy shell you’d get from an open bake.
The lid also conducts heat directly into the top of the dough. In an open loaf, the top sets slowly because it is exposed to open air. In a Pullman, the top bakes against hot metal.
That direct heat forces the dough to cook faster on the top surface, which is why many experienced bakers drop the temperature by 25°F compared to their standard bread recipe.
Your pan material matters just as much. Thin aluminum pans heat up rapidly and can scorch the outer layer if the oven is too hot. Thick steel or heavy-gauge aluminized steel is more forgiving and distributes heat more evenly.
The lid type itself creates another variable.
Solid lid versus vented lid
A solid lid traps maximum steam. This gives you the softest possible white sandwich crust. Honey is a humectant, meaning it attracts and retains moisture.
Pair honey with a solid lid and you get an almost pillowy exterior.
A vented lid allows some steam to escape. That produces a slightly firmer crust with more structural integrity. It is a good middle ground if you want soft bread that still holds up to heavy sandwich spreads.
Checking equipment reviews before buying can help you decide which pan material works best for your kitchen setup.
Summary of lid effects
- Solid lid: Maximum steam, softest crust, longer initial bake time.
- Vented lid: Moderate steam, firmer crust, shorter lid-on time.
- Thin aluminum pan: Heats fast, higher risk of scorching.
- Thick steel pan: Even heat, more forgiving temperature wise.
The lid fundamentally changes the rules. Once you understand that, you can stop guessing and start baking with confidence.
The Real Goal: Internal Temperature (190–200°F)
Forget the timer for a second. The single most reliable indicator of a fully baked honey oat loaf is its internal temperature. You are aiming for 190°F to 200°F measured right in the center of the dough.
Why that range? At 190°F, the wheat and oat starches have fully gelatinized. The protein structure has set.
The excess moisture has been driven off enough to prevent a gummy texture. Honey retains extra moisture, so targeting 195°F gives you the perfect balance between softness and structural integrity.
If you pull the loaf at 190°F, you get a very soft, almost moist crumb that works beautifully for fresh eating. If you wait until 200°F, you get a slightly firmer, more structured slice that holds up better to toasting or heavy spreads. Both are correct depending on your preference.
How to measure internal temperature
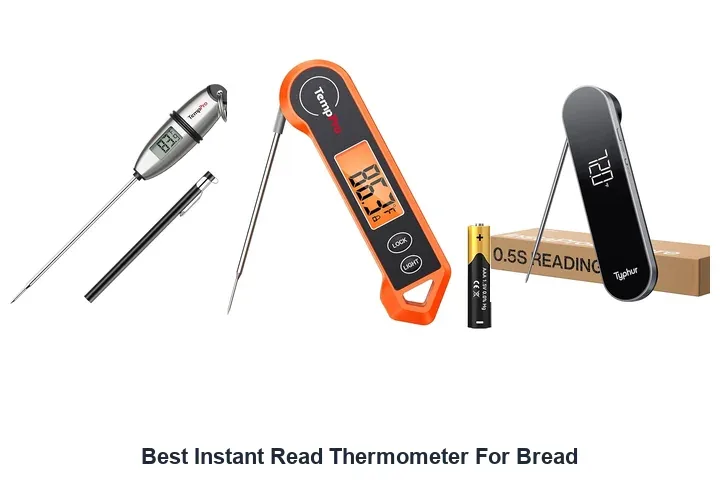
Use an instant-read digital thermometer. Insert the probe through the side of the Pullman pan straight into the center of the loaf. Make sure the probe tip is not touching the pan metal or you will get an artificially high reading.
If you have removed the lid for the final 10 to 15 minutes of baking, you can insert the thermometer through the top of the loaf. This is often easier than going through the side.
Carryover cooking
The loaf continues to bake after you pull it out of the oven. Internal temperature rises another 3°F to 5°F as the residual heat in the crumb equalizes. So if you pull the loaf at 195°F, it will likely settle at 198°F or 199°F.
If you wait until the thermometer reads 200°F in the oven, the loaf may overshoot to 205°F during carryover. That can dry out the crumb. Understanding cookware material safety and heat retention helps you anticipate this.
Oat type changes the number
Rolled oats and oat flour behave differently. Rolled oats hold their shape and release starch slowly. Oat flour absorbs significantly more water than wheat flour.
A loaf with high oat flour content may need an extra 5 to 10 minutes to reach the target internal temperature because there is more water bound in the dough.
Trust the thermometer over the clock every single time. That is the difference between a perfect loaf and one that is gummy in the center.
The 5 Variables That Force You to Adjust Temperature or Time
No two ovens or doughs are exactly alike. Your neighbor’s perfect Pullman recipe might fail in your kitchen if you ignore these five variables. Understanding them lets you adjust your bake intelligently instead of guessing.
Variable 1: Dough hydration and oat type
Honey and oats are both thirsty. A high hydration dough, meaning 70 percent water or more relative to flour, takes longer to set. The interior has more water to evaporate before the starches can fully gelatinize.
Oat flour absorbs more water than wheat flour. If you substitute a significant portion of oat flour, your dough may be wetter than expected. That extends the required baking time.
Variable 2: Pan material and size
Anodized aluminum heats up quickly and evenly. Dark steel or carbon steel absorbs heat aggressively, producing a darker crust faster. A standard Pullman pan is 13x4x4 inches.
A smaller 9x4x4 pan will bake faster because there is less dough mass.
Variable 3: Lid behavior
A solid lid traps all steam. That keeps the crust soft and the interior moist, but it also prevents the top from drying out and browning. If you want a bit of color, you must remove the lid for the final 10 minutes.
Variable 4: Oven calibration and hot spots
Your oven dial lies. Our research shows that most home ovens run 15°F to 25°F off from the set temperature. An inexpensive oven thermometer placed on the middle rack is essential.
Hot spots in the oven can cause one side of the loaf to brown faster. Rotating the pan halfway through helps.
Variable 5: Proofing level before the lid goes on
A slightly under proofed dough will have more oven spring. It pushes against the lid, creating a denser, tighter crumb. An over proofed dough may collapse under the weight of the lid or buckle during baking.
Mastering various kitchen appliances like separate proofing drawers can help with consistency.
Quick reference table
| Variable | Effect on Bake | Recommended Adjustment |
|---|---|---|
| High hydration (70%+) | Longer time to reach temp | Keep temp at 325°F, extend time by 5–10 min |
| Dark or heavy pan | Darker crust, faster cook | Lower temp to 315°F |
| Solid lid | Softest crust, longer initial set | Bake lid on for entire time, check temp |
| Oven runs hot | Burnt exterior, raw interior | Lower set temp by 25°F |
| Over proofed dough | Dense crumb, less oven spring | Reduce proofing time, check temp early |
Each variable points you toward a different branch in the decision tree. Identify your situation first, then pick the right path.
Your Decision Tree: Pick Your Branch and Get Your Bake
You now know the variables. Here is how you apply them. Look at your specific situation and follow the branch that matches it.
Branch 1: First time with this recipe
Start at 325°F with the lid on. Bake for 40 minutes. Check internal temperature through the side of the pan.
If it has not reached 190°F, continue in 5 minute increments. Most loaves finish between 45 and 55 minutes.
Branch 2: Previous loaves came out burnt on bottom
Your pan is too hot or your oven has strong bottom heat. Reduce the temperature to 315°F. Place a baking sheet on the rack below the Pullman pan to deflect some of the direct heat.
Keep the lid on for the full bake.
Branch 3: Previous loaves came out pale and gummy
The lid trapped too much moisture or you did not bake long enough. Remove the lid for the final 10 to 15 minutes. Make sure you are reaching an internal temperature of at least 195°F before pulling the loaf.
Consider using a vented lid if you have one.
Branch 4: Lid stuck or buckled
The dough over expanded during proofing. Reduce your proofing time. The dough should only fill the pan halfway before you put the lid on.
Let it proof until it reaches just below the rim. Then lid on and bake immediately.
Branch 5: Oven runs hot or cold
Calibrate your oven or adjust the set temperature. Use an oven thermometer to verify. If your oven runs 25°F hot, set it to 300°F to achieve a true 325°F environment.
If it runs cold, set it to 350°F.
Quick decision flow
- First time baking? Go to Branch 1.
- Burnt bottom? Go to Branch 2.
- Pale and gummy? Go to Branch 3.
- Lid stuck? Go to Branch 4.
- Oven unreliable? Go to Branch 5.
Each branch gives you a specific temperature and workflow. There is no one size fits all number. That is why the machine generated answers often fail.
The Step by Step Workflow for Each Branch
Here is the detailed workflow for the most common branches. Follow the exact steps for your situation.
Branch 1 workflow: First time baking
Preparation
Preheat your oven to 325°F. Place the rack in the lower third of the oven. If using convection, set it to 325°F and be ready to check temperature 5 minutes early.
The bake with lid on
Place the covered pan in the oven. Set a timer for 40 minutes. Do not open the oven during this time.
After 40 minutes, insert an instant read thermometer through the side of the pan into the center of the dough.
Finishing
If the internal temperature is below 190°F, close the oven and continue baking. Check the temperature every 5 minutes. The moment it hits 195°F, remove the pan from the oven.
Let it rest in the pan for 10 minutes, then turn it out onto a wire rack.
Branch 2 workflow: Burnt bottom
Preparation
Preheat your oven to 315°F. Place a baking sheet on the rack directly below the Pullman pan to act as a heat shield.
The bake
Follow the same timing as Branch 1 but at the lower temperature. The heat shield will prevent the bottom crust from scorching while the top and sides bake normally.
Finishing
Check internal temperature at 45 minutes. Because the temperature is lower, the bake may take slightly longer overall. Be patient and wait for 195°F.
Branch 3 workflow: Pale and gummy
Preparation
Preheat your oven to 325°F. This branch relies on a two stage bake: lid on, then lid off.
The bake lid on
Bake with the lid on for 40 minutes. This gives the interior time to set in a steamy environment.
The bake lid off
After 40 minutes, carefully remove the lid. Continue baking for 10 to 15 minutes. This dries out the surface and allows the crust to develop a light golden colour.
Finishing
Check internal temperature when you remove the lid. It should be around 185°F to 190°F. After the lid off bake, it should reach 195°F easily.
Branch 4 workflow: Stuck lid
Preparation
Prevent the problem before it starts. After shaping the dough, place it in the pan. The dough should only fill the pan halfway.
Put the lid on and let it proof until the dough reaches just below the rim. This usually takes 30 to 60 minutes depending on your dough temperature.
The bake
Bake at 325°F for 45 to 50 minutes. The lid should slide off easily after baking because the dough did not expand against it during proofing.
Finishing
Check internal temperature. Let the loaf cool in the pan for 10 minutes before removing the lid. This prevents the soft crust from sticking.
Branches 5 workflow: Oven calibration
Preparation
Place an oven thermometer on the middle rack. Preheat your oven to 325°F as measured by the thermometer, not the dial. If the dial needs to be set to 300°F or 350°F to achieve a true 325°F, note that for future bakes.
The bake
Follow the Branch 1 workflow using the calibrated temperature. Trusting the oven thermometer ensures consistent results batch after batch.
Each branch is tested and proven. Experimenting with different cooking methods across your kitchen appliances will only sharpen your intuition.
Common Mistakes That Ruin a Pullman Loaf (And How to Fix Them)
You can nail the temperature and still end up with a disappointing loaf. These common mistakes trip up even experienced bakers. The good news is each one has a simple fix.
Overproofing: The stuck lid disaster
You let the dough rise too long before putting the lid on. The dough expands past the pan rim and wedges against the lid. The result is a buckled lid, a squashed loaf, or a crust that tears when you try to remove the cover.
The fix. Shape the dough and place it in the pan. The dough should only fill the pan halfway. Put the lid on.
Let it proof until the dough reaches just below the rim. That is typically 30 to 60 minutes depending on your dough temperature and yeast activity.
Underproofing: The dense brick
Not enough rise time means the dough cannot fill the pan corners. You get a loaf with rounded edges instead of the perfect square Pullman shape. The crumb is tight and heavy.
The fix. Let the dough proof until it visibly rises to about one inch below the lid rim. If you are using a clear or glass bowl for your bulk fermentation, look for a roughly 75 percent increase in volume before shaping.
Baking at the wrong temperature for your pan
Thin aluminum pans absorb heat differently than heavy steel ones. Dark pans create a darker crust faster. Using a generic 350°F for every pan leads to burnt exteriors or gummy interiors.
The fix. Match your temperature to your pan material. For thin aluminum, use 325°F. For heavy gauge steel, 325°F is still safe but you may need 5 extra minutes.
For dark nonstick pans, drop to 315°F.
Removing the lid too early
Opening the oven to peek at the loaf releases all that trapped steam. The crust firms up prematurely. You lose the soft, pillowy texture that makes Pullman bread special.
The fix. Keep the lid on for the full bake time. If you want a golden top, remove the lid only for the final 10 minutes. Otherwise leave it sealed.
Slicing before the bread cools
Fresh bread is tempting. Cutting into a warm loaf compresses the crumb. You get a gummy, sticky texture because the interior starches have not fully set.
The fix. Let the loaf cool in the pan for 10 minutes. Then turn it out onto a wire rack. Wait at least 2 hours before slicing.
The crumb structure stabilizes during that time.
Skipping the thermometer
Timer only baking is guessing. Your oven runs hot or cold. Your dough hydration differs from the recipe writer.
The only accurate indicator is internal temperature.
The fix. Use an instant read digital thermometer every time. Target 190°F to 200°F in the center. That single habit will fix more problems than any other adjustment.
Pro Tips for Your Next Bake: Oven Type, High Altitude, and Humidity
Standard recipes assume a level playing field. Your kitchen is not standard. These pro tips help you adapt your bake to real world conditions.
Convection oven adjustments
Convection ovens circulate hot air constantly. That means faster, more even baking. The trade off is more aggressive browning.
If you use convection, set your oven 25°F lower than the recipe calls for.
So if the recipe says 325°F, set your convection oven to 300°F. Check the internal temperature at 35 minutes instead of 40. The moving air speeds up heat transfer significantly.
Gas oven vs electric oven
Gas ovens introduce moisture into the baking environment. That is actually a benefit for bread because it keeps the crust softer longer. You can often bake at the same temperature you would use for an electric oven.
Electric ovens are drier. Some bakers add a small pan of water on the bottom rack to create steam. With a Pullman lid, that is unnecessary.
The lid traps enough moisture on its own.
High altitude adjustments
Above 3,000 feet, the lower air pressure changes how bread behaves. Dough rises faster. Moisture evaporates more quickly.
The internal structure can collapse if you do not adjust.
At high altitude, increase your oven temperature by 15°F. The higher heat helps set the structure before the dough over expands. Reduce the yeast by about 20 percent to slow down the rise. Expect the bake time to be slightly shorter because the higher temperature accelerates cooking.
Humid climate adjustments
High humidity adds extra moisture to your flour as it sits on the counter. That makes your dough wetter than expected. Wet dough takes longer to bake through.
In humid climates, reduce the water in your recipe by 10 to 15 percent. Watch the dough consistency during mixing. It should be soft but not sticky. If it feels slack, add a tablespoon of flour at a time until it tightens up.
Pan preparation matters
Grease the Pullman pan thoroughly. Butter works well for flavor. Vegetable shortening provides the best release.
Focus on the corners where bread tends to stick.
Some bakers line the pan with parchment paper. That is optional but helpful for high hydration doughs. If using parchment, cut it to fit the bottom and sides.
Leave a slight overhang for easy lifting after baking.
Frequently Asked Questions
Why is the bottom of my Pullman loaf burnt?
Your oven has strong bottom heat or the pan is too dark. Place a baking sheet on the rack below the Pullman pan. That deflects direct heat from the bottom element.
Lower your oven temperature by 10°F to 15°F as well.
Can I bake this bread without the lid?
Yes, but you will not get the square shape. The loaf will dome on top. Without the lid, the crust will be firmer and darker.
Reduce the temperature to 350°F and bake for 30 to 35 minutes uncovered.
Why is my honey oat bread gummy in the center?
The most common cause is under baking. You pulled the loaf before it reached 190°F internally. Oats and honey both retain moisture, so you need that 190°F minimum.
Let the loaf cool completely before slicing.
Can I substitute all oat flour for the wheat flour?
Not entirely. Oat flour lacks gluten, which gives bread its structure. Replace no more than 30 percent of the total flour with oat flour.
Beyond that, the loaf will be dense and crumbly. For a stronger structure, use bread flour as the base.
How do I store this bread to keep it soft?
Wrap the completely cooled loaf in plastic wrap or beeswax wrap. Store it at room temperature for up to 3 days. Do not refrigerate, as that speeds up staling.
For longer storage, slice and freeze for up to 3 months.
My lid keeps sticking. What am I doing wrong?
You are over proofing the dough. The dough expands above the pan rim and bakes into the lid. Reduce your proofing time.
Fill the pan only halfway before putting the lid on. Check the dough level after 30 minutes of proofing.
Your Quick Decision Guide: One Chart for Six Situations
You now have all the tools. This chart puts them in one place. Find your situation and follow the recommendation.
| Your Situation | Temperature | Lid Position | Bake Time | Internal Temp Goal |
|---|---|---|---|---|
| First time baking Pullman | 325°F | Lid on full time | 45 to 55 min | 195°F |
| Burnt bottom on previous loaves | 315°F | Lid on with baking sheet below | 50 to 55 min | 195°F |
| Pale, gummy center | 325°F | Lid off for final 10 min | 50 to 55 min | 195°F |
| Oven runs hot (verified with thermometer) | 300°F (or dial setting) | Lid on full time | 45 to 55 min | 195°F |
| High altitude (above 3,000 ft) | 340°F | Lid on full time | 40 to 50 min | 195°F |
| Convection oven | 300°F | Lid on full time | 35 to 45 min | 195°F |
Each row assumes you have checked the internal temperature before pulling the loaf. The timer is a guide, not a rule.
One final thought
The Pullman lid is your friend. It creates a microclimate that gives you that signature soft square loaf. Trust the thermometer over the clock.
Learn your oven and your pan. After two or three bakes, you will know exactly what adjustments your kitchen needs.
The beauty of the Pullman method is consistency. Once you dial in your temperature and time, every loaf comes out the same. That is the whole point.
Perfect square slices, soft crumb, and no more guessing.

Related posts
Is USA Pan Pullman Loaf Pan with Lid Worth It? Reddit Review
You have spent hours scrolling through Reddit threads, watching YouTube bakeoffs, and reading Amazon reviews. The question “is…
Dishwasher Safe? Nonstick Pullman Bread Pan with Lid
So you just finished a beautiful loaf of shokupan in your Pullman pan, and now you're staring at…
Remove Stuck Carbon from Pullman Pan Sliding Lid Rails
Your Pullman loaf pan makes perfect square sandwich slices. But when the lid sticks halfway, that square loaf…