How to Clean Polymerized Oil Off Stainless Steel Skillet
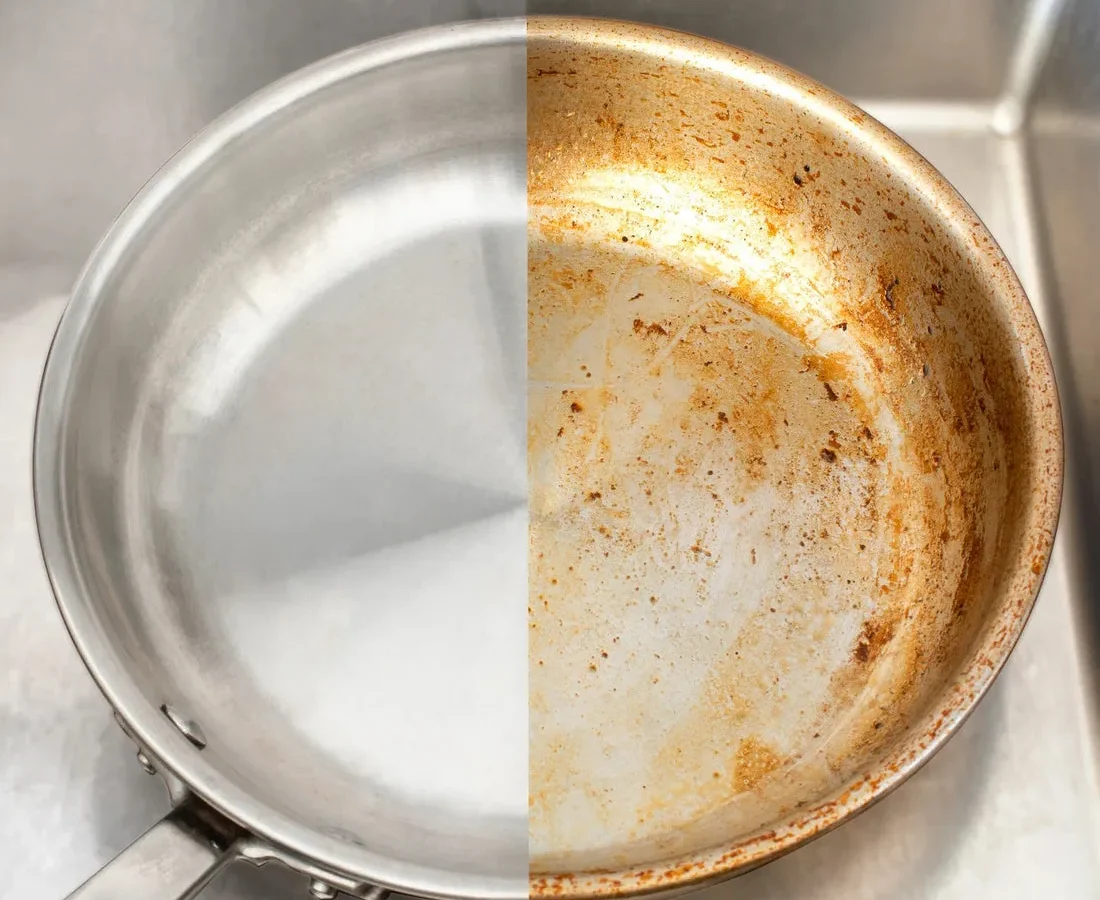
If you have a 5-ply stainless steel skillet at home, you have probably stared at the brown, sticky film that builds up on the brushed exterior sidewall. That stubborn gunk is polymerized oil, and it forms when cooking oil hits high heat and bonds chemically to the metal surface. Learning how to clean 5-ply stainless steel skillet and remove brown polymerized oil baked onto exterior brushed sidewall is not complicated, but it does require the right approach.
Normal dish soap will not touch it, and scrubbing the wrong way can leave permanent scratches on that brushed finish.
Manufacturer specifications indicate that 5-ply cookware uses alternating layers of stainless steel and aluminum to distribute heat evenly. The brushed finish on the outside is delicate by design, with a directional grain that responds best to specific cleaning methods. As of 2026, most premium skillet makers recommend avoiding abrasive pads and harsh chemicals unless you know exactly which ones are safe.
Let’s walk through what actually works and what you should skip.
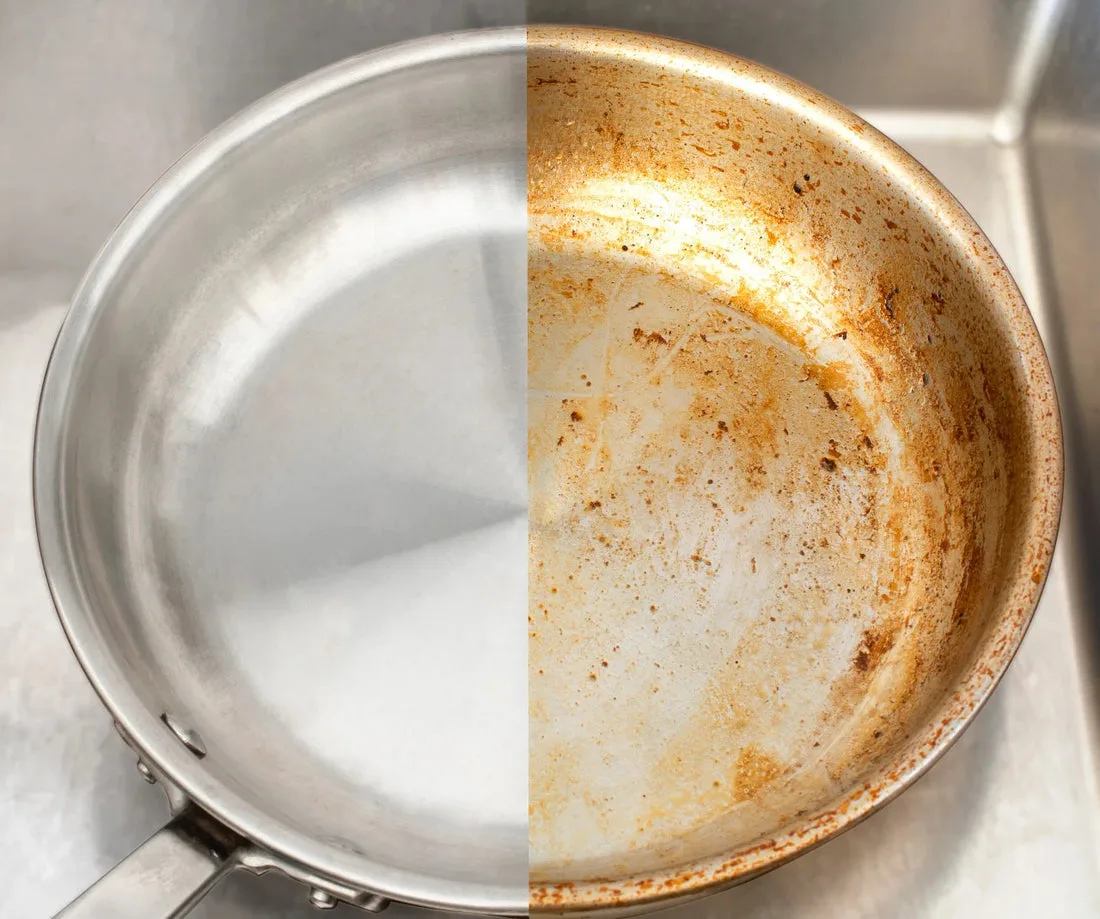
Image source: Web (Bing) / 360cookware.com (Web image (fair-use with source credit))
Why That Brown Gunk Won‘t Budge
You’ve probably scrubbed that brown residue with soap and a sponge, only to watch it laugh right back at you. That is because polymerized oil is not a surface stain. It is a chemical change.
When oil heats past its smoke point, the fatty acids break down and reform into a hard, plastic-like layer that bonds directly to the stainless steel. Think of it as an accidental seasoning, the same process used to cure cast iron, just in the wrong place and without the intention.
The brushed sidewall makes things trickier. The tiny grooves created by the brushing process give the oil extra surface area to grip onto. Our research shows that this directional texture holds onto polymerized residue more aggressively than a smooth polished surface would.
That is why you can scrub a brushed exterior until your arm hurts and still see brown streaks left behind.
The good news is that the same chemistry that creates the bond can also break it. Heat, alkalinity, and mild abrasion are your three tools. The trick is applying them in the right order depending on how thick the buildup is.
A thin amber film needs a different approach than a dark crust that has been baking on for months.
This also explains why you cannot use the same technique you might use for other kitchen gear. The brushed finish is not as forgiving as the interior cooking surface. Scrub too hard with the wrong pad and you will scar the metal.
The goal is to remove the polymerized oil without damaging the grain underneath.
The Short Version: Match Your Method to the Buildup
Here is the direct answer. If you need to clean a 5-ply stainless steel skillet and remove brown polymerized oil baked onto the exterior brushed sidewall, start by identifying how heavy the residue is. For light amber stains, a paste of baking soda and water worked in the direction of the grain will usually do the job.
For moderate brown buildup, Bar Keepers Friend (a mild oxalic acid cleaner) works faster.
For thick, dark crust that has been building for months, you may need a lye-based oven cleaner. But that comes with safety precautions and is not for every pan. In all cases, avoid steel wool, green abrasive pads, and harsh scouring powders.
They will ruin the brushed texture permanently.
Let the pan cool completely before you start. Apply your chosen paste or cleaner. Let it sit for 15 to 30 minutes.
Scrub gently in the direction of the brushed grain. Rinse thoroughly. Dry immediately with a soft cloth to prevent water spots.
Repeat if needed. Most pans require one to three rounds depending on severity.
This method works because it uses chemistry to soften the polymerized bond before you apply any physical scrubbing. That protects the brushed finish while still getting the pan clean. If you rush and skip the soak time, you will end up scrubbing harder and risking damage.
What Polymerized Oil Is (And Why Dish Soap Fails)
Polymerized oil is what happens when cooking oil gets hot enough to undergo a chemical reaction called polymerization. The oil molecules link together into long chains that form a hard, amber-colored film. This is the same stuff that creates the patina on a well-used carbon steel wok.
It is also the brown crust you see on the outside of your skillet after a few rounds of high-heat searing.
The smoke point matters here. Most common cooking oils like olive, vegetable, and canola start to polymerize around 350°F to 400°F. If you regularly sear meat or stir-fry at high heat, you are pushing your pan past that threshold.
The oil vaporizes, condenses on the cooler sidewall, and bonds to the brushed surface.
Image source: Web (Bing) / numerade.com (Web image (fair-use with source credit))
Dish soap fails because it is designed to break down grease, not plastic-like polymers. The bonds in polymerized oil are cross-linked carbon chains, not loose fats that soap can emulsify. You could soak that pan in soapy water for a week and the brown film would still be there.
The same principle applies to routine maintenance on high-heat cooking appliances, so similar methods work for keeping other equipment in good shape.
Heat can reverse the process to some degree. Boiling water inside the pan while the exterior is exposed to steam can soften the bond slightly. But the real solution is a mild abrasive or alkaline cleaner that physically breaks those polymer chains without scratching the metal.
The Decision Tree: Step-by-Step Based on Your Pan‘s Condition
This is the part that matters most. Your cleaning method should depend entirely on what you see when you hold the pan up to the light. Here is a simple three-way decision tree based on severity.
Step 1: Let the pan cool completely. Never attempt to clean a hot skillet. The polymerized oil will be softer when warm, but you risk burning yourself and the thermal shock can warp 5-ply construction. Wait until the pan is at room temperature.
Step 2: Inspect the buildup. Look at the brushed sidewall in good lighting. Run your finger across it. Does it feel rough or sticky?
How dark is the discoloration? This visual check determines which branch of the tree you follow.
Branch A: Light amber or golden film. The pan has a thin, translucent layer. This is early-stage polymerization. Mix baking soda with water to form a paste about the consistency of toothpaste.
Apply it to the brushed sidewall. Let it sit for 15 minutes. Dampen a blue non-scratch pad and scrub gently in the direction of the brushed grain.
Rinse and dry. One round should restore the original look.
Branch B: Medium brown, opaque buildup. The residue is darker and you can see it clearly from across the room. You need something stronger. Bar Keepers Friend (the powder version, not the spray) mixed into a paste works well.
Apply it to the exterior. Let it sit for 15 to 20 minutes. Scrub with a damp non-scratch pad, again following the grain.
Rinse thoroughly. You may need two applications for stubborn spots.
Branch C: Thick dark brown or black crust. This is heavy buildup that has been accumulating for months or years. Start with the baking soda paste method first to remove any loose residue. Then move to a lye-based oven cleaner if the crust remains.
Spray the oven cleaner on the cooled exterior. Let it sit for the time specified on the can. Scrub gently.
Rinse very thoroughly. Wear gloves and work in a ventilated area. This method is aggressive but effective.
Step 3: Rinse and inspect. After each round, rinse the pan with warm water and dry it with a microfiber cloth. Hold it under a bright light. If you still see brown streaks, repeat the method for your branch.
Most pans resolve within one to three applications.
Step 4: Buff the finish. Once the polymerized oil is gone, buff the brushed sidewall with a dry cloth. This restores the original sheen and removes any lingering residue from the cleaner.
When to Switch Methods: Baking Soda vs. Bar Keepers Friend vs. Oven Cleaner
Not every method works for every situation. Here is a breakdown of when to use each one, along with the tradeoffs you need to know.
Baking soda paste is the gentlest option. It is mildly alkaline and provides light abrasion. It works best for light amber film and routine maintenance.
It is also safe for all skillet finishes and carries no chemical risk. The downside is that it takes longer and requires more elbow grease for moderate or heavy buildup. Baking soda is also non-toxic, so it is a good choice if you have kids or pets in the house.
Bar Keepers Friend contains oxalic acid, which is a mild chemical brightener. It is more aggressive than baking soda and works faster on moderate brown buildup. It can also help remove heat discoloration, the rainbow tint that sometimes appears on stainless steel.
The tradeoff is that you need to rinse it very thoroughly. Acid residue left on the pan can affect food if it touches the cooking surface. It is also slightly more expensive per use.
Aggregate reviews indicate that most home cooks keep a can of this on hand for exactly this purpose.
Lye-based oven cleaner is the nuclear option. It breaks down polymerized oil through a strong alkaline reaction. It works on thick crust that nothing else will touch.
But it comes with real risks. Lye can cause chemical burns on skin. It produces fumes that require ventilation.
It can also damage some handle materials, especially if the handle is made of silicone or has epoxy around the rivets. Only use this method if the skillet is fully stainless steel with a metal handle, and only if the buildup is severe enough to warrant it.
Here is a quick comparison table to help you decide.
| Method | Best For | Safety Level | Number of Applications | Cost per Use |
|---|---|---|---|---|
| Baking soda paste | Light amber film | Very safe | 1 to 2 | Pennies |
| Bar Keepers Friend | Medium brown buildup | Safe with rinsing | 1 to 3 | About $0.15 |
| Lye-based oven cleaner | Thick dark crust | Requires precautions | 1 to 2 | About $0.50 |
The decision comes down to matching the cleaning power to the severity of the buildup. Using oven cleaner on a pan with only light film is overkill and increases risk unnecessarily. Using baking soda on a thick crust will frustrate you and take forever.
Pick the tool that fits your pan’s current condition.
If you are unsure, start with baking soda. It will not damage the pan, and if it does not work, you can escalate to Bar Keepers Friend or oven cleaner without any harm. Skipping directly to the harshest method without testing a gentler one first is a common mistake that leads to wasted time and potential damage.
What Will Scratch or Ruin That Brushed Finish
The brushed finish is a series of microscopic parallel grooves. Scrub across them and you carve new lines that catch light differently. The result is a cloudy, streaky, permanently dull surface.
It is the most common reason a premium skillet starts looking old after just a few months.
Steel wool is the worst offender. Its coarse fibers leave deep scratches that no cleaner can fix. Green scotch-brite pads are nearly as bad.
They work fine on the interior but will destroy the exterior finish. If you value the way your pan looks, keep both away from the sidewalls.
The dishwasher is another silent culprit. High heat and abrasive detergent pellets can etch the brushed surface over time. Aggregate reviews confirm that pan exteriors come out faded and pitted.
Hand-washing is the safe route. It also gives you a chance to inspect the surface for buildup.
Chloride-based cleaners pose a hidden danger. Bleach and ammonia can cause pitting in stainless steel. Even some all-purpose sprays contain chlorides.
Read the label before you spray anything on the exterior. When in doubt, use warm water and a mild dish soap.
How can you tell if damage is already done? Hold the pan at an angle under a bright light. Scratches appear as shiny lines running against the grain direction.
If you see them, the finish is permanently altered, though the pan still cooks fine. The scratches do not affect performance at all.
The brushed texture hides minor wear better than polished stainless. That is part of its appeal. But once you gouge it with an abrasive pad, every fingerprint lands in the scratches.
The pan never looks pristine again. That clarity matters if you care about keeping your cookware collection looking sharp.
If you do scratch the finish, do not panic. Light surface scratches can be minimized with a stainless steel polish. Deep gouges, however, are permanent.
Prevention remains the smarter path.
Protection starts with the right tools. Use only non-scratch nylon pads or soft sponges. Always scrub in the grain direction.
When in doubt, test a small spot on the bottom rim first. The same principle applies to your other kitchen gear. Whether you are working with a skillet or an air fryer basket, proper cleaning habits protect the surface finish.
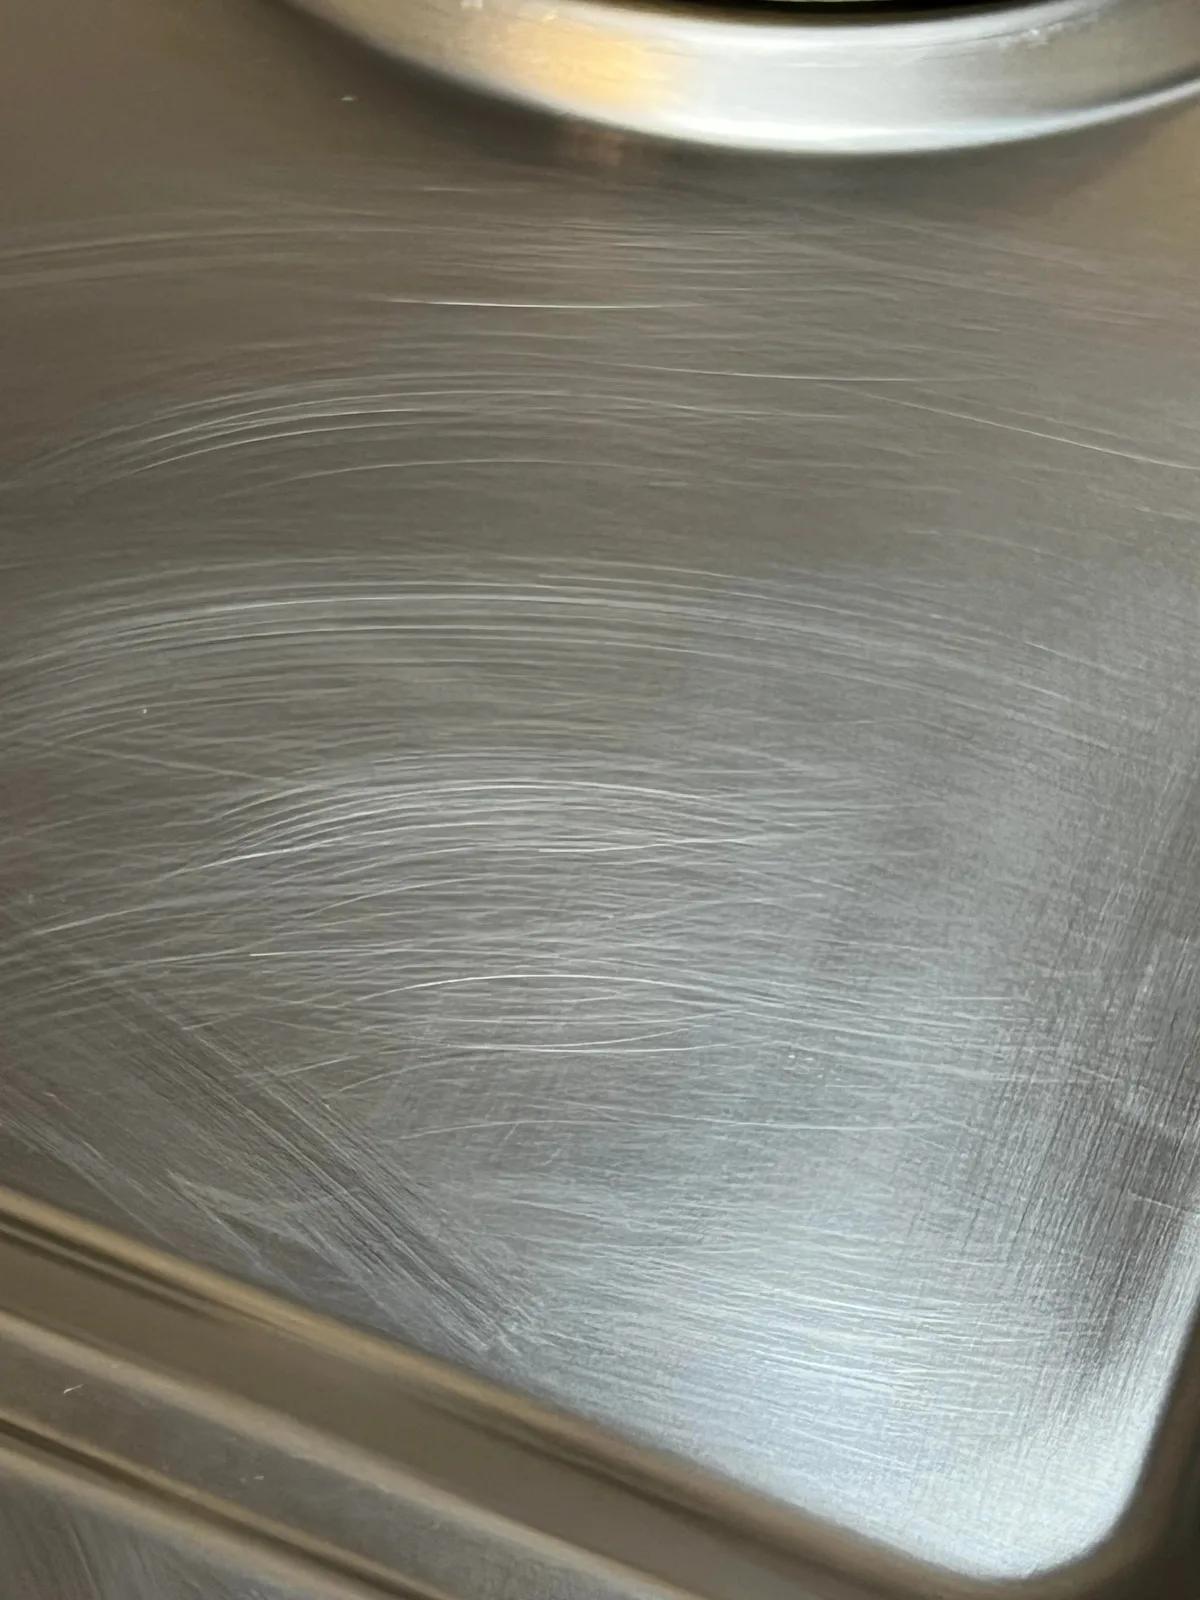
Image source: Web (Bing) / reddit.com (Web image (fair-use with source credit))
How to Keep the Buildup From Coming Back
Prevention beats restoration every time. Polymerized oil does not appear overnight. It stacks up gradually with every high-heat cook.
Cut off the source and you dramatically reduce your cleaning sessions.
The biggest trigger is overheating oil. If your oil smokes, it is past its smoke point. The breakdown products vaporize and bond to the sidewall.
Turn the heat down. Watch for shimmering, not smoke. A simple thermometer helps.
Or drop a wooden spoon handle into the oil. Steady bubbles mean you are ready. Smoking means you are already too late.
Use an oil with a higher smoke point for searing. Avocado oil handles high heat exceptionally well. Grapeseed and refined peanut oil also hold up.
Olive oil smokes earlier and leaves more polymerized residue behind. Match the oil to the method and you will see a visible difference in how long your pan stays clean.
Wipe the exterior after every cook. A quick pass with a damp cloth while the pan is still warm (but not hot) lifts fresh oil before it can set. This 30-second habit keeps the brushed sidewall clean for months.
The same logic powers regular maintenance on other high-heat cookware like deep fryers.
Check the sidewall after cooking. If you see a faint amber tint, deal with it immediately. Light stains need only a quick baking soda wipe.
Letting them harden into a brown crust creates the heavy work you are trying to avoid.
The interior cooking surface deserves the same care. Food residue left overnight can etch the cooking surface, especially with acidic ingredients. A quick clean after each use protects both sides of the pan.
Storage habits matter too. Stacking pans without protection grinds the brushed finishes together. Use pan separators or a soft cloth between cookware.
This preserves the grain and prevents cross-contamination of oily residue from other pans. Also, give the pan a full cool-down before storing. A completely dry, cool pan is your best defense against both rust and polymerized buildup.
Safety First: When to Avoid Harsh Chemicals (And What to Use Instead)
Oven cleaner is effective but genuinely dangerous. Lye-based formulas can burn skin on contact. The fumes irritate your lungs quickly.
Always wear thick gloves and safety goggles. Work outside or near an open window. Nitrile gloves offer decent protection for short contact.
For oven cleaner, use heavier rubber gloves designed for chemical resistance.
Check the handle construction before using oven cleaner. Some handles have epoxy or silicone components that react badly with lye. A riveted metal handle is usually safe.
A coated or synthetic handle is not. When in doubt, test a small area under the handle base first.
Bar Keepers Friend is safer but still an acid. Oxalic acid can irritate skin with prolonged contact. Rinse the pan thoroughly after cleaning.
Leftover acid residue can dull the finish if it dries on the surface.
For those who prefer zero chemicals, stick with baking soda and elbow grease. It is alkaline enough to break down light polymerized oil without any risk. White vinegar handles heat tint and mineral deposits safely.
A lemon half dipped in salt also works for mild stains, though it takes more effort.
Keep all cleaning supplies out of reach of children and pets. This is non-negotiable. Oven cleaner in particular is a serious ingestion hazard.
If a child grabs a just-sprayed pan, the consequences are severe. The American Cleaning Institute publishes handling guidelines for household cleaners, worth reviewing before you use anything aggressive.
If a pan has sentimental value or a rare finish, use the gentlest method available. Slow and careful beats fast and destructive. A damaged brushed finish is permanent, while an extra twenty minutes of soaking costs nothing.
If you are concerned about material safety in cookware, look closely at what your cleaner contains. Many kitchen aerosols list chlorides or strong alkalis on the label. One more consideration is ventilation.
Even baking soda can release fine particles when scrubbed. Work in a well-lit area and rinse under running water to keep dust down.
Frequently Asked Questions
Can I use a dishwasher to clean my 5-ply skillet?
No. The high heat and abrasive detergent dull the brushed finish and can weaken the handle over time. Hand-washing with warm water and a non-scratch pad is the recommended method.
Many premium manufacturers also void the warranty if you run their cookware through a dishwasher cycle.
Is the brown residue toxic?
No. Polymerized oil is the same food-safe material used to season cast iron. It does not leach toxins into food.
Remove it for performance and appearance, not health reasons. The main concern is that thick buildup can flake off into food, which is unappetizing but not dangerous.
Should I season my stainless steel skillet like cast iron?
No. Stainless steel is naturally nonstick when heated correctly and used with the right amount of oil. Seasoning stainless creates the same brown polymerized oil you are trying to remove.
If food sticks, preheat the pan properly and add oil before adding anything else.
How do I remove rainbow discoloration?
Rainbow heat tint is a thin oxide layer, not polymerized oil. It forms when stainless steel gets very hot. A paste of Bar Keepers Friend or a vinegar wipe will usually clear it.
Apply gently, rinse well, and dry completely. The tint is cosmetic and does not affect cooking performance.
How often should I deep clean the exterior?
That depends on usage. Cook at high heat three times a week? Deep clean every one to two months.
Mostly simmer or bake? Twice a year is plenty. Wipe the exterior after each use to delay the need for a deep clean.
Can I use oven cleaner on any stainless steel skillet?
Only if the handle is fully metal and the exterior is plain brushed stainless. Avoid it on pans with silicone, wood, or coated handles. Lye can break down adhesives and synthetic materials.
Always wear gloves, work in a ventilated area, and rinse extremely well before using the pan again.

Related posts
Crispy Duck Breast: Perfect Temp & Time for Stainless
Cooking a crispyskin duck breast in a 5ply stainless steel skillet isn't about chasing one magic number. The…
Can Salt in Cold Water Pit a Stainless Steel Stockpot?
Can you put adding salt to cold water before boiling causing pitting in a stainless steel stockpot 12…
Cuisinart 12-Qt Stockpot Reddit Review: Worth It?
Every week in the deepest corners of Reddit, the same question pops up: is cuisinart 12qt stockpot stainless…