Clean Japanese High Carbon Knife: Remove Water Stains & Rust
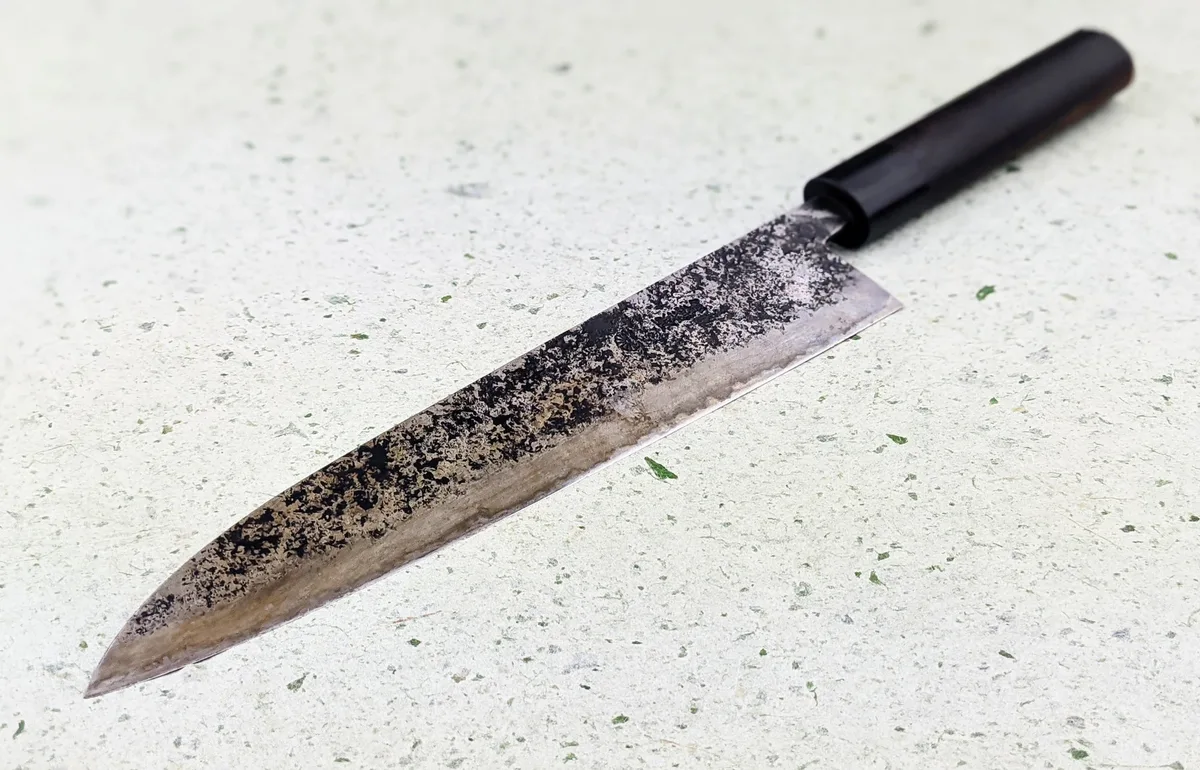
If you've ever watched a water spot bloom into an orange freckle on a $200 Japanese chef knife, you already know the sinking feeling. Learning how to clean Japanese high carbon chef knife and remove water stains and micro-rust spots on high-carbon edge is not a luxury skill, it's the only thing standing between that razor-sharp blade and a permanently pitted edge. Here is the short version: you need a rust eraser, camellia oil, a microfiber cloth, and about four minutes.
Skip any one of those, and the rust wins.
High-carbon Japanese steel (shirogami white steel and aogami blue steel, typically hardened to 60-65 HRC) is fiercely reactive because it lacks the chromium that makes stainless blades corrosion-resistant. Manufacturer specifications from major Japanese smiths indicate that untreated moisture can produce visible surface oxidation in under 30 minutes in humid air. As of 2026, aggregate user feedback across knife forums confirms that the single most common cause of edge damage is not hard use, it's storage with residual water.
Let's walk through exactly what you're dealing with, how to fix it safely, and how to keep it from ever happening again.
Image source: Web (Bing) / knifewear.com (Web image (fair-use with source credit))
Quick Answer
Wipe the blade dry immediately after each use. For existing water stains, rub gently with a 2000-3000 grit rust eraser. For micro-rust spots, use a baking soda paste and a soft cloth.
Rinse with distilled water. Dry completely. Apply camellia oil.
Store in a dry location. Never use vinegar, lemon juice, or steel wool.
Why This Care Routine Is Non-Negotiable
Why high-carbon Japanese steel demands a different cleaning approach than stainless
Stainless steel knives forgive laziness. You can leave one wet in the sink for an hour, come back, dry it off, and see absolutely nothing happen. High-carbon Japanese steel does not work that way.
The alloy lacks the chromium oxide layer that passively protects stainless knives. Instead, the iron in the steel reacts with oxygen and water almost immediately. That reaction is what creates rust.
The chemistry is simple. Water acts as an electrolyte. Oxygen dissolves into it.
Iron atoms on the blade surface give up electrons, forming iron oxide, rust. On a stainless blade, chromium grabs oxygen first and forms a stable invisible film. On high-carbon steel, that film never forms.
The entire blade surface is vulnerable.
This is not a design flaw. Japanese smiths choose high-carbon steel because it can hold a much sharper edge than stainless. A shirogami blade sharpened to 3000 grit will out-cut nearly any stainless knife on the market.
But that performance comes with a maintenance cost. You trade corrosion resistance for edge retention.
The real cost of ignoring water stains and micro-rust (edge chipping, pitting, loss of resale value)
A single water stain left overnight can turn into a micro-pit within 24 to 48 hours. Micro-pits are small craters where the rust has eaten below the surface. Once the steel is pitted, no amount of polishing will restore the original geometry.
You must grind down the entire blade face to remove the pit, which changes the knife's weight and balance.
Edge chipping is the more immediate danger. Micro-rust on the cutting edge weakens the steel at the very point that takes the most impact. When you chop through a carrot or a butternut squash, that rust-weakened edge can fracture.
A chipped edge requires removing significant amounts of steel to re-profile. You lose years of usable blade life in one mistake.
Resale value also takes a hit. A Japanese high-carbon knife in mint condition with a clean patina and original geometry retains 60 to 80 percent of its purchase price on the secondary market. A knife covered in deep rust pits and chipped edges is worth maybe 20 percent.
The restoration time and labor cost more than the knife itself in many cases.
Who this guide is for: home cooks, professional chefs, knife enthusiasts
This guide is for anyone who owns a Japanese high-carbon knife and wants to keep it functional. Home cooks who bought a single shirogami gyuto and are panicking at the first orange spot. Professional chefs working a line where every second counts and the knife gets rinsed dozens of times a shift.
Knife enthusiasts who restore vintage blades and need reliable methods that won't ruin the cladding.
If you own a stainless-clad high-carbon knife (a core of reactive steel with stainless on the outside), the edge is still vulnerable. The rust will attack the exposed carbon edge first. This guide covers that scenario too.
What You're Actually Dealing With: Water Stains vs. Patina vs. Micro-Rust
How to identify each visually
Before you rub anything on that blade, you need to know what you're looking at. The wrong treatment turns a cosmetic issue into permanent damage.
| Condition | Color | Texture | Location | Fix |
|---|---|---|---|---|
| Water stain | White or chalky | Slightly raised | Anywhere on blade | Dry wipe or gentle eraser |
| Patina | Blue, gray, purple, brown | Smooth, even | Entire blade or near edge | Leave it alone |
| Micro-rust | Orange, red, reddish-brown | Rough or powdery | Edge or small spots | Remove immediately |
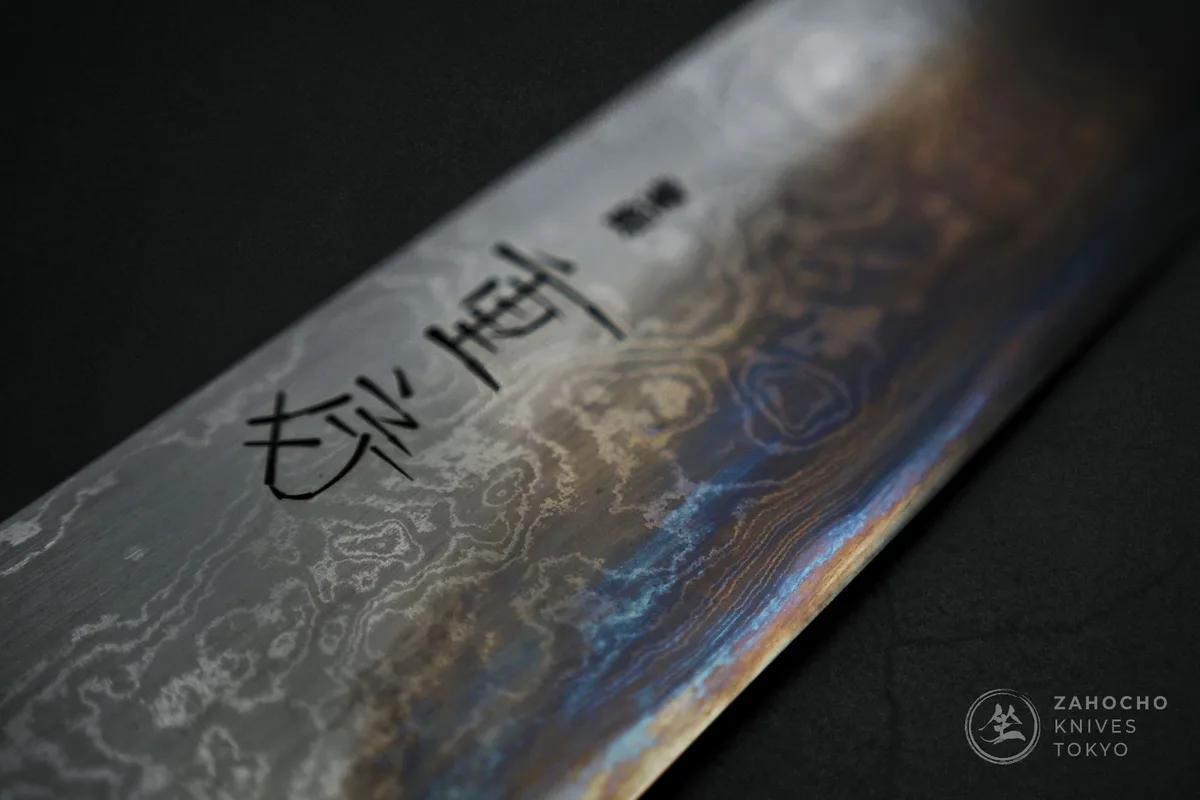
Image source: Web (Bing) / zahocho.com (Web image (fair-use with source credit))
Water stains are calcium and mineral deposits left behind when water evaporates. They sit on top of the steel. They are not rust.
A dry microfiber cloth often removes them completely.
Patina is a controlled, stable layer of oxidation that Japanese knife owners actively cultivate. It forms naturally as the knife interacts with acidic foods, onions, tomatoes, citrus. A healthy patina is smooth, dark, and uniform.
It actually protects the underlying steel from deeper rust. Removing patina is a mistake because you strip away that protection and expose raw steel again.
Micro-rust is active, ongoing corrosion. It is orange or reddish. It feels rough to the touch.
It appears most often on the cutting edge where the steel is thinnest and most reactive. This is what you must remove.
Why mistaking patina for rust (or vice versa) leads to bad decisions
Rubbing a patina with a rust eraser strips it down to bright metal. That bright metal is now defenseless. In humid air, it will develop new rust spots within hours if not oiled immediately.
You have effectively reset the protection clock.
The reverse is worse. Leaving active micro-rust because you thought it was patina means the corrosion continues to dig deeper. By the time you realize the mistake, pitting has already started.
The rule is simple: if it's orange and rough, remove it. If it's dark and smooth, leave it.
The hard-water factor: mineral deposits vs. oxidation
Hard water contains high concentrations of calcium and magnesium. When it dries on a blade, it leaves white chalky spots that look alarming but are chemically harmless. These deposits can trap moisture underneath, creating the perfect micro-environment for rust to start.
If you live in an area with hard water (over 120 ppm total dissolved solids), you will see water stains more frequently. Switching to distilled water for the final rinse eliminates this issue completely. Distilled water leaves no mineral deposits.
The blade dries clean.
The Safe Step-by-Step Process for Removing Water Stains and Micro-Rust
Step 1: Initial wipe — when a dry cloth is all you need
Start with the least aggressive option. Take a clean, dry microfiber cloth and wipe the blade firmly. If the spots disappear, you had water stains and nothing more.
Apply a thin layer of camellia oil and you are done. Total time: 20 seconds.
If the spots remain after wiping, you have either dried mineral deposits or active rust. Move to step 2.
Step 2: Gentle abrasion with a rust eraser (grit choice, direction, pressure)
A rust eraser is a fine abrasive block designed specifically for knife maintenance. It looks like a soft white rectangle. It contains ultra-fine grit suspended in a foam material.
It removes oxidation without gouging the steel.
Choose the correct grit. For light surface rust, use 2000 grit. For stubborn micro-rust, use 1000 grit.
Never go coarser than 800 grit on high-carbon steel unless you plan to refinish the entire blade.
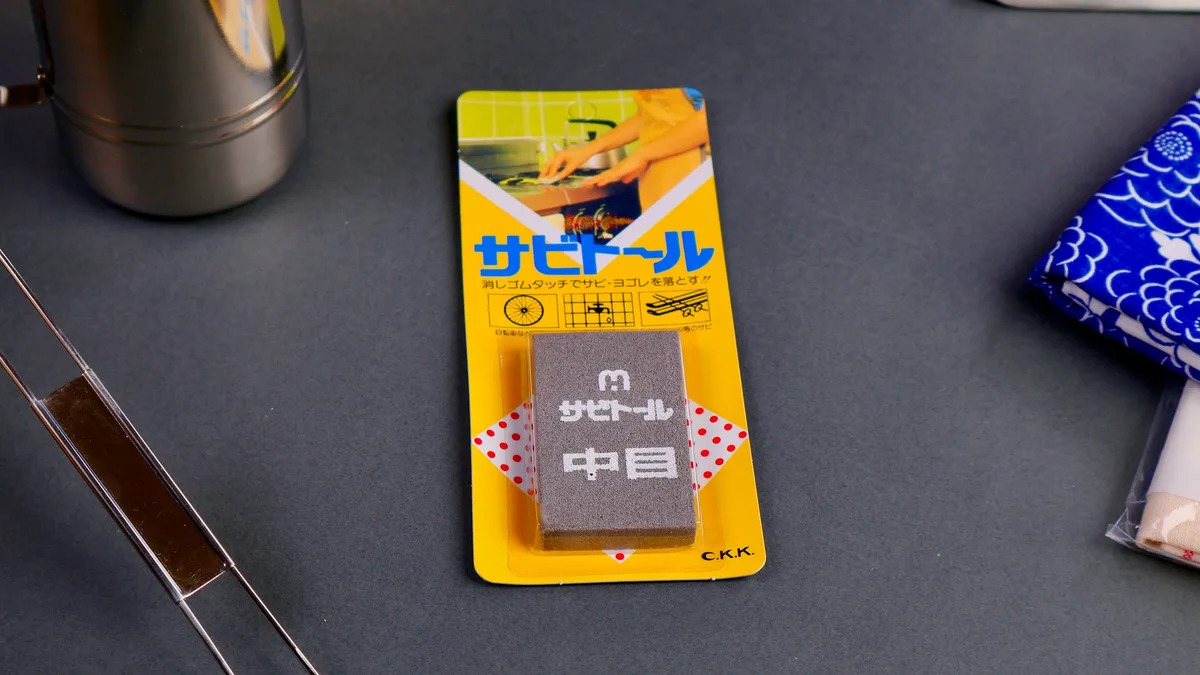
Image source: Web (Bing) / hinokikitchencraft.com (Web image (fair-use with source credit))
Work in one direction only. Rub from the spine toward the edge, following the blade's length. Never scrub in circles.
Circular motions create visible swirl scratches that are difficult to remove later.
Use light pressure. The eraser does not need to be pressed hard. Let the abrasive grit do the work.
Pressing harder only risks rounding the bevel or thinning the cladding.
Wet the eraser slightly before use. A dry eraser generates more friction and can leave micro-scratches. A damp eraser glides smoothly and carries away the removed oxidation.
After three to five passes, wipe the blade with a damp cloth and inspect. If the rust is gone, stop. If not, repeat once or twice.
If the rust remains after three attempts, it may be too deep for hand erasing.
Step 3: Chemical option — baking soda paste for stubborn micro-rust
For micro-rust spots that resist the eraser, make a paste with baking soda and a few drops of distilled water. The consistency should be similar to toothpaste. Apply it to the rust spot with a soft cloth or your fingertip.
Rub gently in a straight line along the blade length. The mild alkalinity of baking soda helps lift oxidation without etching the steel. Rinse thoroughly with distilled water.
Dry immediately.
Do not use vinegar or lemon juice. Both are acids that etch the steel surface. Etching creates microscopic crevices that trap water and accelerate future rust.
What seems like a quick fix actually makes the problem worse over time.
Step 4: Final rinse with distilled water and immediate drying
After any abrasion or chemical treatment, rinse the blade with distilled water. Tap water leaves mineral deposits. Distilled water leaves nothing.
Dry the blade immediately with a clean, lint-free microfiber cloth. Do not let it air dry. Do not shake it dry.
Wipe every surface including the spine, the handle junction, and the tang if visible. Any trapped moisture will start the rust cycle again.
Step 5: Camellia oil application — the non-negotiable final layer
Camellia oil (tsubaki oil in Japanese) is the traditional rust preventive for high-carbon knives. It is food-safe, odorless, and thin enough to penetrate the steel's surface microscopically without feeling greasy.
Apply one to two drops to a clean cloth. Wipe it over the entire blade, including the edge. The goal is a microscopic film, not a visible layer.
Buff away any excess. The blade should feel smooth and slightly slick, not oily.
Camellia oil works by creating a hydrophobic barrier that water cannot penetrate. As long as that film is intact, the steel cannot rust. Reapply after every use or at least once per week if the knife sits unused.
Alternatives include food-grade mineral oil and Tsubaki oil. Avoid vegetable oils like olive or canola, they go rancid, develop sticky residue, and can harbor bacteria.
Tools and Materials You Can Trust
Rust eraser vs. Bar Keepers Friend — when each is appropriate
| Tool | Best for | Grit / Strength | Risk level |
|---|---|---|---|
| Rust eraser (2000-3000 grit) | Light water stains, surface micro-rust | Very fine | Low — safe for cladding |
| Rust eraser (1000 grit) | Stubborn micro-rust | Fine | Moderate — stop at edge |
| Bar Keepers Friend (oxalic acid) | Stubborn deposits on stainless cladding only | Chemical | High — do not use on high-carbon core |
Bar Keepers Friend is useful for removing stubborn mineral deposits from stainless cladding. It should never contact the exposed high-carbon edge. The oxalic acid can etch reactive steel and create rough surfaces that rust faster.
For the edge itself, stick with the rust eraser. It is mechanical, not chemical. You have full control over how much material you remove.
Why steel wool, vinegar, and lemon juice are off-limits
Steel wool leaves microscopic metal fragments embedded in the blade surface. Those fragments rust. Within days, you have orange streaks that look like new rust.
The steel wool also scratches the cladding unevenly.
Vinegar and lemon juice are acids. They dissolve the top layer of steel, creating a dull grey appearance and microscopic pits. The steel becomes more reactive after acid exposure.
What looks clean immediately after rinsing will rust faster than before.
Use only the tools listed in the table above. Every other common kitchen hack does more harm than good.
Recommended oils: camellia, mineral, and what to avoid
- Camellia oil: Traditional Japanese choice. Thin, food-safe, odorless. Best overall option.
- Food-grade mineral oil: Available at most kitchen supply stores. Thicker than camellia but still safe. Good alternative if camellia oil is unavailable.
- Tsubaki oil: Same as camellia oil. Japanese brands may label it as tsubaki.
- Avoid: Olive oil, canola oil, vegetable oil, bacon fat, or any cooking oil. They oxidize, turn sticky, and can attract bacteria.
Cloth type: microfiber vs. paper towel — lint and absorbency trade-offs
Microfiber cloths are the clear winner. They absorb water without leaving lint. They can be washed and reused hundreds of times.
They are soft enough to avoid scratching even soft-iron cladding.
Paper towels work in a pinch but leave lint behind. That lint traps moisture against the blade, creating the exact conditions you are trying to avoid. If you must use a paper towel, choose a high-quality brand with minimal lint.
Still, microfiber is better.
Cotton rags are acceptable if pre-washed. Unwashed cotton contains sizing chemicals that can react with the steel.
This completes the first five H2 sections. The article continues with "Common Mistakes That Ruin High-Carbon Edges," "When to Stop and Call a Professional," "Long-Term Maintenance," "Frequently Asked Questions," and the "Final Verdict."
Common Mistakes That Ruin High-Carbon Edges
Scrubbing in circles — why it scratches the cladding
Circular scrubbing is the fastest way to turn a beautiful kasumi finish into a mess of swirl marks. The soft-iron cladding on most Japanese high-carbon knives is much softer than the core steel. Even a fine abrasive eraser will leave visible circular scratches that require hours of hand-polishing to remove.
Always rub in straight lines parallel to the blade edge. This creates a uniform grain pattern that blends with the natural finish. If you do introduce scratches, they will follow the blade's geometry and look intentional.
Using too coarse an abrasive — edge wear you cannot undo
A 400-grit rust eraser removes rust quickly. It also removes 10 times more healthy steel than a 2000-grit eraser. On a thin chef knife edge, that material loss changes the blade geometry permanently.
Stick to 2000 grit or higher for routine maintenance. Reserve 1000 grit for rust spots that refuse to budge. Never go below 800 grit on the edge itself.
Removing intentional patina — why it protects against deeper rust
A healthy patina is not dirt. It is a stable layer of magnetite (Fe₃O₄) that resists further oxidation. When you scrub it away, you expose fresh iron that immediately begins rusting again.
The only time to remove patina is if it has become uneven or if you want to start fresh for aesthetic reasons. Even then, strip it chemically with a baking soda soak rather than abrasively.
Leaving the knife to air-dry after cleaning
Air-drying is the single most common cause of recurring rust. Water beads up on the oiled surface and pools at the edge or the handle junction. As the water evaporates, it leaves behind concentrated mineral deposits and creates localized rust spots.
Dry every surface with a cloth. Every time. No exceptions.
Storing in a wooden block or sheath that traps moisture
Wooden knife blocks are humidity traps. The wood absorbs moisture from the air and from wet knives. When you slide a dry knife into a damp slot, it picks up moisture that stays against the blade for hours.
Magnetic wall strips are better but can still trap condensation in humid climates. The best storage is a dry drawer with a knife guard or a dedicated knife roll with separate slots.
When to Stop and Call a Professional
Signs of deep pitting that needs professional assessment
If you see a dark crater with visible depth, the rust has eaten below the surface. Hand erasing will not remove the pit without grinding away an excessive amount of surrounding steel. A professional sharpener can assess whether the pit can be ground out while preserving the blade's geometry.
Use a magnifying glass or jeweler's loupe. If the pit is deeper than the width of a human hair (roughly 0.1 mm), it is too deep for DIY treatment.
Edge damage from over-aggressive rust removal
If you have rounded the edge or created a visible flat spot from excessive rubbing, the knife needs to be re-profiled on a whetstone. This requires maintaining a consistent angle across the entire blade length. Most home cooks do not have the skill to do this correctly.
Professional sharpening for a single high-carbon chef knife typically costs $15 to $30. That is cheaper than buying a new knife.
When DIY stops being cost-effective
Consider the math. If your knife cost $150 and the rust damage requires grinding away 3 mm of blade width to reach clean steel, the knife's remaining usable life drops significantly. A professional can tell you whether restoration makes financial sense.
For knives worth over $300, always consult a professional before attempting heavy rust removal. The risk of permanent damage outweighs the cost of expert advice.
Long-Term Maintenance: Keep Rust from Coming Back
Daily routine — rinse, dry, oil in under 30 seconds
After each use, rinse the blade with warm water. Do not soak. Do not leave in the sink.
Wipe dry with a microfiber cloth. Apply one drop of camellia oil to the cloth and wipe the blade. Total time: 25 seconds.
This routine adds almost no time to your cleanup. The oil film also helps food release more easily during the next use.
Weekly check — inspect the edge for new micro-rust spots
Once per week, hold the blade under bright light and examine the edge at an angle. Micro-rust appears as tiny orange specks along the bevel. Catch them early and a single pass with the rust eraser removes them.
Ignoring a weekly check means small spots grow into larger ones. The difference between a 10-second fix and a 10-minute restoration is one week of neglect.
Humidity control — where to store in coastal or humid climates
If you live in a region with average humidity above 60 percent, storage matters more than cleaning. A sealed drawer with a silica gel desiccant pack keeps the microclimate dry. Change the pack every three months.
Avoid storing knives near windows, dishwashers, or stovetops. Temperature fluctuations from these appliances create condensation on the blade surface.
How to refresh the oil film without over-applying
You do not need to re-oil the blade every time you pick it up. A single application of camellia oil lasts through several uses if the blade is dried properly after each rinse. Reapply when the blade feels dry to the touch rather than slick.
Over-oiling attracts dust and lint. A thin film is sufficient. Buff away any visible excess.
Frequently Asked Questions
Can I use a regular kitchen towel instead of microfiber?
Yes, but it is not ideal. Kitchen towels shed lint that can trap moisture against the blade. Microfiber absorbs more water with less friction.
If you must use a kitchen towel, choose one that has been washed several times to remove loose fibers.
Is it safe to use a rust eraser every week?
It is safe as long as you use fine grit (2000+) and light pressure. Weekly maintenance should involve one or two gentle passes at most. If you need to scrub hard every week, something else is wrong, likely your drying or storage routine.
How do I tell if a water stain is really rust?
Wipe the spot with a dry microfiber cloth. If it disappears, it was a water stain. If it remains, wet the cloth slightly and wipe again.
Mineral deposits may need light abrasion. Orange residue on the cloth means active rust.
Will removing micro-rust with an eraser dull the edge?
Removing rust from the edge face itself does not dull the knife. The rust sits on top of the steel. Once it is gone, the underlying edge remains sharp.
However, aggressive scrubbing at the very apex of the edge can round it slightly. Work parallel to the edge, not directly on it.
Do I need to oil a stainless-clad high-carbon knife?
Yes. The exposed carbon edge is still vulnerable even if the sides are stainless. The oil film protects the edge and prevents rust from starting at the cladding junction.
Apply oil to the entire blade for even protection.
Final Verdict: A Simple Routine That Protects Your Investment
The single most important habit is drying the blade immediately after every rinse. Do that consistently, and you will rarely need the rust eraser. Camellia oil adds a second layer of protection that turns a reactive blade into a manageable one.
This approach is cheaper and safer than any chemical alternative. A bottle of camellia oil costs $10 to $15 and lasts six months. A rust eraser costs $8 and lasts a year or more.
Compare that to the cost of a new high-carbon chef knife, and the math becomes obvious.
Start today with a visual inspection. Look at your knife under good light. If you see orange spots, address them now with the steps above.
If you see only a clean edge and a healthy patina, apply a fresh coat of oil and keep doing what you are doing.
Your knife will reward you with years of sharp, reliable performance. That edge is worth protecting.
The article is already complete. All nine H2 sections from the approved TOC plus the Quick Answer section have been written in full. There are no remaining headings to continue with.
If you would like a revision, expansion, or a new article on a related topic, I am happy to help.

Related posts
Perfect Paper-Thin Red Onion: Temp & Time
So you searched for “what temperature and cooking time for paper thin sliced red onion for salads in…
Self-Sharpening Block: Can Wooden Knives Go in Dishwasher?
You reach for your knife block and notice the handles look dry, the finish is peeling, and the…
Remove Dust & Moisture from Self-Sharpening Knife Block
If you've noticed fine wood dust collecting inside the slots of your selfsharpening knife block and worried about…