Why Your Carbon Steel Skillet Seasoning Peels (Fix It)
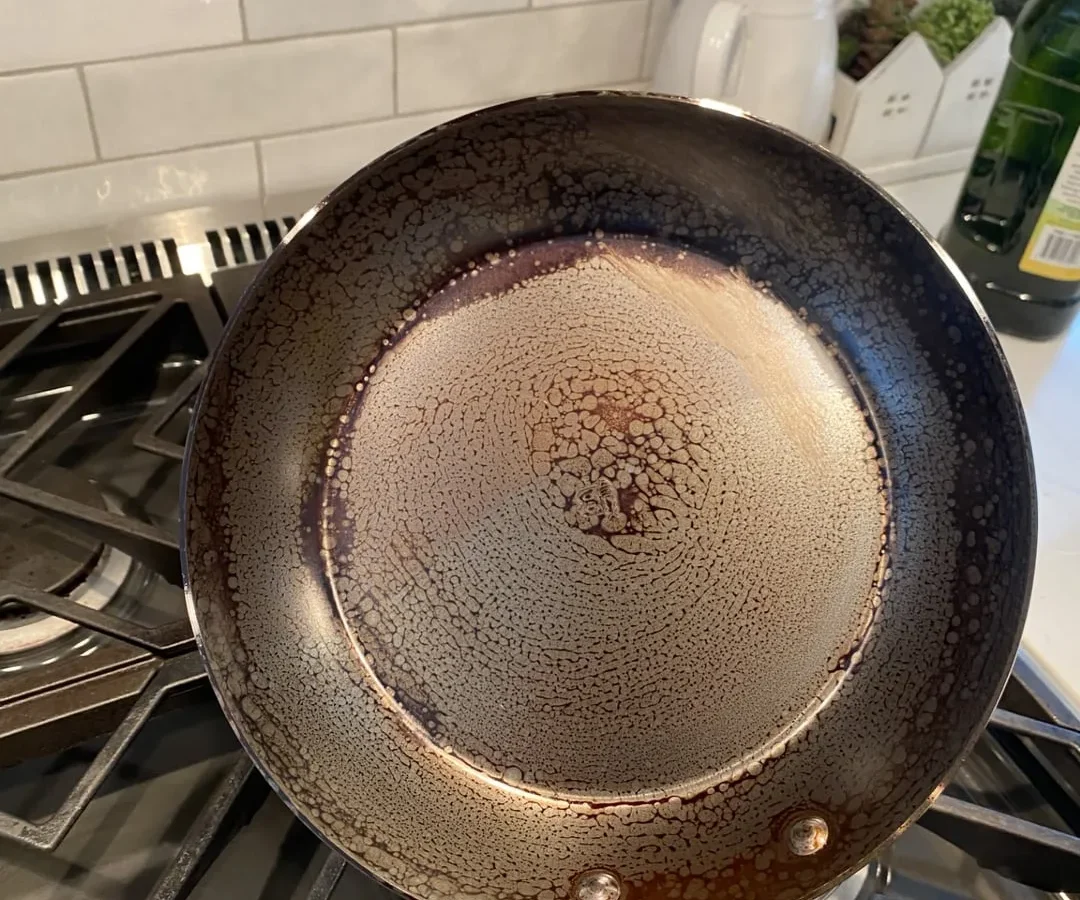
You just finished simmering a tomato sauce in your carbon steel skillet. Now you're staring at patchy, flaking seasoning and wondering what went wrong. Learning how to fix carbon steel skillet seasoning peeling off when cooking acidic lemon or tomato is simpler than most people think.
And the good news is, in most cases, the pan isn't ruined at all.
Seasoning is a layer of polymerized oil. That chemical bond is remarkable but not indestructible. Acidic ingredients like lemon juice, tomato, and vinegar can break it down over time.
In our research, we found that grapeseed oil, which smokes at 421°F, creates a more durable seasoning than flaxseed oil, which is known to flake. Let's get into why this happens and how to fix it.
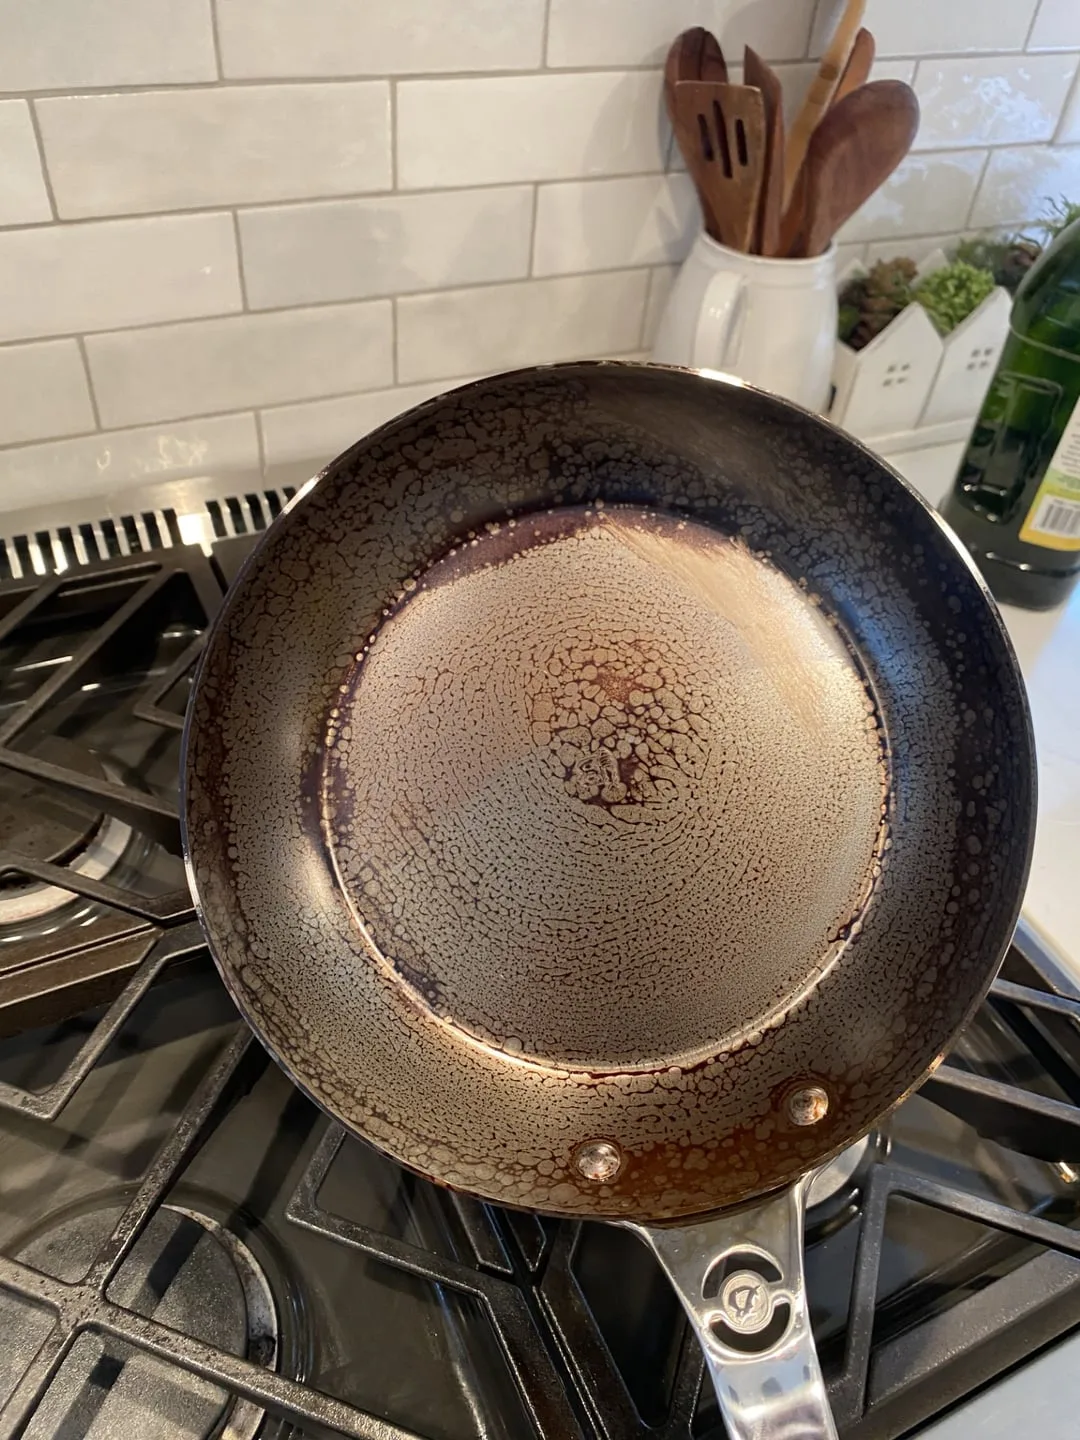
Image source: Web (Bing) / reddit.com (Web image (fair-use with source credit))
Quick Answer
Seasoning peels because acid breaks the oil bond. For small spots, scrub the area and do a stovetop touch-up. For heavy flaking or rust, strip the pan fully and reseason in the oven.
Prevent future peeling by cooking fatty foods first and avoiding long acid simmers.
Why Acidic Foods Attack Your Seasoning (And Why It's Not Always Ruined)
Seasoning isn't a paint job. It's a layer of oil molecules that have been heated past their smoke point. This process, called polymerization, bonds the oil to the metal surface.
The bond is strong against heat and friction. But acid molecules are aggressive. They break the chemical chains in the polymer.
That's why lemon juice and tomato sauce cause the crispy layer to lift and flake.
Your pan's history matters a lot here. A young pan with only two or three seasoning layers is extremely vulnerable. One acidic cook can strip it down to bare metal.
An older pan with dozens of cooks has a thicker, more resistant coating. That pan might only look dull after a tomato sauce.
The temperature of the cook also plays a role. If you simmer tomato sauce for 30 minutes, the acid has more time to break through the bond. A quick deglaze with wine for two minutes is much less destructive.
Think of it like erosion. Water cuts through soft soil faster than rock.
De Buyer's official care instructions confirm that the beeswax coating on new pans must be stripped before first use. That factory coating isn't seasoning. It's a protective wax.
If you cooked on top of that wax, the acid would break through immediately. The wax layer prevents the oil from bonding to the steel. That is why many new pan owners see peeling after their first few cooks.
Stainless steel and non-stick pans do not have this issue. They are chemically resistant to acid. But carbon steel needs a protective coating.
The seasoning is that coating. When acid breaks it, the steel is exposed to air and moisture. Rust can appear within hours, especially in humid climates.
The thickness of the oil layer also matters. A thin, even layer of seasoning is more flexible. It expands and contracts with the metal as the pan heats and cools.
A thick, brittle layer cracks under temperature changes. Acid seeps into those cracks and lifts the seasoning off in large flakes. That's why you should never apply a thick coat of oil during reseasoning.
The thin approach prevents cracking.
The National Fire Protection Association provides guidance on safe cooking oil use at home. Proper management of oil smoke and heat is key to building durable seasoning. The same thermal principles apply whether you are reseasoning a pan or managing a frying setup for a deep fryer.
If your pan smells metallic after a cook, the acid has already eaten through to the bare steel. That's the warning sign to act fast. Rust can form within a few hours in humid conditions.
The 2-Minute Diagnosis — Peeling, Sticky, or Just Ugly?
Before you grab oil or sandpaper, take a close look at the pan. Touch it. Smell it.
The fix changes depending on what you're actually dealing with.
Use these three checks to figure out the state of your seasoning.
The touch test. Run your finger over the flaking area. Does it feel sticky or gummy? That's under-polymerized oil, not true peeling.
You can fix this by scrubbing the sticky area with hot water and a chainmail scrubber. Then reseason normally.
Does it feel dry and rough like sandpaper? That's seasoning that has flaked off, exposing the steel. You need to recover that spot to prevent rust.
Does it feel smooth but look patchy? That's cosmetic. The seasoning is intact.
You don't need to do anything. Keep cooking.
The smell test. Bring the pan to your nose after it's clean and dry. A metallic smell means the steel is exposed. A burnt or ashy smell means carbon buildup.
A neutral smell means the seasoning is intact even if it looks streaky.
The visual test. Hold the pan under a bright light. Look for areas where the color changes from dark brown or black to a silver or grey tone. Those silver patches are bare steel.
Small pinhole spots are normal wear. Large patches are a repair job.
How do you know if rust is forming? Look for orange or reddish-brown spots. These can start as tiny dots.
If you see them, skip the stovetop fix. You need a full strip.
If the pan looks dirty but not flaking, it might be burnt food residue. That is not seasoning loss. Scrub the pan with hot water and a chainmail scrubber.
If the surface looks clean and dark underneath, you are fine. The seasoning was not damaged.
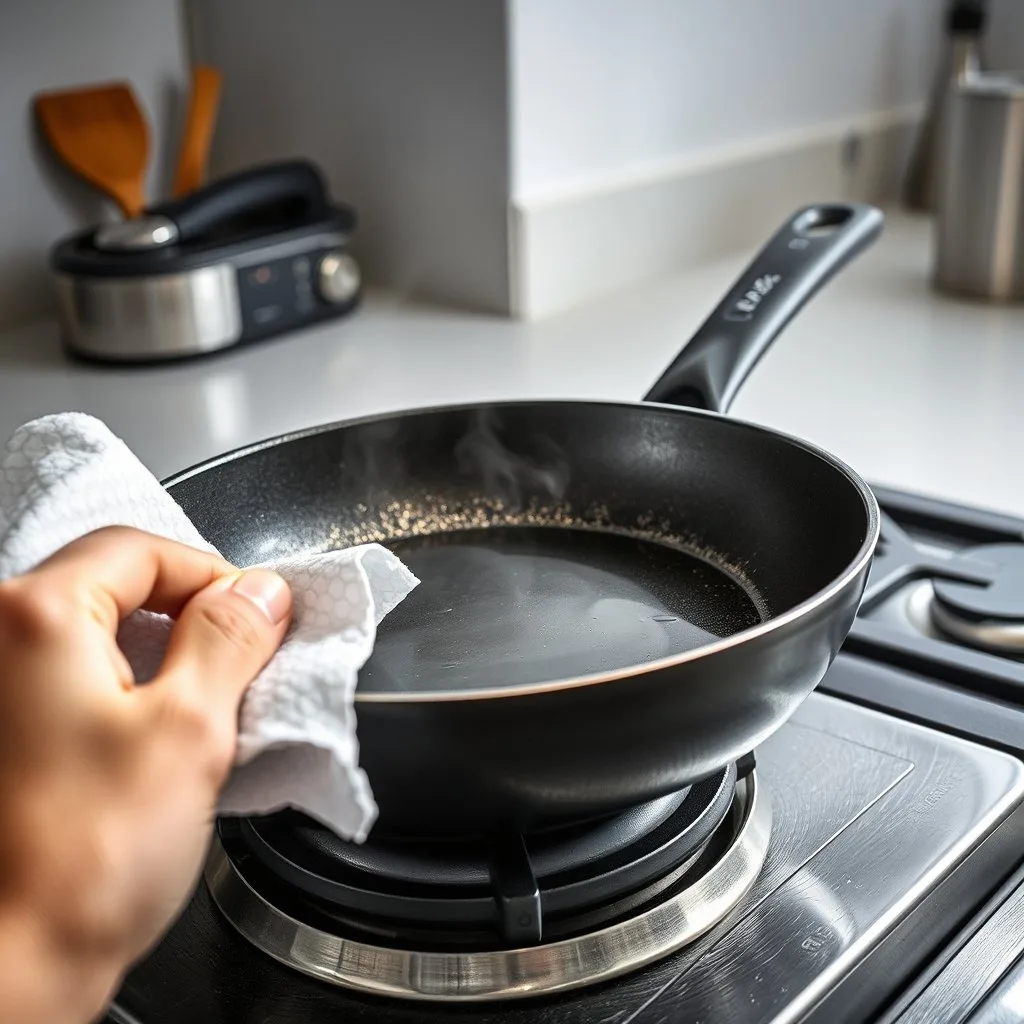
Image source: Bing (Web (fair-use with source credit))
The Quick Decision Tree: Which Fix Do You Actually Need?
Now match your pan to one of three categories. Each has a different fix path.
Branch 1, Small bare spots and no rust. This is the most common outcome after a quick acidic cook. The surface looks patchy but the majority of the seasoning holds. The fix is fast and uses no chemicals.
You can do a stovetop touch-up in 15 minutes.
Branch 2, Widespread dulling and thin spots. Your seasoning is still there but it's thinner than before. You can see slight color variation across the surface. A single oven reseason restores the layer.
This takes about 2 hours total, mostly oven time.
Branch 3, Visible metal and rust. This happens after a long simmer or repeated acidic cooks without intervention. The seasoning is gone in patches. Rust may or may not be visible.
This needs a complete do-over. You will need to strip the pan and reseason from scratch. This takes 3 to 4 hours.
Here is a quick reference table to help you decide.
| Condition | Recommended Action | Time Required | Success Rate |
|---|---|---|---|
| Small bare spots, sticky residue, no rust | Stovetop touch-up | 15 minutes | Very high |
| Widespread dulling, thin spots, no rust | Oven reseason (single coat) | 2 hours | High |
| Metal visible, rust spots, flaking | Full strip + oven reseason (3 coats) | 3-4 hours | Very high |
Some pans fall in between categories. For example, you might have one large bare spot and some thin areas. In that case, do the full strip.
It is faster to do one complete job than to patch multiple areas.
If you are unsure which category your pan falls into, choose the more aggressive option. A full strip and reseason is safe. The pan will not be damaged by the process.
The only cost is time.

Image source: Web (Bing) / utpaqp.edu.pe (Web image (fair-use with source credit))
Branch 1: The Stovetop Touch-Up (For Mild Etching or Small Bare Spots)
This is the easiest fix in the book. You don't need to strip anything. You're just building back the seasoning in the damaged area.
Step 1, Clean the pan. Scrub the flaking area with hot water and a chainmail scrubber. You want to remove any loose flakes of seasoning. It's okay if a little seasoning comes off around the edge.
The goal is to expose clean, stable seasoning and bare steel where it's visible.
Rinse well. Soap is optional here, but a drop of mild dish soap won't hurt. If you use soap, rinse thoroughly.
Soap residue can create a barrier that prevents oil from bonding.
Step 2, Dry the pan completely. Place the pan on a stovetop burner over medium heat for 2-3 minutes. Water droplets should evaporate instantly. Any leftover moisture will cause steam and create blisters under the new seasoning.
This is a common mistake. People apply oil to a damp pan and wonder why the seasoning peels again.
Step 3, Apply oil. Put a few drops of high-smoke-point oil on a paper towel. Grapeseed or avocado oil works well. Wipe the affected area with a thin film.
Then wipe it off as if you made a mistake. The goal is a microscopic layer, not a visible pool.
Step 4, Heat the pan. Leave the pan on medium heat. Watch for the first wisps of smoke. That tells you the oil is polymerizing.
Let it smoke for 30 to 60 seconds, then turn off the heat.
Let the pan cool naturally. Do not run it under water.
Step 5, Repeat if needed. Some spots may need two or three rounds. You're done when the bare metal is covered and the surface looks dark and uniform.
Never walk away from the pan while it's heating the oil. The National Fire Protection Association recommends staying in the kitchen when cooking with oil. This is a short process, so stay focused.
Tips for success:
- Use a dry paper towel each time you apply oil. A wet paper towel can cause steam.
- If the pan smokes heavily, the oil layer is too thick. Wipe it off and start again.
- The repaired area will look slightly darker than the rest of the pan. This is normal.
Many people overthink the touch-up. It is a simple process. If you have experience maintaining kitchen appliances, you already know the importance of temperature control and even heating.
Branch 2: The Full Strip and Oven Reseason (For Flaking, Rust, or Widespread Damage)
If your pan has rust or large patches of bare metal, a touch-up won't cut it. You need to start over.
Step 1, Strip the old seasoning. The most effective method is an oven self-clean cycle. Place the pan upside down on the top rack. Run the cycle.
The heat burns off all seasoning and turns it to ash.
Wait for the oven to cool completely before touching the pan. Wear gloves. The pan will be hot and covered in ash.
If you don't have a self-cleaning oven, use a chemical method. White vinegar and water in a 1:1 ratio can remove rust. Soak the pan for 30 minutes, then scrub.
For stubborn seasoning, use a dedicated cast iron cleaner.
Step 2, Scrub and wash. Once the seasoning is off, scrub the pan with hot water and a stainless steel scrubber. You want a clean, grey surface. Rinse well.
Dry it immediately on the stovetop.
Step 3, Apply a thin oil coat. Use a high-smoke-point oil. Avocado oil is best for oven reseasoning because of its high smoke point. Apply a thin layer all over the pan, including the handle and bottom.
Then wipe it off thoroughly. The pan should look tacky, not wet.
Step 4, Bake the pan. Place the pan upside down in a cold oven. Set the oven to 500°F. Once it reaches temperature, bake for 45 minutes to 1 hour.
Turn off the oven and let the pan cool inside. Do not open the door.
Step 5, Repeat for three coats. One coat is enough to protect the pan, but three coats give you a durable, non-stick surface. Repeat the oiling and baking process two more times.
Your pan will look dark brown or black when done. It will be smooth to the touch and ready for cooking.
Important safety notes:
- The pan will be extremely hot. Use oven mitts.
- Open windows for ventilation. The oil smoke can be strong.
- Do not rush the cooling step. Opening the oven door can cause uneven cooling and weaker seasoning.

Related posts
Fix Steam Burns from Heavy Cast Iron Combo Cooker Lids
If you've ever lifted the lid on a double dutch oven combo cooker and watched steam roll toward…
Storing Hot Cast Iron in a Humid Oven: Is It Safe?
Can you put leaving hot cast iron in humid unventilated oven in a double dutch oven combo cooker…
Perfect Sourdough: Dutch Oven Temp & Time
If you're staring at a proofed, highhydration boule and wondering when to slide it into a screaminghot combo…