Sun-Ripened Tomato Slices: Temp & Time for 9-Tray Dehydrator
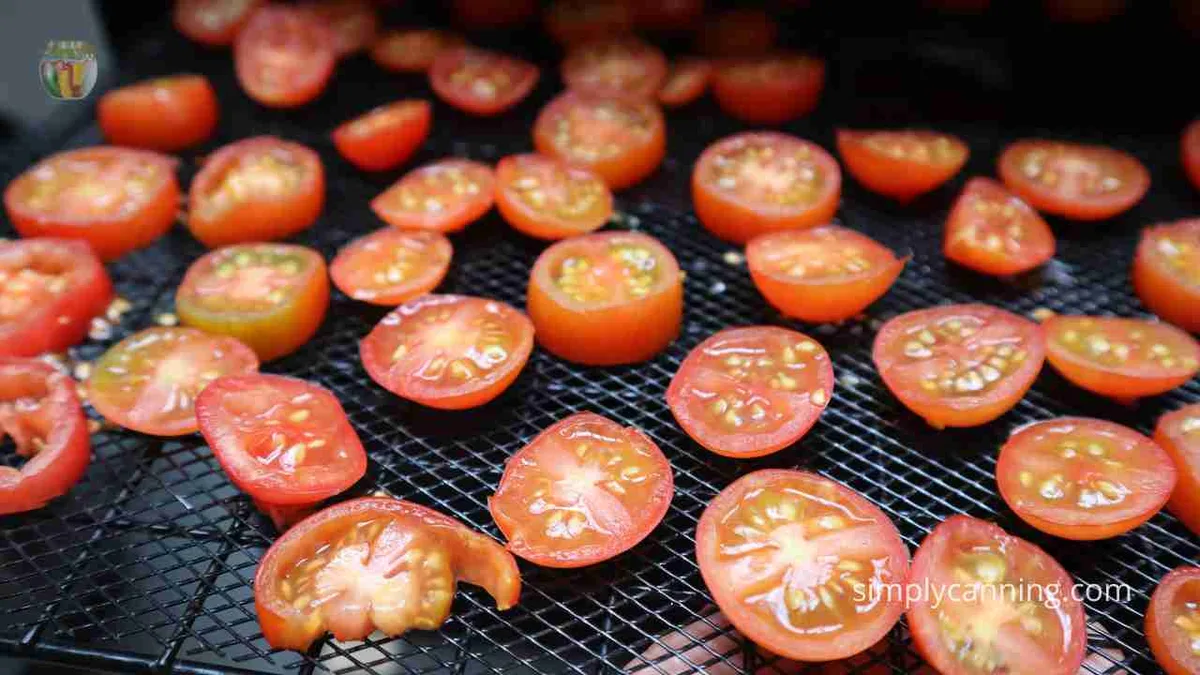
The question always feels bigger than it actually is. You've got a 9‑tray commercial dehydrator ready to go, a pile of sun‑ripened garden tomatoes, and you just need the right number: what temperature and cooking time for dried sun‑ripened garden tomato slices in commercial 9 tray food dehydrator? The short answer is 135, 145 °F for 8, 12 hours for ¼‑inch slices, but that range is useless unless you know which end to aim for.
Your specific batch of tomatoes, how ripe they are, how thick you slice them, and the humidity in your kitchen, shifts the sweet spot by several hours.
As of 2026, manufacturer specifications from commercial dehydrator brands like Excalibur and Nesco confirm that 140 °F is the most versatile target for garden tomatoes. But the real secret is learning the three variables that control drying speed, not just memorising a number. Let's walk through those variables first, then I'll give you a decision tree that tells you exactly which temperature and time to use for your exact situation.
Quick Answer
Set your dehydrator to 140 °F. Slice tomatoes ¼‑inch thick. Dry for 8 to 12 hours.
Check for leathery consistency. No moisture should come out when you squeeze a cooled slice. Adjust for thickness and humidity: thinner slices dry faster, high humidity adds time.
Use the bend test: the slice should bend without cracking. This baseline works for most home gardeners with a 9‑tray unit.
The Variables That Change Everything – Slice Thickness, Ripeness, and Humidity
You cannot pick a single temperature and time off the internet and expect perfect results every time. Three variables control your drying curve: thickness, ripeness, and ambient humidity. Change any one of them and your drying window shifts by two to four hours.
Understanding these three lets you dial in the right settings without guesswork.
Thickness: How Thin? How Thick?
A ⅛‑inch slice dries in about 4, 7 hours. A ¼‑inch slice needs 8, 12 hours. A ⅜‑inch slice can take 14, 18 hours.
The thicker the slice, the longer the interior moisture has to travel to the surface. Thinner slices dry faster but are more fragile once crisp. Most home preservers prefer ¼‑inch because it produces a chewy, leathery texture that rehydrates well in soups and sauces.
Use a mandoline slicer set to ¼‑inch for consistent thickness across all trays. Inconsistent slices mean some are done while others are still wet. That's the number one cause of failed batches.
Ripeness Stage: Firm vs. Fully Soft
A firm, just‑ripe tomato has less free moisture and a denser cell structure. It dries faster and holds its shape better. A fully soft, over‑ripe tomato is more watery, sometimes up to 95% water by weight.
That extra moisture adds one to three hours to the drying time. Over‑ripe tomatoes also tend to stick to the trays and may need a light dusting of salt or a non‑stick mesh liner. If you're mixing firm and soft tomatoes from the same harvest, group them by ripeness on different trays so you can check and remove the firmer slices earlier.
Your Environment: Dry Desert vs. Humid Coastal Air
Ambient relative humidity directly affects how fast moisture evaporates from the tomato surface. In a dry climate (under 40% RH), your dehydrator will finish at the low end of the time range. In humid coastal air (60% RH or higher) during summer, the dehydrator struggles to pull moisture out.
The machine is still blowing warm air, but the air itself is already full of moisture, so evaporation slows down. In humid conditions, add two to four hours to your expected time. You can also run the dehydrator overnight when humidity drops, or park it in an air‑conditioned room if possible.
The Decision Tree: Choose Your Path Based on Your Situation
Now that you know the three variables, here's a simple decision tree. Pick the row that matches your tomato thickness and your local conditions. Use the starting temperature and time given, then adjust based on the doneness tests later.
| Your Situation | Starting Temp | Starting Time | Adjustments |
|---|---|---|---|
| Path A: ⅛″ slices, firm ripe, low humidity (<50% RH) | 135 °F | 5 hours | Check at 4h. May finish at 6h. |
| Path B: ¼″ slices, very ripe or mixed, moderate humidity (50–70% RH) | 140 °F | 10 hours | Check at 8h. May need 12h. |
| Path C: ⅜″ slices, soft tomatoes, high humidity (>70% RH) | 145 °F | 14 hours | Check at 12h. May need 16–18h. |
Path A: Thin Slices (⅛″), Ripe but Firm, Low Humidity
Start at 135 °F. After four hours, check a test piece. Thin slices in dry air can over‑dry quickly, turning crisp and brittle.
You want them leathery, not crunchy. If they're already dry to the point of cracking when bent, pull them early. This path is best for making tomato powder, just grind the crispy slices.
Path B: Medium Slices (¼″), Very Ripe, Moderate Humidity
This is the most common scenario for home gardeners. Set the thermostat to 140 °F. Rotate trays after six hours (move bottom trays to top, top to bottom).
At eight hours, start checking a slice from the middle of the stack. If it feels springy and shows no moisture beads when squeezed, it's done. If still slightly tacky, give it another two hours.
Path C: Thick Slices (⅜″), Soft Tomatoes, High Humidity
Thick slices from over‑ripe tomatoes in a humid kitchen are the hardest challenge. Crank the temperature to 145 °F, the higher heat helps overcome the humidity. Expect 14, 18 hours.
Do not skip tray rotation every four hours, because the outer slices will dry faster than the middle ones. The finished slices will be chewier and more leathery than thin ones. They rehydrate beautifully in stews.
Step‑by‑Step Process: From Garden to Dehydrator to Storage
Once you've picked your path, follow these steps. Each one matters, skipping a step is how you end up with moldy tomatoes three weeks later.
Prepping the Tomatoes (Washing, Culling, Slicing)
Rinse your garden tomatoes under cool water. Discard any with soft spots, cracks, or visible mold. A single bad tomato can ruin a batch by introducing mold spores.
Cut out the stem core with a paring knife. Slice cross‑wise (through the equator) at your chosen thickness. If you're using a mandoline, wear a cut‑resistant glove, tomato juice makes the grip slippery.
For a 9‑tray dehydrator, you'll need roughly 15, 20 pounds of fresh tomatoes to fill all trays with a single layer of ¼‑inch slices.
Pre‑treatment for Color and Safety
Sun‑ripened garden tomatoes are naturally acidic enough to prevent most spoilage, but pre‑treatment helps preserve colour and speeds drying. Dip the slices for 30 seconds in a solution of 1 tablespoon lemon juice or citric acid per quart of water. Drain briefly on a clean towel.
This step is optional but recommended if you want bright red dried tomatoes rather than dull brown ones. Skip the oil, oil before drying traps moisture and encourages mold. You can oil them after drying, just before storage.
Loading the 9‑Tray Unit – Spacing and Airflow
Place slices in a single layer on each tray. Do not overlap, overlapping creates steam pockets that prevent drying. Leave a small gap between slices for air circulation.
Most 9‑tray units have a horizontal or vertical airflow design. For horizontal flow (Excalibur style), you don't need to rotate trays as often. For vertical flow (Nesco style with a central fan), rotate trays every four hours because the bottom trays dry faster.
Check your owner's manual, if it recommends rotation, do it.
Setting the Temperature and Starting the Run
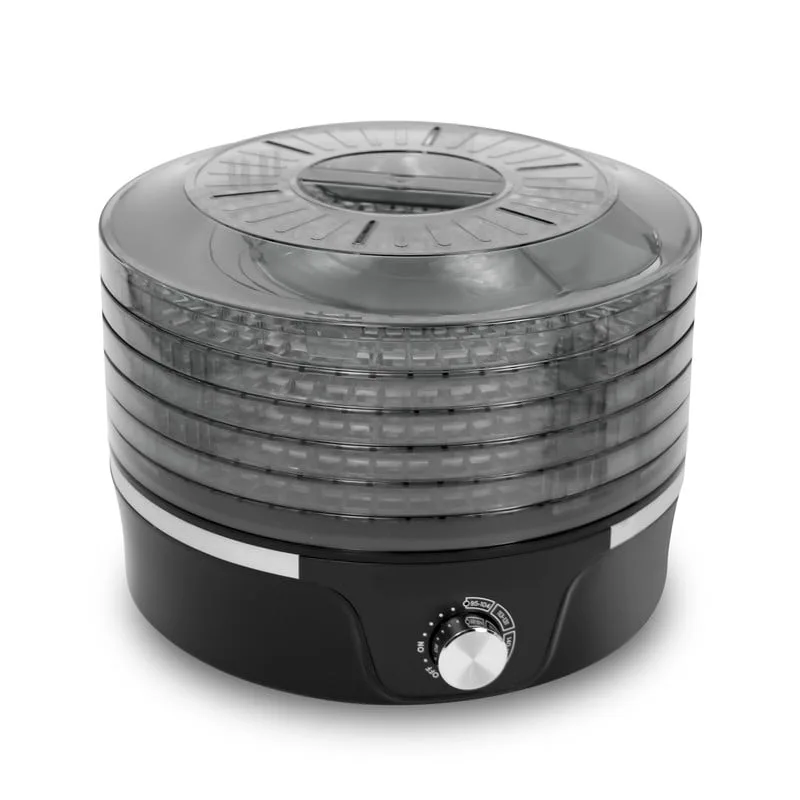
Set your thermostat based on the decision tree above. If your dehydrator doesn't have a precise digital thermostat, use a separate oven thermometer on a middle tray to verify the actual temperature. Many analog units run 10, 15 °F hotter or cooler than the dial says.
Pre‑heat the unit for 10 minutes before loading trays. Then place the loaded trays, close the door, and set a timer for the initial check time.
Checking Doneness – The Feel Test and the Bend Test
Doneness is not a time; it's a texture. After the initial check time, pull one slice from the centre of a tray. Let it cool for two minutes (warm tomatoes feel softer than they really are).
Press it between your fingers. If no moisture beads up on the surface, it's on track. Bend the slice gently.
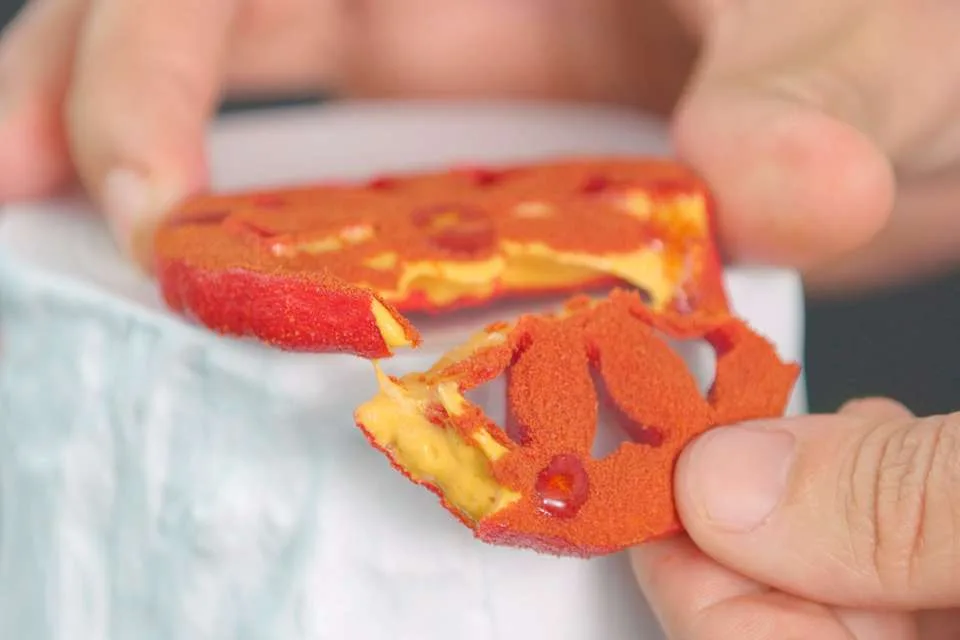
A properly dried tomato should bend without cracking, leathery, not brittle. If it cracks, it's over‑dried (still usable for powder). If it feels damp or sticky, keep going.
Repeat this test every hour after the initial check. Write down the time when each tray's slices pass the bend test. The top trays often finish faster than the bottom in vertical‑flow units.
Conditioning and Final Storage
Conditioning is the step most people skip, and then wonder why their tomatoes get moldy after two months. Place the dried slices in a glass jar, fill it only halfway, and seal the lid. Shake the jar once a day for seven days.
If condensation appears on the inside of the jar, the slices are still too wet. Return them to the dehydrator for another hour or two, then repeat the conditioning test. Once no condensation forms, transfer to final storage: vacuum‑sealed bags or airtight jars with oxygen absorbers.
Store in a dark cupboard below 70 °F. Properly dried and stored, your tomatoes will last 12 months.
Common Mistakes That Ruin Dried Tomatoes (And How to Avoid Them)
Even experienced dehydrator users make these errors. Here's what to watch out for.
Slicing too thick or too irregular. A mandoline is your best friend. Hand‑slicing creates thin edges that burn and thick centres that stay wet. Invest in a mandoline set to your chosen thickness.
Overlapping on trays. This is the fastest way to trap moisture and grow mold. Take the time to lay each slice in a single layer. It's tedious but it's the difference between a successful batch and a wasted one.
Not rotating trays in vertical‑flow units. The bottom trays get the hottest air first. If you don't rotate, the bottom slices will be crispy while the top ones are still raw. Set a timer on your phone for every four hours.
Relying solely on time instead of texture. A tomato that looks dry at six hours may still have internal moisture. Always do the bend test and the squeeze test. If you're unsure, condition the batch for a week before sealing.
Storing without conditioning. This is the number one cause of spoilage after a few months. Conditioning equalises moisture between slices, one slightly wet slice can turn an entire jar moldy. Never skip the seven‑day conditioning period.
Adding oil before drying. Oil coats the surface and prevents water from evaporating. It also turns rancid during long storage. If you want oil‑packed dried tomatoes (like the ones from the store), do that after drying, not before.
Heat the dried slices in oil at 200 °F for 10 minutes, then seal them in oil in the fridge for short‑term use.
Pro Tips for Consistent Results Batch After Batch
After a few runs, you'll notice patterns. Here's how to turn good batches into great ones without the guesswork.
Use a hygrometer. A $10 digital hygrometer placed on a spare tray tells you the ambient humidity inside the dehydrator. If the reading stays above 60% RH even after four hours, your machine is fighting high humidity. Crack the door open an inch for better airflow.
Some 9‑tray units have a vent that can be propped.
Preheat the unit for 10 minutes before loading. Cold trays and cold tomatoes take longer to reach drying temperature. Preheating shaves about 30 minutes off your total time and helps prevent case hardening, where the outer surface dries too fast and traps moisture inside.
Label your trays. Use a dry‑erase marker on the edge of each tray to note the time you loaded it. When you rotate or remove trays, you'll know exactly which ones have been drying longest. This is especially helpful when you're doing multiple batches in one day.
Weigh a test slice. Before loading, weigh a single slice on a kitchen scale. After six hours, weigh it again. When the slice loses about 70% of its original weight, it's in the leathery zone.
Aggregated user reports indicate this method is more reliable than the bend test for beginners.
Store dried tomatoes with a silica gel pack. A food‑grade silica desiccant pack inside your storage jar absorbs any residual moisture that might escape during storage. Replace the pack every three months for year‑round freshness.
Don't crowd your pantry. Keep different batches separate. Date each jar and note the drying temperature and time used. That way, if one batch fails, you know exactly what not to repeat.
Consider a dehydrator timer. Many 9‑tray commercial units don't have a built‑in timer. A simple outlet timer (the kind used for holiday lights) costs under $10 and lets you set the dehydrator to turn on early in the morning and shut off in the evening without babysitting.
Frequently Asked Questions
Can I dry tomatoes without any pretreatment?
Yes. Sun‑ripened garden tomatoes are acidic enough to dry safely without pre‑treatment. The downside is color: untreated slices turn a dull brownish‑red instead of bright red.
If appearance matters, dip them in a lemon juice solution for 30 seconds.
Why are my dried tomatoes turning black?
Black or dark brown spots usually mean the temperature was too high (above 150°F) or the slices were overlapped, causing steam burns. It can also happen if the tomatoes were not fully ripe. Stick to 140, 145°F and avoid overlapping.
Should I remove the seeds before drying?
You can, but it's not necessary. Seeds stay dry and don't affect texture. If you want a smoother rehydrated tomato for sauces, remove the seeds before slicing.
For snacking or soups, leave them in.
How do I rehydrate dried tomatoes?
Place slices in a bowl and cover with warm water or broth. Let them soak for 20, 30 minutes. For a chewier texture, use cold water and soak for an hour.
Drain and use immediately. Rehydrated tomatoes work well in the same recipes as fresh.
Can I dry different tomato varieties together?
Yes, but group them by ripeness and thickness. Roma and paste tomatoes dry fastest because they have less water. Beefsteak tomatoes take longer and may need a higher temperature.
Mixing them can lead to some slices over‑drying while others are still wet.
Final Recommendation – Your Personal Decision Guide
Start with the baseline: 140°F, ¼‑inch slices, 10 hours. Write down the ambient humidity and note the tomatoes' ripeness. That first batch is your calibration run.
Adjust up or down for the next batch based on the results.
If you live in a humid climate, drop the temperature to 135°F and extend the time to 12, 14 hours. If your kitchen is dry, you can safely run at 145°F and finish in 8, 9 hours.
The decision tree has three paths: thin slices for powder, medium slices for cooking, and thick slices for chewy snacks. Choose your path before you start slicing. Once you've got a successful batch, replicate the conditions next season.
Remember the two most important rules: never skip the conditioning step, and always trust the bend test over the clock. Your dehydrator is a tool. Your senses are the real guide.
Keep a log, and within three batches you'll have a repeatable process that works for your exact tomatoes, your exact machine, and your exact climate.

Related posts
Fix Stackable Dehydrator: Top Trays Wet, Bottom Crispy
If you've ever loaded up a compact stackable food dehydrator only to find the top trays still damp…
Is Presto 06300 Dehydro Compact Stackable Worth It? Reddit
If you've been searching for honest takes on a budget dehydrator, you've probably seen the same question pop…
Can You Leave Moist Food in a Dehydrator After It Turns Off?
So you’re standing there with a tray of just‑dried mango slices or a batch of jerky, and the…