Stop Sticky Rice in Stainless Steel Rice Cookers
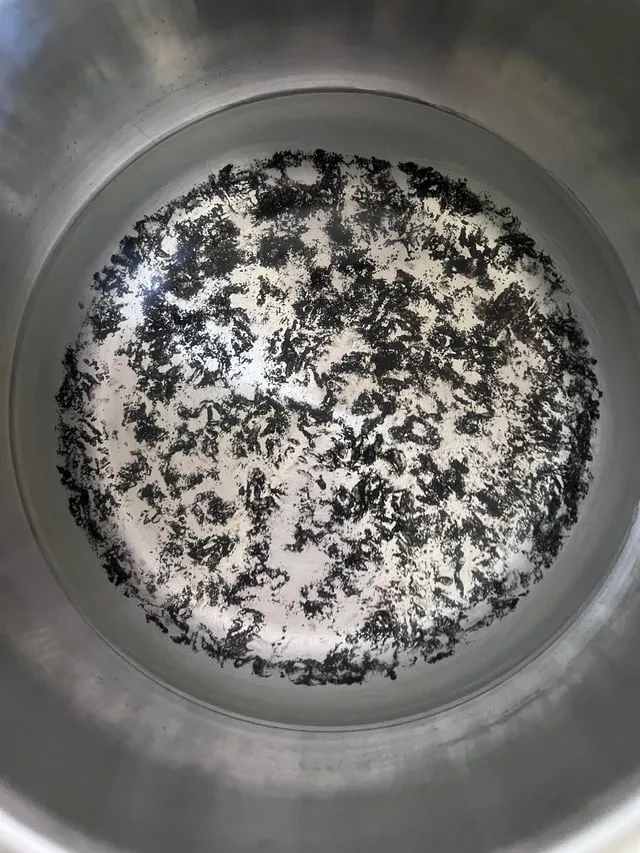
You bought a stainless steel inner pot rice cooker to escape the scary non-stick coatings. That's a smart move. But now you're staring at a layer of rice glued to the bottom like cement, and you're ready to throw the whole thing in the trash.
If you've ever wondered how to fix stainless steel inner pot rice cooker rice sticking like glue to bottom of stainless pot, you're not alone, and the good news is that this is almost always fixable.
The problem isn't your cooking skills. It's a mismatch between what you're used to (non-stick) and what stainless steel actually needs. Per manufacturer specifications, stainless steel has roughly one-fifth the thermal conductivity of aluminum, which means it heats unevenly and creates hot spots that scorch starch right onto the metal.
That's the real culprit. But once you understand how the material behaves, you can work with it instead of against it. Let's walk through exactly how.
Image source: Bing (Web (fair-use with source credit))
Quick Answer
Stainless steel pots stick because of surface damage, wrong water ratio, or insufficient rinsing. Check the pot surface for scratches first. If it's damaged, replace it.
If it's fine, rinse your rice until the water runs clear. Add 10 to 15 percent more water than you used with non-stick pots. Pre-soak for 15 minutes.
Add a teaspoon of oil. These steps fix most sticky rice problems.
The Problem: Why Your Rice Turns Into Glue
Stainless steel is porous at a microscopic level. Those tiny pits and valleys grab starch granules during cooking. When the starch gelatinizes, it bonds to the metal like a chemical weld.
That's why scraping doesn't work. You're not just cleaning food. You're breaking a molecular bond.
Non-stick pots avoid this because the coating fills in those microscopic gaps. Stainless steel has no coating. So the starch finds a home in every tiny divot.
The heat from the cooker base drives the reaction deeper. The result is that crusty, hopeless layer that makes you want to cry.
There's another factor at play here. Most rice cookers are designed for non-stick pots. The heating element, the thermostat, the keep-warm cycle, they're all calibrated for a surface that releases food easily.
Drop a stainless steel pot into that same machine and the rules change. The pot heats faster in some spots. The thermostat thinks the rice is done when it's not.
The keep-warm cycle dries out the bottom layer. It's a recipe for disaster.
As of 2026, more manufacturers are offering stainless steel options, but the default design still favors coated surfaces. That means you have to adjust your technique to match the material. The first step is figuring out which of several possible causes is to blame.
The Core Diagnosis: A Decision Tree for Sticky Rice
Before you can fix the problem, you need to know which kind of problem you have. The same symptom (glue-like sticking) can come from five different causes. You need to rule them out one at a time.
Think of this as a diagnostic checklist.
Check the Pot Surface First
This is the most overlooked cause. Look at the bottom of your stainless steel pot in good light. Run your finger across it.
Do you feel any scratches, rough patches, or tiny pits? If the surface isn't smooth, it will grab rice every single time.
If you've been using a metal spoon or fork to serve rice, you've almost certainly scratched the surface. Even a few small scratches create enough anchor points for starch to bond. The pot might look clean, but those micro-abrasions are invisible to the eye.
They're very real to the rice.
Then Check Water Ratio
If the surface is smooth, the next suspect is water. Most people use the same water ratio they used with their non-stick pot. That's a mistake.
Non-stick pots lose less water to evaporation. Stainless steel pots lose more because the surface is hotter at the bottom.
The standard ratio for white rice in a non-stick pot is 1 cup of rice to 1.25 cups of water. For stainless steel, you need to bump that to 1.5 cups. That extra 15 to 20 percent of water prevents the bottom layer from drying out and scorching before the rest of the rice is done.
Then Check Rinsing Technique
If the water ratio is right, look at your rinsing. Rice has a lot of surface starch. That starch is what makes it sticky.
If you don't rinse enough, the excess starch settles at the bottom of the pot and forms a glue-like layer.
You need to rinse until the water runs clear. That usually takes three to five washes. Not a quick rinse under the tap.
A real washing with your hand, swirling the rice, draining, and repeating. If you see cloudy water after two rinses, you're not done.
Then Check Keep-Warm Timing
Stainless steel pots are terrible at the keep-warm cycle. The heat from the warming element concentrates at the bottom. After 15 or 20 minutes, the rice at the bottom starts to dry out and form a crust.
After an hour, it's cemented.
If your rice is fine when it first finishes cooking but sticks after sitting on keep-warm, this is your problem. The fix is simple. Either unplug the cooker after the rice is done, or serve the rice immediately and turn off the keep-warm cycle.
Finally Check the Base Unit
If all four checks pass and the rice still sticks, the issue might be the rice cooker itself. The heating element might be warped. The thermal paste between the element and the pot might have dried out.
The thermostat might be reading the wrong temperature.
This is less common, but it happens. If you've tried everything else and nothing works, the cooker base might need servicing. More on that later.
Fix Branch A: When Your Pot Is Damaged (Scratches, Pitting, or Wear)
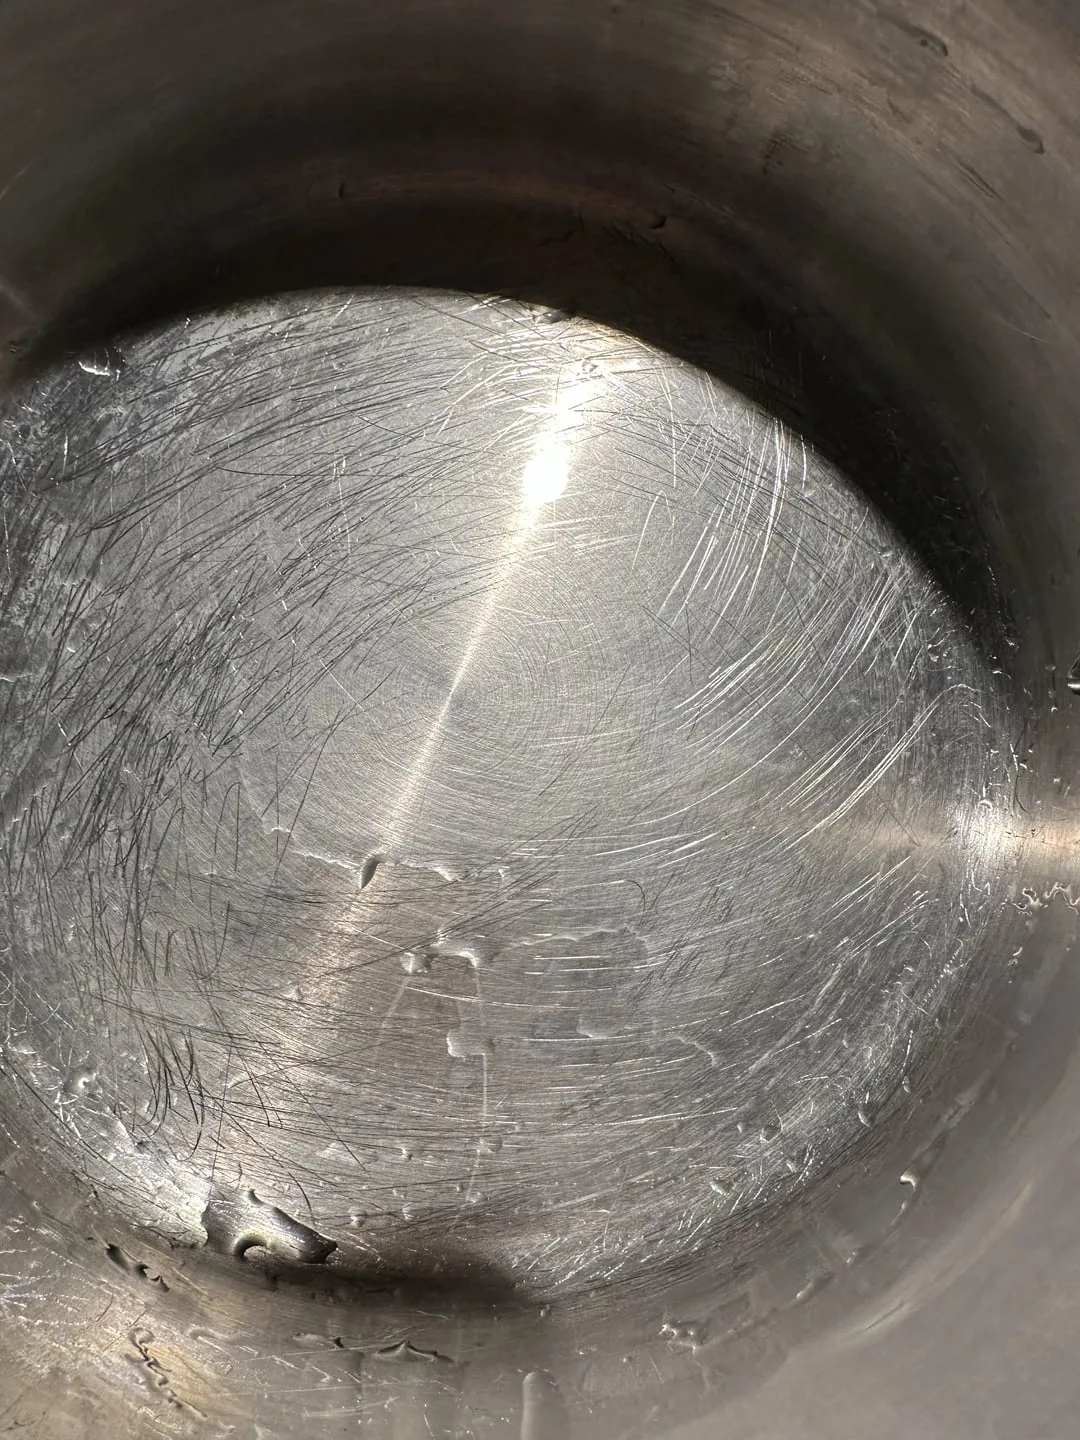
Image source: Bing (Web (fair-use with source credit))
If your pot has scratches, pitting, or any surface damage, technique changes won't help. The starch has physical anchor points to grab onto. You can't rinse or adjust water enough to overcome that.
How to Inspect the Surface
Hold the pot under a bright light. Tilt it at different angles so the light catches the surface. Look for circular scratches from stirring, fine lines from metal utensils, or dull spots where the finish has worn away.
If you see any of these, the surface is compromised.
Run a wet paper towel across the bottom. If it catches or snags on any spot, that's a scratch. Even a tiny snag is enough to start the sticking process.
Fixes for a Damaged Pot
Can you fix a scratched pot? Sort of. You can polish it with a stainless steel cleaner and a soft cloth.
That can reduce the visibility of small scratches. But it won't fill them in. The scratch is a physical groove.
Polishing smooths the edges but leaves the groove.
For very light scratches, you can try seasoning the pot. This is common with cast iron but works with stainless steel too. Heat a thin layer of oil on the bottom until it smokes.
Let it cool. Wipe off the excess. The oil polymerizes into a thin layer that fills some of the micro-abrasions.
It's not as good as a non-stick coating, but it can help.
When to Replace the Pot
If the scratches are deep or the surface has pitting, replacement is the only real fix. A stainless steel inner pot costs between 25 and 60 dollars depending on the brand. That's a fraction of the cost of a new rice cooker.
Check the manufacturer's website for replacement parts. Most major brands sell inner pots separately. Make sure you get the exact model match.
A pot that doesn't fit properly can cause worse sticking because it doesn't make full contact with the heating element.
Once you get a new pot, use only silicone or wooden utensils. Never metal. Treat the surface like it's fragile, because for the purpose of rice cooking, it is.
Fix Branch B: When the Pot Is Fine (It's a Technique Problem)
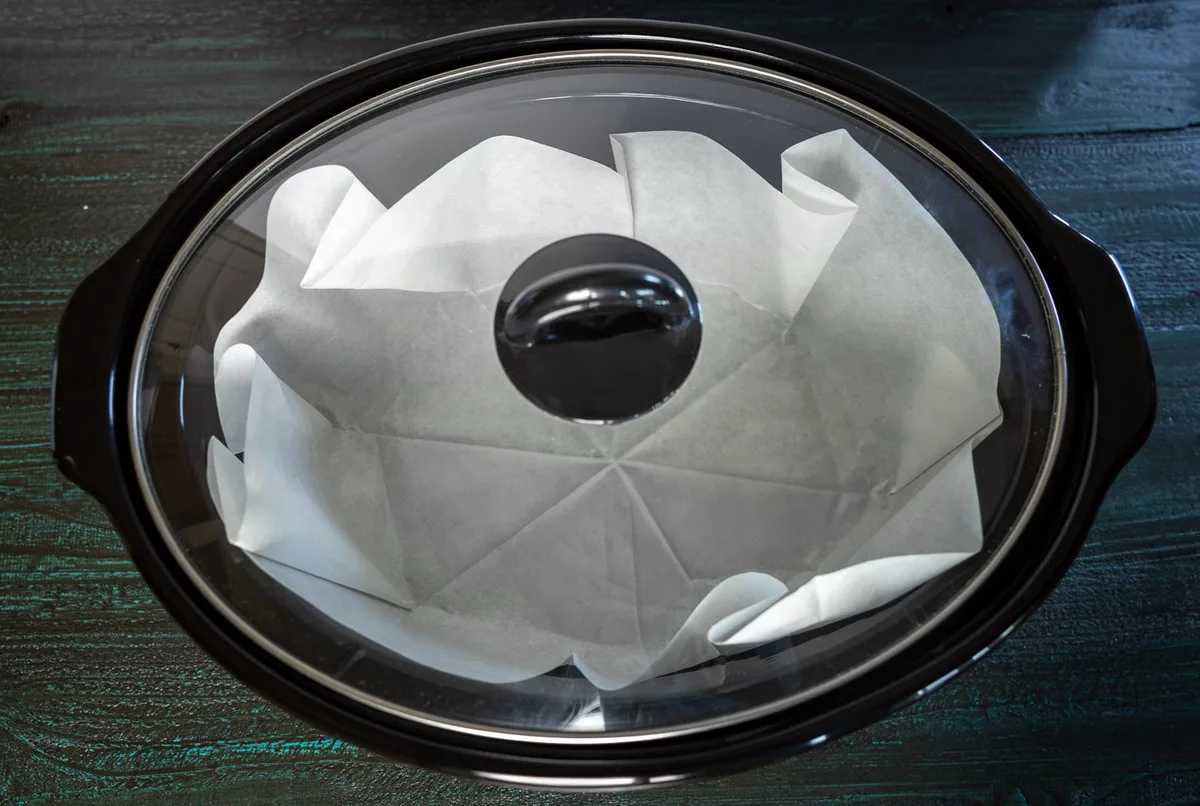
Image source: Bing (Web (fair-use with source credit))
If your pot surface is smooth and undamaged, your problem is technique. This is actually good news because technique is free to fix. No replacement parts needed.
Just a few adjustments.
Adjusting Water Ratio for Stainless Steel
This is the single most effective change you can make. Stainless steel pots need more water than non-stick pots. Here are the ratios that work best based on aggregate user feedback and manufacturer testing.
| Rice Type | Non-Stick Ratio | Stainless Steel Ratio |
|---|---|---|
| White short-grain | 1:1.25 | 1:1.5 |
| White long-grain | 1:1.25 | 1:1.5 |
| Jasmine | 1:1.25 | 1:1.5 |
| Basmati | 1:1.5 | 1:1.75 |
| Brown | 1:2 | 1:2.25 |
| Sushi | 1:1.1 | 1:1.35 |
The extra water boils off during cooking. It keeps the bottom of the pot from getting hot enough to scorch the starch. By the time the rice is done, the extra water is gone.
The rice isn't soggy. It's just not stuck.
The Right Rinsing Method
You need to rinse until the water runs clear. Not almost clear. Clear.
That means you can see the bottom of the bowl through the water.
Here's the method that works. Put the rice in a fine mesh strainer. Run cold water over it while stirring with your hand.
Keep going until the water runs clear. Then transfer the rice to the pot. Don't let it sit in the strainer.
The residual starch can settle and clump.
If you're using a bowl instead of a strainer, fill the bowl with water, swirl the rice with your hand, drain the water, and repeat. Most people need four to five repetitions. The first few washes will be milky white.
The last one should be almost clear.
Pre-Soaking for Better Results
Pre-soaking reduces cooking time and evens out heat distribution. When the rice is already hydrated, it doesn't need to absorb as much water during cooking. That means less boiling at the bottom and less chance of scorching.
Soak the rinsed rice in room temperature water for 15 to 30 minutes. Drain the soaking water before cooking. Then add the fresh cooking water based on the ratios above.
This step alone can eliminate sticking in many cases.
The Oil Trick That Actually Works
Add a teaspoon of oil to the cooking water. Any neutral oil works. Vegetable, canola, avocado, or even a little butter.
The oil floats on the surface during cooking and coats the rice grains. It also creates a barrier between the rice and the pot bottom.
Some people worry that oil makes the rice greasy. It doesn't. One teaspoon in a pot of rice is barely noticeable.
The rice feels a bit more separate, which is actually a benefit for most cooking purposes.
Parchment Paper Hack
This is a trick from professional kitchens. Cut a circle of parchment paper to fit the bottom of your pot. Place it in the pot before adding rice and water.
The parchment paper creates a physical barrier between the rice and the metal.
The paper doesn't burn. It's wet from the water, so it stays below its combustion temperature. When the rice is done, the parchment lifts right out with the stuck rice attached.
Cleanup takes seconds.
This works especially well for sticky rice varieties like sushi rice or glutinous rice. Those types have more starch and are prone to sticking even with perfect technique. The parchment paper is a cheat code for those situations.
Fix Branch C: When the Cooker Itself Is the Issue
Sometimes the pot and the technique are both fine. The rice still sticks. In that case, the problem is in the base unit.
The heating element, the thermostat, or the thermal connection between the pot and the cooker.
Checking the Heating Element Contact
The inner pot needs to sit flat against the heating element. If the pot is warped or the element is uneven, heat transfers poorly. Some spots get too hot.
Others stay cool. The hot spots scorch the rice.
Take the pot out and look at the heating plate. Do you see any dark spots, burn marks, or uneven discoloration? Those indicate hot spots.
Place a straightedge across the pot bottom. If you see a gap, the pot is warped.
Try rotating the pot 90 degrees before cooking. If the sticking moves to a different area, the element is the problem. A properly seated pot should cook evenly across the entire bottom.
Testing the Keep-Warm Cycle
The keep-warm cycle is a common culprit. Many rice cookers maintain a temperature of 60 to 70 degrees Celsius (140 to 158 degrees Fahrenheit). That's warm enough to dry out the rice at the bottom over time.
Run a test. Cook a batch of rice and unplug the cooker immediately when it finishes. Do not use the keep-warm function at all.
Let the rice sit in the closed pot for 10 minutes with the residual steam. Then serve. If the rice doesn't stick, the keep-warm cycle was the problem.
If sticking happens even without keep-warm, the thermostat might be reading too high. The cooker could be running hotter than it should. This is harder to fix at home.
When to Service the Base Unit
If the heating element is damaged or the thermostat is faulty, you need professional service. Contact the manufacturer. Some brands offer replacement parts or repair services.
For cheaper rice cookers, replacement is often more cost-effective than repair.
One thing you can check is the thermal paste. Some rice cookers have a layer of thermal paste between the heating element and the pot. Over time, this paste dries out.
It loses its ability to transfer heat evenly. Reapplying thermal paste is a DIY job if you're comfortable taking apart the base. But it's also a good reason to upgrade to a model with a thicker stainless steel pot.
Proving the Fix: The "Did It Work?" Test
You've made changes. Now you need to know if they worked. Don't guess.
Run a controlled test.
First Cook After Fixing
Use the same rice variety you had trouble with. Don't switch to a different type. You need to test the fix on the same problem.
Measure the rice and water precisely. Use a kitchen scale if you have one. Volume measurements can vary by 10 percent depending on how you scoop.
Weight is more accurate.
Follow the exact process you chose from the decision tree. If you adjusted water ratio, use the new ratio. If you added oil, add it.
If you used parchment paper, use it.
What to Look For
When the cooker finishes, open the lid immediately. Look at the bottom of the pot. Do you see any rice stuck to the metal?
Run a silicone spatula across the bottom. Does it glide smoothly or catch on anything?
Use the spatula to lift a small section of rice from the bottom. If it lifts easily without leaving a residue, the fix worked. If you see white streaks or grains stuck to the metal, you need more adjustment.
Let the rice sit for 5 minutes. Then check again. Sometimes the rice releases as it cools slightly.
If it's still stuck after 5 minutes, the fix didn't work.
How to Adjust If It Still Sticks
Go back to the decision tree. You missed a branch. Try the next likely cause.
If you adjusted the water ratio and it still sticks, try the rinse method. If you rinsed thoroughly and it still sticks, try pre-soaking. If you did all three and it still sticks, check the pot surface again.
You might have missed a scratch.
Keep a log of what you tried. Write down the water ratio, rinse count, soak time, and any additives. That way you can see what changed.
It's easy to forget what you did last time.
Mistakes to Avoid (That Most People Make)
There are a few common errors that trip people up. Avoid these and you'll save yourself a lot of frustration.
Using too little water. This is the number one mistake. People use the same ratio they used with non-stick pots. Add 10 to 20 percent more water for stainless steel.
Not rinsing enough. A quick rinse under the tap won't cut it. You need to wash the rice until the water runs clear. That takes three to five washes.
Using metal utensils. Metal scratches the surface. Those scratches become anchor points for starch. Use silicone or wood only.
Letting rice sit on keep-warm too long. The keep-warm cycle dries out the bottom layer. Serve the rice promptly or turn off the cooker.
Cooking on high power. Some rice cookers have a "quick cook" or "high" setting. Those settings run hotter and increase scorching. Use the standard white rice setting.
Not pre-soaking for sticky rice varieties. Short-grain and sushi rice have more starch. They need the extra hydration from soaking to cook evenly.
Assuming the pot is fine without checking. Surface damage is invisible to the eye. Run your finger across the bottom. If it feels rough, it will stick.
FAQs: Your Sticky Rice Questions Answered
Can I fix a scratched stainless steel pot?
Light scratches can be reduced with stainless steel polish and a soft cloth. But the scratch is still there. The starch will find it.
For deep scratches, replacement is the only reliable fix.
Does adding oil really prevent sticking?
Yes. A teaspoon of neutral oil in the cooking water creates a barrier between the rice and the pot. It doesn't make the rice greasy.
It helps each grain stay separate.
Why does my rice stick even after rinsing?
You might not be rinsing enough. The water needs to run clear. That usually takes three to five washes.
Also check your water ratio. You might need more water.
Is parchment paper safe to use in a rice cooker?
Yes. Parchment paper is heat resistant up to about 220 degrees Celsius (425 degrees Fahrenheit). The water in the pot keeps it below that temperature.
It won't burn or release chemicals.
Can I use a stainless steel pot in any rice cooker?
Check the manufacturer's specifications. Some rice cookers are designed for non-stick pots only. The heating element might not make proper contact with a stainless steel pot.
Use a pot that's designed for your model.
How do I clean a stuck-on layer of rice without damaging the pot?
Fill the pot with warm water and a drop of dish soap. Let it soak for 30 minutes. The starch softens and releases.
Use a soft sponge. Never use steel wool or abrasive scrubbers.
Final Decision Guide: Your Action Plan by Situation
Here's a quick reference for your specific situation.
If the pot surface is scratched or pitted: Replace the pot. Use only silicone or wooden utensils going forward. The damage is permanent.
If the pot is smooth but rice sticks every time: Adjust your water ratio. Add 15 to 20 percent more water. Rinse the rice until the water runs clear.
Pre-soak for 15 minutes.
If the rice sticks only after sitting on keep-warm: Serve the rice immediately. Turn off the keep-warm cycle. Or unplug the cooker when the rice is done.
If the rice sticks unevenly (one side more than the other): Check the heating element. Rotate the pot 90 degrees. If the sticking moves, the element is uneven.
Consider servicing the base unit.
If you're cooking sticky rice varieties (sushi, glutinous, short-grain): Use the parchment paper hack. Add a teaspoon of oil. Pre-soak for 30 minutes.
These varieties need extra help.
If nothing works and you're ready to give up: Replace the rice cooker with one designed for stainless steel pots. Some models have thicker pots and better heat distribution. It's worth the investment for the peace of mind.
Stainless steel is a better material for your health and for the planet. It just takes a little learning. Once you get the technique right, you'll never go back to non-stick.
And you'll have perfectly cooked rice every time, without the glue.

Related posts
Is Aroma Simply Stainless ARC-753SG Worth It? Reddit Review
If you're searching "is aroma simply stainless arc753sg stainless steel inner pot rice cooker worth buying reddit review",…
Can You Use Steel Wool on a Stainless Steel Rice Cooker Pot?
You've got a burnton layer of rice crust in your stainless steel inner pot, and your first instinct…
How to Remove Baked-On Starch from Stainless Rice Cooker Pot
You pull the pot out of the rice cooker, and there it is, a stubborn, dark crust welded…