How to Remove Greasy Yellow Film from White Ceramic Pans
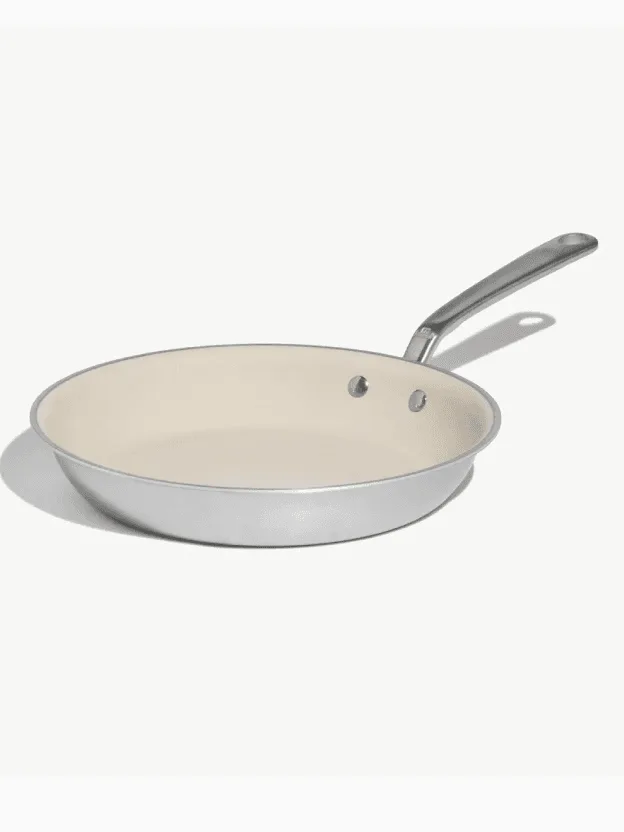
That white ceramic pan isn't dirty. It's coated in a greasy yellow film that regular dish soap won't lift. If you're looking for how to clean budget ceramic frying pan and remove greasy yellow film on white ceramic nonstick surface, you're in the right place.
The fix isn't harsh chemicals or aggressive scrubbing. It's a simple workflow that starts gentle and escalates only when necessary.
Manufacturer specs for most budget ceramic coatings list a maximum temperature around 450°F (230°C). Staying under that limit slows future staining and keeps the nonstick surface working. As of 2026, most budget ceramic pans use a sol-gel coating over aluminum, and that coating is more porous than it looks.
That porosity is exactly why oil clings in the first place. Let's walk through the full process.
Image source: Web (Bing) / bonappetit.com (Web image (fair-use with source credit))
Quick Answer
To clean a budget ceramic frying pan and remove greasy yellow film on white ceramic nonstick surface, use warm soapy water and a soft sponge. If the film stays, make a baking soda paste. Let it sit for ten minutes.
Rinse thoroughly. Never use steel wool or harsh abrasive pads.
The Yellow Film Problem: Why Budget Ceramic Pans Lose Their Clean Look
The yellow film on a white ceramic pan looks like a stubborn stain. In reality, it's a thin layer of polymerized oil. When cooking oil gets hot enough, it bonds with the pan's surface and hardens.
That's why regular washing doesn't touch it.
Budget pans develop this film faster than premium ceramic pans do. The coating is thinner, and the surface texture has tiny imperfections that trap oil. Think of it like a freshly waxed car versus an older car with micro-scratches.
The older car holds grime much faster. A white ceramic pan works the same way.
Several habits make the film worse:
- Pouring oil directly into a hot pan instead of heating the pan with oil in it.
- Using nonstick cooking sprays that leave a baked-on residue.
- Cooking on medium-high or high heat instead of medium.
- Running the pan through the dishwasher.
There's a useful clue in how the film feels. If it's yellow but hard and glossy, it's polymerized oil and needs the baking soda treatment. If it's still sticky or tacky, it's just grease and warm soapy water will handle it.
The workflow below covers both situations.
Here's the decision tree in simple terms. If the film is still greasy, just degrease. If it's hard and baked on, move straight to a baking soda paste.
If the coating is peeling or flaking, stop cleaning and prepare to replace the pan. A damaged coating can't be fixed.
The good news is that the yellow film isn't a permanent stain in most cases. It's sitting on the surface, not embedded deep into the ceramic layer. With the right method and a little patience, you can restore most budget pans to their original white finish.
Exactly Why White Ceramic Nonstick Turns Yellow and Greasy
How Cooking Oil Causes the Film
Polymerization sounds like a chemistry term, but it just means oil molecules join together into a plastic-like film. Every cooking oil does this when it gets hot enough. The higher the heat, the faster it happens.
Olive oil has a smoke point around 375°F to 405°F depending on the variety. Vegetable oil is a bit higher, around 400°F to 450°F. When oil passes its smoke point, it breaks down and leaves a sticky residue on whatever it touches.
On a white ceramic pan, that residue shows up as a yellow film within a few weeks.
The film starts invisible. It's a thin layer that builds meal after meal. After two to four weeks of daily cooking, the built-up layers become visible as a yellowish tint near the center of the pan.
That center spot gets the hottest, so it always shows the film first.
The FDA's food-contact substance program regulates the coating materials used in ceramic cookware sold in the U.S. Those coatings are safe for cooking, but they weren't designed to repel oil forever. Ceramic nonstick is more about easy food release than true stain resistance.
So if you're cooking with oil, some residue is basically unavoidable. You just need the right way to remove it.
Why Budget Coatings Show It Faster Than Premium Ones
Budget ceramic pans use the same basic sol-gel material as premium pans. The difference is thickness and number of layers.
A budget pan might have a single thin ceramic layer over bare aluminum. A premium pan may use two or three layers, which makes the surface denser and less porous. A thin layer wears down faster and leaves more microscopic texture for oil to grip.
That's why the yellow film appears sooner on budget pans.
The pan base also matters. Budget pans often use thinner aluminum, which heats unevenly. Hot spots cause oil to break down faster in those spots.
That's why the film often shows up in a ring around the center of the pan rather than an even coating across the whole surface.
One more thing to keep in mind: not every yellow mark is oil. If you live in an area with hard water, mineral deposits can leave a chalky white or faint yellow film. That needs a different fix.
A quick vinegar rinse on the outside of the pan handles mineral buildup, but vinegar should not be left soaking on the ceramic surface because it can degrade the coating.
Step-by-Step Cleaning Workflow: Match the Method to the Film Thickness
This is the part that actually matters. The right method depends on how bad the film is. Start with the lightest option and move up the ladder only if you need to.
Here's a quick decision table to guide you:
| Film Level | What It Looks Like | Best Method |
|---|---|---|
| Light | Barely visible yellow tint, no stickiness | Warm soapy water and soft sponge |
| Medium | Clear yellow film, slightly rough to the touch | Baking soda paste with gentle scrubbing |
| Stubborn | Brownish yellow layer that won't budge | Repeated paste treatments and a longer soak |
Light Film: Warm Water, Soap, and a Soft Sponge
If you catch the film early, you don't need anything fancy. Let the pan cool completely first. Hot ceramic can crack or warp if it hits cold water, and thermal shock is one of the fastest ways to ruin a budget pan.
Fill the pan with warm tap water and add a few drops of dish soap. Let it sit for 10 to 15 minutes. That soak softens the grease without scrubbing.
Then rinse out the water and use a soft sponge to clean the surface in small circular motions.
Rinse the pan again and dry it with a soft towel. This handles about 70% of light film cases. If the surface still feels slick or looks yellow, move up to the next method.
Medium Film: Baking Soda Paste Technique
This is the goto method for most yellow film problems. Baking soda is mildly abrasive, which means it can lift polymerized oil without scratching the ceramic coating. The trick is using it correctly.
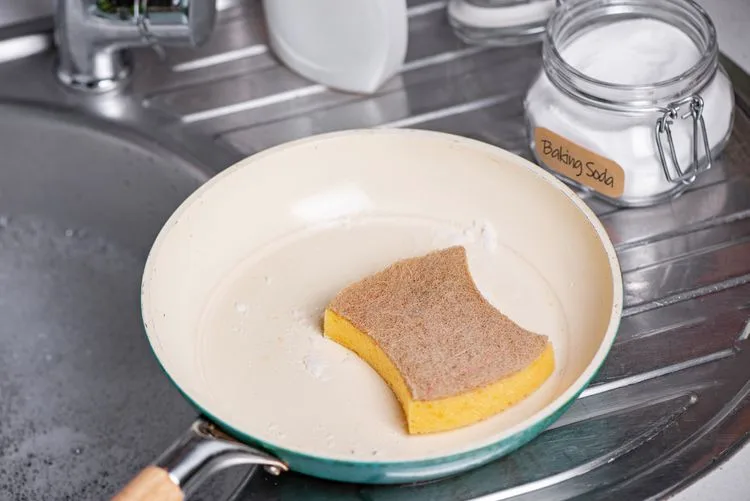
Image source: Bing (Web (fair-use with source credit))
Mix about three parts baking soda with one part water. You want a thick paste, not a thin slurry. Spread it over the yellow areas using your fingers or a soft cloth.
Let the paste sit for 10 minutes so it can work on the oil.
Then scrub gently with a soft sponge. Use light pressure and small circles. Let the paste do the work.
Rinse thoroughly and check the result. Most medium films lift after one application.
If you see improvement but the pan isn't fully white yet, repeat the process. Two light applications beat one aggressive scrubbing session every time.
Stubborn Film: The Soak-and-Paste Loop
Sometimes the film has been building for months, and one paste application won't cut it. In that case, apply a thicker layer of baking soda paste across the stained surface. Cover the pan with plastic wrap to keep the paste moist.
Let it sit for 30 to 45 minutes.
The moisture keeps the baking soda active, which breaks down the polymerized oil more effectively. After the wait, remove the plastic wrap and scrub gently with a soft sponge.
If the film still won't lift after two rounds, the pan may be permanently stained. That happens when the oil has penetrated through micro-cracks in the coating. At that point, no amount of cleaning will restore the original white finish.
One important note: if the pan's coating is peeling, flaking, or covered in deep scratches, don't try to clean it back to new. That pan is done. Continuing to use it risks bits of coating in your food, and replacing a budget pan is cheaper than worrying about it.
Best Cleaning Tools and Cleansers for a White Ceramic Surface
Not every sponge is safe for ceramic nonstick. Some tools remove the film and the coating at the same time. This table breaks down what to use and what to avoid.
| Tool or Cleanser | Safe for Ceramic? | Notes |
|---|---|---|
| Soft sponge | Yes | The safest everyday option |
| Microfiber cloth | Yes | Great for final buffing |
| Nylon brush | Yes | Only if the bristles are soft |
| Non-abrasive scrubbing pad | Yes | Look for "non-scratch" on the label |
| Baking soda paste | Yes | The best DIY degreaser |
| Steel wool | No | Will scratch the coating instantly |
| Chainmail scrubber | No | Way too aggressive for ceramic |
| Abrasive powder cleansers | No | Removes the film and the ceramic |
| Dishwasher detergent pods | No | Harsh on the coating and leaves film |
The one tool you really need is a soft sponge. A standard kitchen sponge with a soft side and a mild scrubby side works fine. If you want a dedicated ceramic-safe pad, look for one labeled "non-scratch" or "safe for nonstick."
Dish soap matters too. A basic grease-cutting dish soap is enough. You don't need industrial degreasers for a ceramic pan.
In our research, gentle dish soap plus a warm soak handles most daily buildup on budget pans.
Commercial ceramic cooktop cleaners can also work on ceramic pans. They're designed for glass-ceramic stovetops, which have a similar coating hardness. If you choose that route, test the cleaner on the outside bottom of the pan first.
That way, if it reacts badly, your cooking surface stays safe.
The same cleaning logic applies to other nonstick appliances you might own. Air fryer baskets with ceramic or nonstick coatings need the same gentle touch. If you've ever spent time cleaning a Ninja air fryer, you already know how quickly harsh scrubbing degrades the surface.
The same principle applies here: soft tools, warm water, and patience.
Budget pans also respond well to routine care. Wipe the pan out with a paper towel while it's still warm after cooking. That simple habit removes a lot of oil before it hardens.
Then wash it with soapy water once it's cool enough to handle. That one extra minute every day makes the deep cleaning sessions much easier.
If you're dealing with a baked-on mess from deep frying, the approach is the same. Grease residues everywhere respond to warm soaking and gentle scrubbing. Even stubborn oil-using equipment like an old Presto deep fryer gets cleaned that way.
You just need to match the method to the surface.
One last tip: if the yellow film appears only on the pan's exterior, that's a different situation. The outside of a budget ceramic pan is often raw aluminum or painted metal, not ceramic. Use a regular kitchen degreaser there instead of baking soda.
Just keep it away from the cooking surface.

Related posts

Sensarte Ceramic Pan: Is This Budget Buy Worth It? Reddit
You're staring at a $25 ceramic pan wondering if it'll actually hold up or if you're just throwing…
How to Fix a Wobbly Ceramic Frying Pan Handle
That wobbly handle is a real hazard, and it's one of the most common complaints about budget nonstick…
Hot Pan Under Cold Tap Water? Budget Ceramic Danger
You might be wondering if you can you put putting hot pan under cold running tap water in…