How to Clean Nugget Ice Maker: Remove Black Mold & Pink
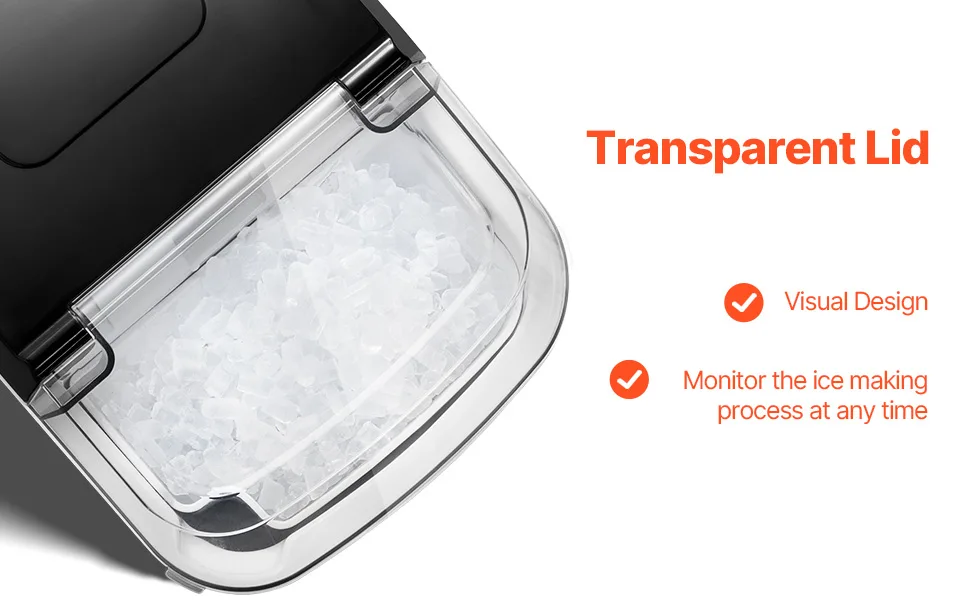
If you've ever wondered how to clean countertop nugget ice maker and remove black mold and pink slime inside interior water lines, you're not alone. That pink film and those dark spots aren't just gross, they're signs of living contaminants that can make you sick. The problem is that most people grab vinegar, scrub the basket, and call it done, but the real trouble hides deep inside the machine's tubing and pump.
According to CDC guidelines, mold and bacteria thrive in moist, dark environments, and the narrow silicone water lines inside an ice maker are exactly that. As of 2026, more households own countertop nugget ice makers than ever, yet fewer than one in three owners knows the correct cleaning protocol for the internal plumbing. Let's fix that.
Quick Answer
Unplug the machine. Dump all ice. Remove every removable part.
Clean the reservoir with diluted bleach or hydrogen peroxide. Run the solution through the water lines. Wait 15 minutes.
Flush with fresh water three times. Dry everything completely. Clean every 1 to 3 months.
Why This Cleaning Job Is Different – Mold Versus Pink Slime (And the Risks You’re Facing)
Most kitchen appliances collect crumbs and grease. Your nugget ice maker collects something more dangerous: living biofilm inside the water lines. That black spec in your ice cube?
It’s likely Stachybotrys mold spores. The pink ring around your water reservoir? That’s Serratia marcescens bacteria, the same biofilm that grows in toilet bowls and shower drains.
Cleaning this machine is not like wiping down a countertop. It’s a disinfection process that demands the right chemicals, the right contact time, and the right rinse procedure.
Why vinegar alone won’t cut it. Vinegar is great for dissolving mineral scale. It kills some molds but not all. It does almost nothing to Serratia marcescens.
If you’re dealing with pink slime, vinegar just spreads it around. You need a disinfectant strong enough to break down the biofilm matrix, and that means using a diluted bleach solution or hydrogen peroxide. Many people ruin their machines by using harsh chemicals on aluminum parts or by mixing bleach with vinegar, which creates toxic chlorine gas.
That’s a serious safety hazard.
The health risks are real. Breathing in mold spores from your ice machine can trigger allergic reactions, asthma attacks, and respiratory infections. Ingesting Serratia marcescens can cause urinary tract infections and pneumonia in vulnerable individuals, especially children, the elderly, and immunocompromised people. The CDC categorizes mold cleanup as a health priority, especially in humid climates.
Your countertop ice maker sits right next to your drinking cup. You don’t want that cup filled from a contaminated water line.
Why this job is different from other kitchen cleaning. First, you’re dealing with hidden surfaces. The water lines are narrow, flexible, and often have bends where biofilm collects. A scrub sponge can’t reach them.
You must circulate cleaning solution through the entire path. Second, the machine’s pump and internal seals are sensitive to certain chemicals. Using an abrasive cleaner or an acidic solution on the wrong material can crack the plastic housing or eat through rubber gaskets.
Third, inadequate rinsing leaves chemical residue that gives your ice a bleach taste, or worse, leaves enough disinfectant to cause throat irritation.
The timeline matters. If you clean too quickly, the disinfectant doesn’t have enough contact time to kill the bacteria. If you let the solution sit too long, it can damage components. The sweet spot is 15 minutes for bleach solutions, 20 to 30 minutes for hydrogen peroxide.
You also need to flush with fresh water at least three full ice-making cycles to ensure all residue is gone. Most people rush and stop after one rinse. That’s how ice ends up tasting like a swimming pool.
Manufacturer specs confirm that the average countertop nugget ice maker uses a recirculating pump that moves water through about 3 feet of silicone tubing. That tubing has an internal diameter of roughly 1/4 inch. The surface area inside those lines is larger than you think.
Biofilm grows on every square millimeter. If you don’t clean the lines directly, the bacteria will re-inoculate the reservoir within 24 hours.
You might already know how to keep other kitchen appliances running smoothly, like keeping your air fryer basket free of grease buildup. The stakes are different here. You’re drinking the output.
This is a health procedure, not a beauty job.
Image source: Bing (Web (fair-use with source credit))
The Two Contaminants You’re Actually Dealing With (Black Mold vs Pink Slime – What They Are and Why They Grow in Water Lines)
Before you mix any chemicals, you need to know what you’re fighting. Black mold and pink slime are not the same thing. They require different cleaning approaches.
Let’s break them down.
Black Mold (Stachybotrys chartarum)
This is the classic toxic black mold that media warnings talk about. It looks like dark greenish-black spots, often fuzzy or slimy depending on humidity. It grows where there’s persistent moisture and a food source, in this case, starch and minerals from your tap water.
Black mold produces mycotoxins that can cause chronic sinus infections, fatigue, and neurological symptoms with long exposure.
Where it hides in your ice maker. You’ll find it on the silicone gasket around the ice chute, on the underside of the lid, and inside the water reservoir where the surface stays wet between cycles. If you see black specks floating in your ice cubes, the mold has likely colonized the water lines themselves. That’s when a normal cleaning won’t be enough.
Why it keeps coming back. Mold spores are everywhere in the air. As soon as your ice maker provides moisture, warmth, and darkness, spores land and grow. The only way to stop it is to break the moisture cycle or disinfect regularly.
Many machines have dead spaces, corners where water pools but doesn’t drain, that are impossible to dry. Those spots act as ongoing infection points.
Pink Slime (Serratia marcescens)
Don’t let the pretty color fool you. Pink slime is not mold; it’s a colony of pigmented bacteria. Serratia marcescens is common in bathrooms, around drains, and in moist appliances.
It feeds on fatty acids and phosphates found in soap residue and even in your tap water.
How to identify it. A bright pink or orange stain that appears slick or wet. It often forms a ring around the water reservoir at the waterline. It also builds up inside the flexible tubing, where it creates a biofilm, a sticky matrix that protects the bacteria from mild cleaners.
Rubbing alcohol or diluted bleach will kill it, but you have to physically break up the slime layer first.
Health concerns. Serratia marcescens is an opportunistic pathogen. In healthy adults it rarely causes problems beyond the ick factor, but it can cause wound infections, conjunctivitis, and respiratory issues. For anyone with a compromised immune system, it’s a real danger.
The CDC includes Serratia in its list of healthcare-associated pathogens.
Comparison at a Glance
| Feature | Black Mold | Pink Slime |
|---|---|---|
| Organism type | Fungus (mold) | Bacteria |
| Color | Dark greenish-black | Bright pink to orange |
| Texture | Fuzzy or slimy | Slick, film-like |
| Health risk | Mycotoxins, respiratory | Opportunistic infections |
| Preferred cleaner | Hydrogen peroxide or vinegar | Diluted bleach or hydrogen peroxide |
| Where it grows | Dark, moist surfaces | Waterline rings, tubing biofilms |
| Scrubbing needed | Moderate | Heavy – must break biofilm |
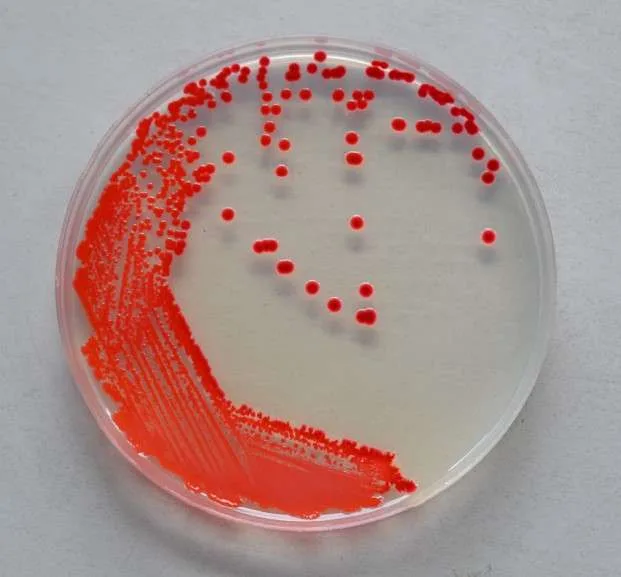
Image source: Web (Bing) / harperwater.com (Web image (fair-use with source credit))
Why Both Thrive in Your Ice Maker
Your nugget ice maker is a perfect incubator. It holds water at room temperature between cycles. The water lines are never fully drained.
The reservoir lid traps humidity. And you refill it with fresh water that may contain dissolved minerals, organic matter, and even trace bacteria from your tap. The machine recirculates that water over the ice mold, spreading any contamination throughout the system.
If you’ve been using your ice maker daily for more than three months without a deep clean of the water lines, you almost certainly have some level of biofilm. It might not be visible yet. The first sign is often a strange taste or a faint pink ring.
Don’t ignore it. The longer you wait, the harder the biofilm is to remove.
What You’ll Need to Clean Safely – Tools, Cleaners, and What Never to Mix
This is not a job for dish soap and a sponge. You need specific items to effectively clean and sanitize the interior water lines without damaging the machine or leaving toxic residue. Gather everything before you start, because once you begin, you shouldn’t stop mid-process.
Tools and Materials Checklist
| Item | Purpose |
|---|---|
| Unscented bleach (sodium hypochlorite, 5-6%) | Disinfects pink slime and bacteria |
| 3% hydrogen peroxide (food grade if possible) | Disinfects mold and mildew |
| White distilled vinegar | Dissolves mineral scale, light mold |
| Bottle brush with nylon bristles | Scrubs reservoir and chute |
| Small soft-bristle brush (toothbrush size) | Reaches corners and crevices |
| Microfiber cloths | Wiping down parts |
| Turkey baster or small syringe | Flushing solution through lines |
| Fresh water (filtered preferred) | Rinsing cycles |
| Large bowl or sink basin | Soaking parts |
Choosing the Right Cleaner
Use bleach when you see pink slime. Mix one tablespoon of unscented bleach per quart of cool water. Never use hot water with bleach, it releases fumes. This solution kills Serratia marcescens in less than 10 minutes of contact time.
It also kills mold spores, but it doesn’t penetrate porous surfaces as well as hydrogen peroxide.
Use hydrogen peroxide for black mold on plastics and silicone. Hydrogen peroxide bubbles on contact, lifting mold from surfaces. It’s less corrosive than bleach and breaks down into water and oxygen, so it leaves no chemical taste if rinsed properly. Use it full strength (3%) for best results.
Use vinegar only for mineral scale, not for disinfection. Vinegar is about 5% acetic acid. It dissolves calcium and lime deposits, which can clog your water lines and reduce ice production. But it does not reliably kill Serratia marcescens, and it can damage rubber seals over time.
The CDC does not recommend vinegar for disinfecting surfaces against bacteria like Serratia.
What Never to Mix
This list could save your life. Mixing certain household cleaners creates toxic gases.
- Bleach + vinegar produces chlorine gas. Even small amounts can cause chemical pneumonia.
- Bleach + ammonia produces chloramine gas. Extremely dangerous.
- Bleach + rubbing alcohol forms chloroform and hydrochloric acid.
- Hydrogen peroxide + vinegar produces peracetic acid, a corrosive irritant.
Never combine any two cleaners. Use one at a time, and thoroughly rinse before switching. When in doubt, use only the cleaner you need and flush the system with water before trying something else.
The CDC’s guidelines for mold cleanup recommend using either diluted bleach or hydrogen peroxide, but not both. Stick to that advice. If you have both black mold and pink slime, clean with hydrogen peroxide first, rinse, then follow with bleach for the slime.
You can also use a commercial NSF-approved ice machine cleaner designed for countertop models. These often combine descaling with a disinfectant. Read the label carefully to confirm it’s safe for your machine’s materials.
Safety gear you should use. Wear rubber gloves to protect your hands from bleach and mold. Wear safety glasses if you’re using a spray bottle. Work in a well-ventilated area, open a window or turn on the range hood.
The fumes from bleach, even diluted, can irritate your lungs if the machine is in a small kitchen.
Step-by-Step: Deep Clean the Reservoir, Water Lines, and Ice Chute (With Safe Chemical Choices)
Now that you have your tools and know your enemy, it’s time to work. This process takes about an hour, not counting the rinse cycles. Don’t rush it.
Step 1: Prepare the Machine
Unplug the ice maker. Discard any ice in the basket. If the machine has an ice scoop, remove it.
Pull out the ice basket and any removable drip tray. Place these in the sink.
Remove all removable parts. Most machines have a chute cover or a silicone flap where ice drops through. Gently pry it off. Some machines have a water filter, remove it as well.
You don’t want to run cleaning solution through a filter; it will ruin it.
Step 2: Clean the Reservoir and Chute
Fill the reservoir with your chosen cleaning solution. For general cleaning, use 1 part white vinegar to 2 parts water. For pink slime, use the bleach solution (1 tablespoon bleach per quart water).
For black mold, use 3% hydrogen peroxide.
Let the solution sit in the reservoir for 5 minutes. Then dip your bottle brush in the solution and scrub the reservoir walls, the corners, and the chute opening. Pay attention to the water-level line where pink slime likes to form.
Don’t forget the underside of the lid, mold loves that spot.
For stubborn black mold spots, make a paste of baking soda and a small amount of water. Use your toothbrush to scrub the area. Baking soda is mildly abrasive and won’t scratch plastic.
Rinse the paste away with the cleaning solution.
Step 3: Run the Cleaning Solution Through the Water Lines
Now you need to push the solution through the machine’s internal plumbing. Fill the reservoir again with fresh cleaning solution. Plug the machine in and turn it on as if you were making ice.
The machine will pump the solution through the lines and over the ice mold.
Important: Do not collect the ice that forms. Let the solution run for one full cycle (about 10-15 minutes). The ice that forms will be contaminated.
Let it fall into the basket or discard it. After the cycle ends, unplug the machine and let the solution sit inside the lines for 15 minutes. This contact time is critical for killing biofilm.
For machines with a drain plug on the bottom, you can also remove the plug and let the solution drain through. That helps flush the lines more thoroughly. Check your manual, not all models have this.
Step 4: Flush and Rinse
Empty any remaining solution from the reservoir. Fill it with fresh water. Run two to three full ice-making cycles, discarding all ice and water each time.
This flushes the bleach or hydrogen peroxide out of the lines.
Taste test. After the third rinse cycle, take a small cup of the water that comes out. Smell it. If it smells like bleach, run another rinse.
Taste a tiny amount. If you taste chemicals, keep rinsing. A clean machine should produce water that tastes like water.
Step 5: Clean Removable Parts
While the rinse cycles are running, hand wash the ice basket, scoop, chute cover, and drip tray in warm soapy water. Rinse thoroughly. Wipe them dry with a microfiber cloth or let them air dry completely.
Do not reassemble until all parts are bone dry.
Step 6: Reassemble and Sanitize
Once everything is clean and dry, reassemble the machine. Fill the reservoir with fresh water and run one more ice-making cycle. Discard the first batch of ice.
This final batch is just a safety measure. After that, your ice maker is ready for normal use.
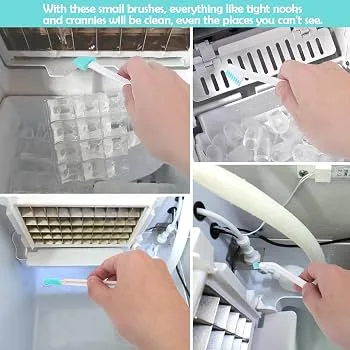
Image source: Bing (Web (fair-use with source credit))
If you’ve ever cleaned the grease from a deep fryer or scrubbed the basket of your air fryer, you know that a thorough job takes time. The same patience applies here. Don’t shortcut the rinse cycles.
How to Remove Stubborn Pink Slime Inside the Interior Water Lines (Bleach Soak Method)
Pink slime can be the hardest contaminant to eliminate because it forms a biofilm that clings to the inside of your water lines. A simple vinegar rinse won’t touch it. You need a targeted bleach soak.
Why bleach works. Serratia marcescens is bacteria, not fungus. Bleach (sodium hypochlorite) denatures bacterial proteins and destroys the biofilm matrix. The key is contact time and concentration.
Too weak, and the bacteria survive. Too strong, and you risk damaging the silicone tubing or leaving residue that tastes terrible.
The right concentration. Use exactly 1 tablespoon of unscented bleach per quart of cool water. That’s about 1/2 cup of bleach for a full 1-gallon reservoir. Do not exceed this.
Higher concentrations may cause the tubing to become brittle over time.
The soak method for stubborn slime.
- Prepare the bleach solution in a separate container.
- Pour it into the water reservoir.
- Using a turkey baster or syringe, force some of the solution directly into the water inlet tube. This is where the machine draws water into the pump.
- Plug in the machine and start a cycle. Let it run for about 5 minutes so the solution circulates through the entire system.
- Unplug the machine. Let the solution sit inside the lines for 20 minutes minimum. If the pink slime is thick, push it to 30 minutes.
- After the soak, plug in the machine and run one full cycle without interruption. This pushes the loosened biofilm out.
- Empty the reservoir. Fill with fresh water and run three full rinse cycles.
If the pink slime persists. You may need to repeat the soak. Some machines have a “clean” cycle that runs the pump longer, check your manual. You can also remove the water lines if they are accessible.
On many models, the tubing snaps off from the reservoir and the pump. Soak the removed tubing in the bleach solution for 30 minutes, then scrub the inside with a bottle brush. Rinse thoroughly before reattaching.
What to do if bleach doesn’t work. In rare cases, especially with older machines, the biofilm may have formed inside a cracked or pitted surface. At that point, no chemical will fully remove it. The lines may need to be replaced.
Contact the manufacturer for replacement parts.
A note about commercial ice machine cleaners. Some NSF-certified cleaners are designed specifically for commercial ice machines. They contain chemicals like acid cleaners and sanitizers. You can use them in a countertop model if they are labeled safe for plastic and silicone.
Follow the manufacturer’s directions. They often work faster than bleach because they use higher concentrations. However, they tend to be more expensive and can be harder to find.
Never mix commercial cleaners with bleach. Stick to one method per cleaning session. If you use a commercial cleaner and want to switch to bleach later, flush the system with water between them.
After you’ve removed the pink slime, take a moment to check your whole kitchen appliance routine. Keeping other appliances free of buildup, like knowing the correct oil level or cleaning the interior properly, shares the same principle: regular maintenance prevents major issues. The same logic applies to your ice maker.

Related posts
GE Profile Opal 2.0 Nugget Ice Maker: Worth It? Reddit
If you’ve ever typed “is ge profile opal 2.0 countertop nugget ice maker worth buying reddit review” into…
How to Fix a Squealing GE Profile Opal Ice Maker
That highpitched screech from your GE Profile Opal isn't just annoying. It's your ice maker telling you something…
Hard Tap Water Without Descaling: Safe for Nugget Ice
So you're standing in your kitchen, staring at that brandnew countertop nugget ice maker, wondering can you put…