Clean & Defrost Heavy Duty Vacuum Sealer Bag Rolls

Opening the freezer to find a vacuum-sealed package crusted with frost and ice crystals is frustrating. If you're searching for how to clean heavy duty vacuum sealer bags rolls and remove frost and ice crystal buildup inside compromised vacuum bag, the first step isn't grabbing soap and water. Ice inside the bag is a warning sign, not just a cosmetic nuisance.
It usually means the seal failed and air crept in.
Per USDA FSIS cold storage guidelines, a freezer set at 0°F or lower keeps food safe indefinitely. Once vacuum is lost, though, the clock starts moving faster. Thawed food that sat above 40°F for more than two hours should hit the trash, not the cutting board.
That safety call shapes everything else you'll read below.
Image source: Web (Bing) / pixabay.com (Web image (fair-use with source credit))
Quick Answer
To clean heavy-duty vacuum sealer bags and rolls, inspect the compromised bag first. Discard food that thawed above 40°F. Hand-wash reusable bags in warm soapy water.
Soak frost-affected bags in baking soda, rinse, and dry fully. Test the seal before refreezing. When in doubt, cut fresh film.
First, Is That Bag Worth Cleaning or Should You Toss It?
How a Compromised Bag Fails
A compromised vacuum bag loses its airtight barrier along the seam, the film wall, or the heat-seal zone. Sharp bones, overstuffed packages, and creases that become micro-cracks are the usual culprits. Even a pinhole lets oxygen back in.
Once air enters, moisture escapes the food and re-freezes as frost on the inside.
The word "compromised" covers a lot of ground. A bag that lost its vacuum during the first week looks very different from one that leaked slowly over eight months. The frost pattern and the food's condition tell you which one you're holding.
You don't need a microscope to spot the damage. Check for holes, puffy spots where the film pulled away from the food, cloudy or melted seams, and frost clinging to the bag wall instead of the food itself.
The Quick Triage Checklist Before You Do Anything
Run this checklist before you reach for soap. It takes about thirty seconds.
| If you see… | Then… |
|---|---|
| Food fully frozen, frost only on the bag's exterior | Wipe it off. The bag is fine and needs no cleaning. |
| Food fully frozen, frost inside the bag | Clean the bag and reseal, or refreeze the contents in fresh film. |
| Food partially thawed but still below 40°F | Refreeze if ice crystals remain, or cook immediately. Clean the bag if undamaged. |
| Food above 40°F for more than two hours | Discard the food. Discard the bag too, unless it's a heavy-duty reusable type you can sanitize. |
| Off odor, slime, or visible discoloration | Discard both. No washing fixes a bag that held spoiled food. |
Cost matters here. Standard 3-mil suction bags run roughly ten to twenty cents per foot. An 8-mil chamber bag costs more, so cleaning makes sense if it's undamaged.
Thin film isn't worth the effort. Cut fresh from the roll and move on.
A leaking bag in the freezer often freezes into a brick, hiding tiny holes until it thaws. If water seeps out during a rinse test, the film has failed. Treat that as a decision point, not a washing challenge.
Reusing a compromised bag can also fail silently, since the old pinhole can reopen under vacuum pressure. If in doubt, don't gamble a pork shoulder on a five-cent bag.
Why Frost and Ice Crystals Build Up Inside a Vacuum Bag
Freezer Burn, Moisture Sublimation, and Air Leaks
Frost inside a vacuum bag is freezer burn in action. Freezer burn happens through sublimation, a process where ice turns directly into water vapor without melting. That vapor drifts away from the food and re-freezes on the colder bag wall.
A perfect vacuum seal slows this dramatically because no air is available to carry moisture away.
The moment a leak opens, sublimation accelerates. The food dehydrates, texture degrades, and frost crystallizes across the interior. Your freezer's temperature swings make things worse.
Frost-free freezers cycle through defrost periods that warm the interior by several degrees. The film expands and contracts, turning a weak seam into a slow leak.
Corners and seal edges cool slightly faster than the center of the bag. That's why frost collects there first. University extension research has documented this pattern for decades.
What Ice Inside the Bag Is Actually Telling You
Light frost scattered through the bag points to a slow leak over several weeks. Thick ice plates hugging the film suggest a failed seal that's been leaking for months. Both mean the vacuum is gone and the food is oxidizing.
But frost alone doesn't make food unsafe. If the food stayed below 40°F, it's still edible, just less fresh. Texture, flavor, and moisture take the hardest hit.
Frost on the outside means your freezer has humidity, not a failed bag. Wipe it off and move on. Frost on the inside means the seal failed.
Those two situations require totally different responses.
Small ice crystals dusted on the food itself are normal, even in a good seal. They come from temperature cycling. What you should not see is a thick coat of frost on the bag wall that never touches the food directly.
That gap means air is inside with your food.
If the bag looks puffy, that's more than frost. A puffy bag indicates gas production inside, which can signal bacterial activity, especially with fish, garlic in oil, or low-acid vegetables. Treat a swollen bag with suspicion.
In our research of user reports, frost inside the bag is how most people discover a worn-out heating element or a roll that developed pinholes from creasing. It's rarely a one-time event. If it happens often, inspect your sealer and rethink how you store your roll.
Food Safety First: What You Can Salvage vs. What Has to Go
Safe to Clean and Reuse
Heavy-duty vacuum bags, especially chamber-style films at 4 mil or thicker, are designed for multiple use cycles. Most manufacturers allow gentle hand-washing. The bag can be reused if it held dry goods, cooked foods, or raw produce that was thoroughly washed.
Clean it within a few hours of emptying, and it performs like new.
Never Reuse These Bags, No Matter How Well They Clean Up
Bags that held raw meat, poultry, or fish are a firm no, particularly if they weren't cleaned right away. Bacteria like Salmonella and Campylobacter can lodge in the tiny surface channels of an embossed bag. A quick soap-and-water rinse won't reliably dislodge them.
That's why manufacturers specify hand-washing, not sanitizing.
Also skip reuse for:
- Bags with visible holes, thin spots, or cloudy plastic
- Bags that held spoiled food, slimy marinades, or raw eggs
- Bags stored crumpled, where creases became micro-cracks
- Any bag whose seam you can't confidently recheck
The Two-Hour Rule from USDA
USDA freezing guidelines are straightforward: discard any food that has been above 40°F for more than two hours. That includes time on the counter before you noticed the leak. Partial thawing counts.
If the bag thawed completely and sat out, the food goes.
Refreezing doesn't reset the clock. Freezing stops bacterial growth, but it doesn't undo bacterial activity or neutralize toxins formed while the food was warm. Cooking kills live bacteria but not all toxins.
That's why the advice is "when in doubt, throw it out."
The low-oxygen environment inside a compromised bag can also support anaerobic bacteria if the food warms enough. Fish, garlic in oil, and low-acid vegetables carry the highest risk. If any of those thawed in a ruptured bag, don't take the chance.
One bright line to remember: if the food is still frozen solid and the problem is just frost inside the bag, it's safe to eat. The safety window opens and closes based on temperature history, not ice crystals alone.
How to Clean Heavy-Duty Vacuum Sealer Bags and Rolls Safely

Image source: Bing (Web (fair-use with source credit))
What You Need (and What to Avoid)
You don't need specialized brushes or sanitizing tablets. A basin of warm water, a drop of mild dish detergent, and a soft sponge handle nearly everything. Keep water between 110°F and 140°F.
Anything hotter can warp the film and damage the heat-seal layers.
Never run vacuum bags through the dishwasher. As of 2026, most bag manufacturers still recommend hand-washing only, and none of them approve dishwasher use. The drying cycle gets hot enough to degrade the plastic.
Skip steel wool and abrasive pads, which scratch the surface and create anchor points for bacteria and frost. This is the same warm-water approach we recommend for routine kitchen appliance care.
Bleach, ammonia, and citrus degreasers are also off the table. They break down the plasticizers that keep the film flexible.
Step-by-Step Cleaning Routine for Reusable Bags
- Turn the bag inside out to expose the dirtiest surface.
- Rinse with warm water to flush loose crumbs.
- Soak in warm soapy water for about five minutes.
- Scrub gently with a soft sponge, working into the textured channels.
- Rinse thoroughly. Then rinse again, because soapy residue ruins heat seals.
- Drape the bag over a drying rack, opening facing down.
- Press a clean towel or paper towel inside to absorb trapped moisture.
For heavy grease, add a tablespoon of baking soda to the soak water. It lifts film without scrubbing damage.
Aggregate reviews from home cooks consistently show that everyday kitchen tools respond best to gentle hand-cleaning. Fryer hygiene follows the same rule: wash, rinse, dry, repeat.
Cleaning a Scratched or Greasy Vacuum Sealer Roll
Rolls need extra patience. Unroll only as much film as you're cleaning. Wipe it down with a microfiber cloth soaked in soapy water, then wipe with a damp cloth and pat dry.
Never submerge the whole roll. The cardboard core will wick moisture into the layers and make the film stick together.
Store rolls upright in their original box. Add a silica gel pack to absorb humidity. A dry roll is a clean roll.
How to Remove Frost, Ice Buildup, and Odors Before Reuse
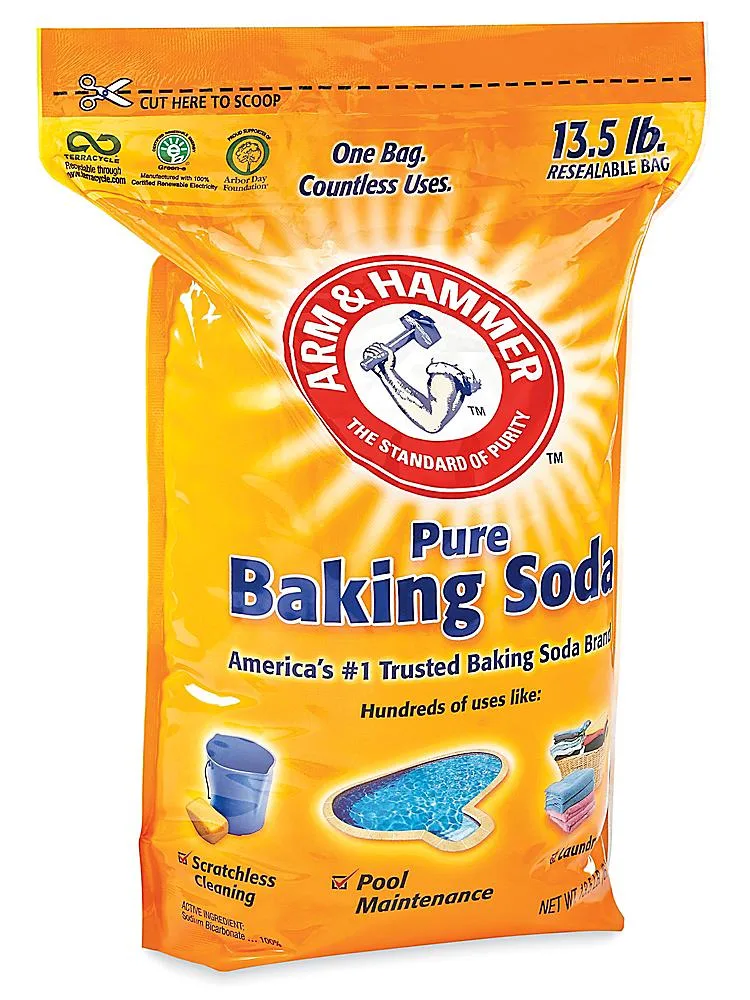
Image source: Web (Bing) / sfapx.quebecbaroque.com (Web image (fair-use with source credit))
Deodorizing with Baking Soda and Vinegar Rinses
Frost itself doesn't smell. The odor problem comes from whatever the bag held before, fish, onion, or fatty cooked meat. A baking soda soak is the most reliable neutralizer.
Mix one tablespoon of baking soda per cup of warm water. Soak the bag for fifteen to thirty minutes. Rinse thoroughly.
For heavier odors, follow with a 50/50 white vinegar and water rinse. Vinegar breaks down the fatty residues that trap odor. Anyone who has fought with a grimy basket knows the value of countertop appliance upkeep.
A final warm-water rinse leaves the bag neutral and ready to dry. For strong fish smells, add a pinch of salt to the vinegar rinse. The salt helps pull remaining proteins from the film surface.
Then wash one more time with a tiny dab of dish soap.
If the bag has a thick frost layer, soak it in cool water first to melt the ice gently. Warm water on a frozen bag can cause thermal shock, making the film brittle. Once the frost breaks free, wash normally.
Drying Methods That Actually Prevent Refreezing Clumps
The fastest way to ruin a cleaned bag is to seal it while damp. Trapped water freezes into jagged ice crystals. Those crystals tear the film from the inside on your next thaw.
Dry with a dish towel first. Then let the bag air dry upside down for at least an hour. For stubborn moisture in the sealed corners, stuff a rolled paper towel inside the bag and leave it for a few hours.
The paper pulls water out of the folds.
One old freezer trick is to tuck a dry paper towel inside the bag before vacuum sealing. It absorbs leftover moisture. Just know it also creates a tiny air pocket near the seal, slightly reducing vacuum quality.
Skip it unless you really need it.
Don't forget the seal strip. Grease and crumbs along the top edge are a common reason a freshly cleaned bag fails to reseal. Wipe the seal zone with a vinegar-dampened cloth and dry it completely.
That small step is the difference between a bag that holds vacuum for months and one that leaks frost all over again.
How to Cut and Reseal a Fresh Bag from a Roll
Cutting a fresh bag from a roll is straightforward once you get the rhythm. Place your food on the film, then add two to three inches of extra material for the seal zone. That buffer gives you room to make a clean seam without fighting crumbs.
Use food-safe scissors or a rotary cutter. A dull blade tears the film and leaves ragged edges that invite leaks. Cut straight across, perpendicular to the roll's sides.
Angled cuts waste film and stress the heat-seal bar.
If you're using a roll rather than pre-cut pouches, seal the bottom end first. Run the film through the sealer, press the seal button, and wait for the indicator light. While it's still warm, run your finger along the seam to flatten any wrinkles.
A wrinkled seal is a weak seal.
Tension matters when you seal. Hold the film taut, but don't stretch it. Overstretching thins the plastic and creates weak spots that fail under vacuum pressure.
If the film shifts mid-seal, you'll get a crooked line.
Sealing Through Damp Grease Without Ruining the Roll
Grease and moisture love to creep along the roll's surface. If you pull film past a greasy patch, that residue ends up inside your new bag. Wipe the roll's outer layer with a vinegar-dampened cloth before cutting.
Then dry it completely.
The heat-seal bar also collects film residue over time. Clean it every few cycles with a soft cloth and a drop of dish soap. A dirty seal bar creates cold spots, and cold spots cause partial seals.
Getting comfortable with a new kitchen tool takes practice, and the same learning curve applies here.
If you notice the seal is cloudy or translucent, the temperature is too low. If the film bubbles or scorches, it's too high. Check your sealer's manual for the recommended wattage and adjust accordingly.
Store the roll upright in its box. A roll that's left loose on the counter absorbs humidity and develops creases. Creased film often becomes a creased seal.
Common Mistakes That Ruin Bags or Put Your Food at Risk
Washing Film Too Hot or Too Rough
Hot water feels like the right call, but anything above 140°F can distort the film layers. That distortion weakens the oxygen barrier. Use warm water and a soft sponge instead.
Steel wool and abrasive scrubbers are worse. They gouge the surface, creating tiny channels where bacteria hide. Those scratches also catch ice crystals on your next freeze.
The result is a bag that looks clean but performs poorly.
Ignoring Micro-Punctures and Hidden Leaks
Pinholes are easy to miss. They're often smaller than a pinhead and appear around the seal edges. Bone fragments, pasta shells, and sharp spice particles cause most of them.
If a bag lost frost but you can't find a hole, don't assume it's fine. Fill it with water and squeeze gently. A single droplet escaping is enough to ruin a pork shoulder.
When you find a leak, that bag is done. Per USDA Food Safety guidelines, if you have to question the food's temperature history, it's safer to discard the food and the bag.
Resealing a Bag That Was Thawed Too Long
Partial thawing doesn't reset safety. A roast that sat out for three hours while you cleaned the freezer isn't safe just because you're defrosting it again. The USDA's two-hour rule applies.
When in doubt, cook it immediately or throw it out.
Other Mistakes That Cut a Bag's Life Short
Overfilling a bag is common. Too much food strains the seal. Leave at least an inch of empty film above your food.
That space gives the vacuum channel room to pull air out.
Sealing liquids too close to the edge also creates problems. Moisture bubbles form under the seal and cause peeling. Let marinades settle before sealing, or freeze the liquid separately first.
How to Test a Cleaned Bag Before Refreezing
A cleaned bag needs proof before it earns a spot in your freezer. The water test is the fastest check. Fill the bag about halfway with water, seal it, and squeeze.
Watch the exterior for droplets. Any moisture means the film failed.
For a vacuum sealer test, place the empty bag in your unit and run a normal cycle. If the machine struggles or the bag never tightens, the seal or film is compromised. This works best with suction-style sealers.
Simple Signs Your Bag Will Hold a Vacuum
| Test | What to look for | Verdict |
|---|---|---|
| Water squeeze test | No droplets on bag wall | Pass |
| Water squeeze test | Tiny droplets or a stream | Fail, discard |
| Vacuum run on empty bag | Bag pulls tight and stays tight | Pass |
| Vacuum run on empty bag | Vacuum light never shuts off | Fail, discard |
| Visual seam inspection | Smooth, even, no white cracks | Pass |
| Visual seam inspection | Cloudy, bubbly, or peeling seam | Fail, discard |
What to Do After the Test Passes
Dry the bag completely before refreezing. Air-dry it upside down for at least an hour. Then insert a folded paper towel inside to draw out residual moisture.
Store cleaned bags flat, never crumpled. A flat bag resists creases and pinholes. Stack them inside a large zip-top freezer bag to keep them clean and humidity-free.
Frequently Asked Questions
Can I reuse a vacuum bag that was compromised but the food still looked frozen?
If the food stayed fully frozen and you only see frost on the bag wall, you can clean the bag and reseal it. But inspect the film carefully. Any pinhole or weak seam means the bag needs to be discarded.
A compromised bag that still held vacuum long-term isn't worth the risk.
Will washing a bag remove frost that's already inside?
Washing removes surface frost and the moisture that created it. Your bag must be fully dry before reuse. If you seal a damp bag, you'll recreate the frost problem within days.
Dry the inside with a towel, then air-dry for at least an hour.
Is it cheaper to clean bags or cut fresh from a roll?
Cleaning reusable chamber bags, typically 4 mil or thicker, saves money over time. Standard suction bags are thin and cheap, so the cost of soap and water isn't worth it. Cut fresh from the roll when the bag is thin or damaged.
When the cost of the bag is less than a dollar, skip the sink.
Can I put a washed heavy-duty vacuum bag in the dishwasher?
No. Dishwasher heat and detergent degrade the plastic film. The intense drying cycle warps the seal area.
Always hand-wash with warm water and mild dish soap. Follow the same logic you would for delicate kitchen tools, and your bags will last through many freeze cycles.

Related posts
Dehydrating Frozen Fruit Slices Safely in a Dehydrator
You’re wondering can you put putting frozen fruit slices directly into dehydrator in a digital food dehydrator stainless…
How to Clean Sticky Teriyaki from Dehydrator Mesh Trays
When that shiny teriyaki glaze turns into a rockhard crust on your stainless mesh trays, it feels like…
Best Temp & Time for Spicy Teriyaki Beef Jerky
Making homemade spicy teriyaki beef jerky is one of those projects that feels deeply satisfying, until you pull…