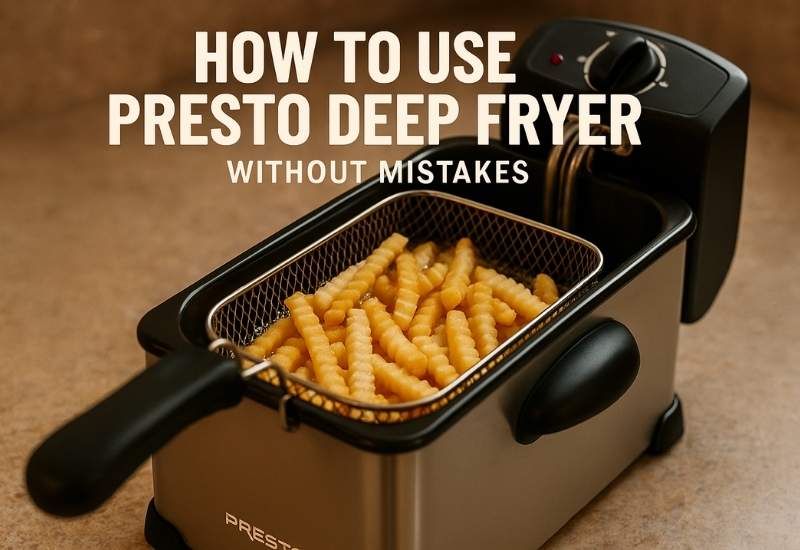
The first time I tried to learn how to use Presto deep fryer, I felt excited and a little nervous at the same time. Hot oil can feel intimidating, especially if you have never deep-fried at home before. I remember standing in my kitchen, fryer on the counter, wondering if I was about to make a mess or ruin dinner.The good news is this: learning how to use a Presto deep fryer step by step is much easier than it looks. Once you understand the basics, frying becomes simple, safe, and even fun.
In this guide, I’ll walk you through everything I’ve learned from using Presto fryers at home. I’ll explain the setup, cooking steps, safety rules, common mistakes, and differences between models. By the end, you’ll know exactly how to use your Presto fryer with confidence.
Understanding Your Presto Deep Fryer
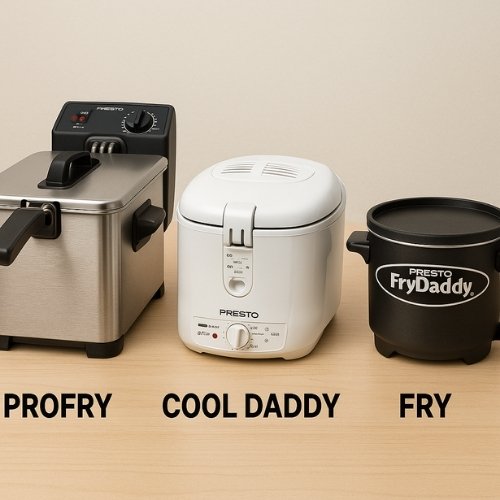
Before you start frying, it helps to understand how a Presto deep fryer works. No matter which model you own—Presto ProFry, Presto Cool Daddy, or Presto Fry Daddy—they all follow the same basic idea. The fryer heats oil to a set temperature, cooks food evenly, and helps you remove it safely once it’s done.
Each model has its own personality.
- Presto ProFry is the largest option. It’s great for families, parties, and game days.
- Presto Cool Daddy is smaller and has a locking lid with an odor filter, which keeps smells under control.
- Presto Fry Daddy is the most basic and budget-friendly. It skips the basket but still makes crispy food.
If you’re searching for how to use a Presto ProFry deep fryer or how to use a Presto Cool Daddy deep fryer, the steps are almost the same. You just adjust for size and features.
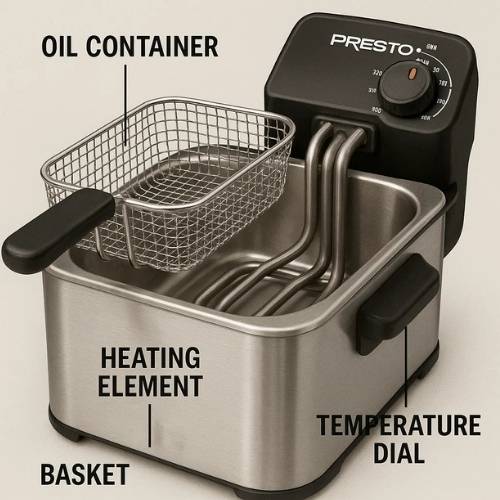
At the core, every Presto fryer includes:
- A heating element
- An oil pot with fill lines
- A temperature control
- A basket (except Fry Daddy)
Once you understand these parts, learning how to use a Presto deep fryer becomes straightforward.
How to Use a Presto Deep Fryer (Step-by-Step Guide)
If you prefer clear steps, this section is for you. I’ll break it down exactly how I do it at home.
Step 1: Unbox and Assemble
Take everything out of the box and place it on a stable counter. Attach the basket and heating element before adding oil. No tools needed. The first time I set mine up, I was surprised by how fast this step was.
Step 2: Fill with Oil
Pour oil into the fryer until it reaches the marked fill line. Never go below the minimum or above the maximum line.
I usually use peanut oil for fries because it has a clean taste and handles high heat well. Vegetable or canola oil also works fine.
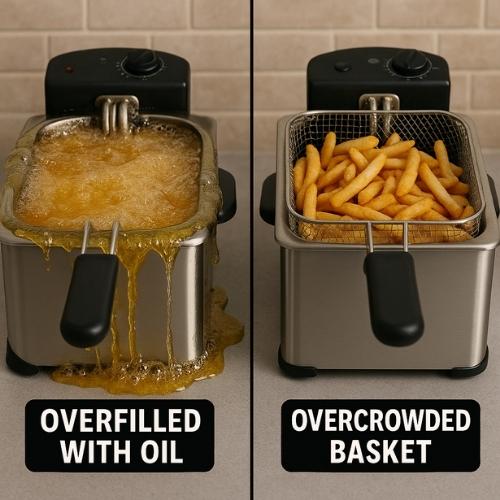
Key rule: Too much oil can overflow. Too little oil can overheat.
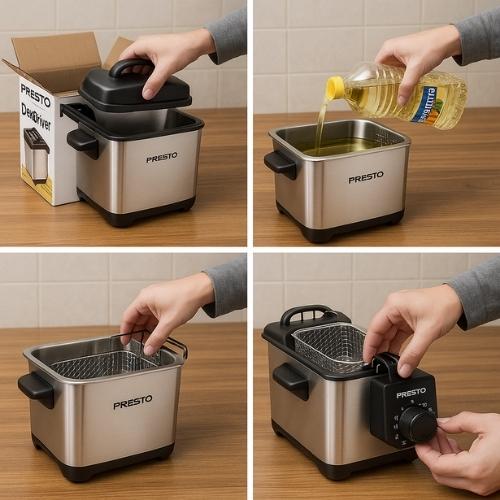
Step 3: Plug In and Preheat
Plug in the fryer and set the temperature. Most foods cook best between 350°F and 375°F. Wait until the ready light turns off before adding food.
I made the mistake of rushing this step once. The fries came out pale and greasy. Waiting for full heat makes a huge difference.
Step 4: Prepare the Food
Before frying, pat your food dry with paper towels. Water and hot oil do not mix. Even small drops can cause splattering.
If you’re using frozen food, shake off ice crystals first. This simple habit makes frying safer and cleaner.
Step 5: Lower the Basket Slowly
Place food in the basket and lower it slowly into the oil. Don’t dump food in all at once.
Overcrowding lowers the oil temperature and makes food soggy. I always fry in small batches, even if it takes longer.
Step 6: Monitor Cooking
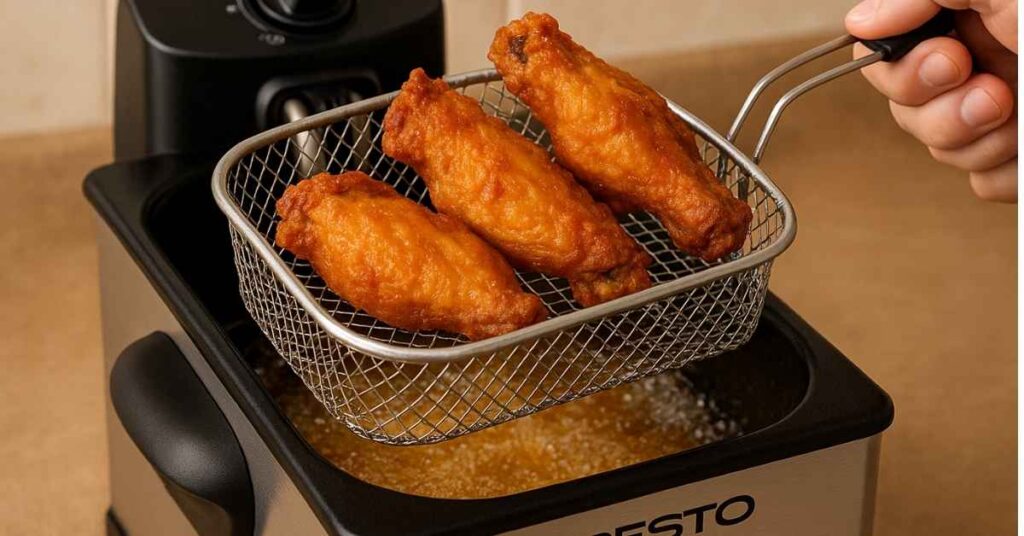
Watch the color and timing. Fries usually take about 4–5 minutes. Wings take longer.
Adding food drops the oil temperature briefly. That’s normal. Just give it time to recover.
Step 7: Drain and Serve
Lift the basket and let oil drip back into the fryer. I place food on a wire rack with paper towels underneath. This keeps it crispy instead of oily.
Serve right away for best results.
First-Time Users: Tips and Mistakes to Avoid
When learning how to use a fryer machine for the first time, mistakes happen. I made plenty. Here’s what I wish I knew earlier.
Always Dry Food
Wet food causes splatter and uneven cooking. Dry food equals safer frying and crispier results.
Never Overfill Oil
Stick to the fill line. Extra oil can rise fast when food goes in.
Check Temperature
Too cool = greasy food. Too hot = burned outside, raw inside. A thermometer helps if you’re unsure.
Avoid Overcrowding
Crowded baskets lead to soggy food. Small batches win every time.
The Three Rules You Must Follow for Safe Frying
If someone asked me the three most important rules for using a deep fryer, these would be them.
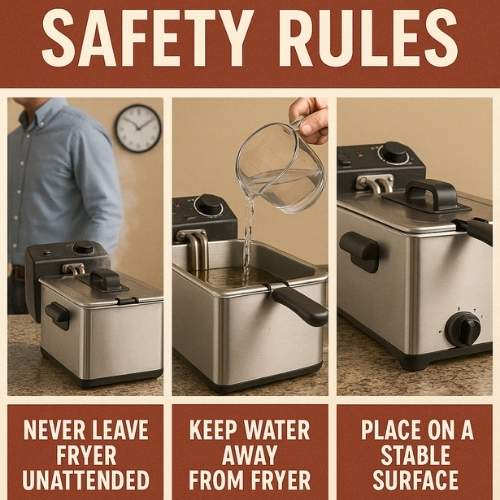
Rule 1: Never Leave the Fryer Unattended
Oil can change fast. Stay nearby and focused.
Rule 2: Keep Water Far Away
Oil and water don’t mix. Dry food and dry counters are essential.
Rule 3: Use a Flat, Heat-Safe Surface
A stable surface prevents tipping and spills.
I also keep a fire extinguisher nearby. You may never need it, but it’s smart to be prepared.
Using Different Presto Models (Quick Guide)
Presto ProFry
Best for families and parties. Large capacity and dual baskets. Great for wings and fries in big batches.
Presto Cool Daddy
Compact with a locking lid and odor filter. Ideal for apartments and beginners.
Presto Fry Daddy
Small, simple, and budget-friendly. Best for snacks and small portions.
| Model | Best For | Pros | Cons |
| Presto Profry | Families, parties | Large capacity, dual baskets, restaurant-style frying | Takes more counter space, more oil to fill |
| Presto Cool Daddy | Beginners, apartments | Compact, odor filter, locking lid | Smaller capacity, not ideal for big groups |
| Presto Fry Daddy | Singles, snacks | Affordable, simple design, quick cleanup | No basket, only good for small batches |
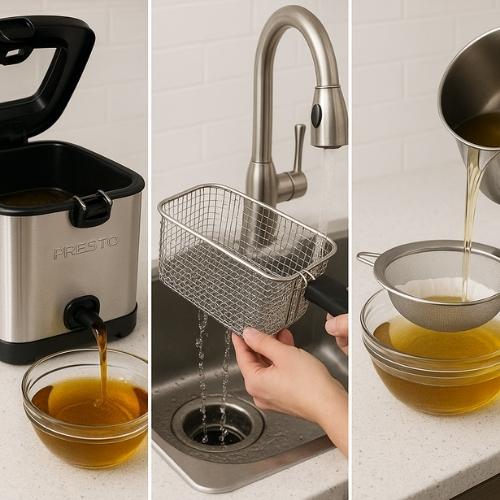
Cleaning and Maintenance Basics
Cleaning is part of safe frying.
- Let oil cool completely before draining
- Strain oil if reusing
- Handwash basket, lid, and pot
- Avoid harsh scrubbers
- Dry everything before storing
A clean fryer heats better and lasts longer.
My Personal Experience and Verdict
After months of using Presto fryers, I can say they make home frying much less stressful. Fries, shrimp, and wings come out crisp and evenly cooked. The temperature control works well, and cleanup is easier than pan frying.
It’s not perfect. It takes counter space and uses oil. But for anyone who enjoys fried food, the results are worth it.
If you’re asking “Is a Presto deep fryer worth it?”, my honest answer is yes—especially if you follow the steps and safety rules in this guide.
Conclusion about how to use presto deep fryer
Learning how to use a Presto deep fryer is easier than it looks. Once you understand oil levels, temperature, and safety basics, frying becomes smooth and predictable.
Start simple. Fries are a great first test. Then move on to wings, shrimp, or onion rings. With practice, confidence grows fast.
My advice is simple: respect the process, take your time, and enjoy it. Deep frying doesn’t have to be scary—it can be one of the most rewarding ways to cook at home.
visit Official website instructions
FAQs about how to Use Presto Deep Fryer
How do you use a Presto deep fryer?
Plug it in, add oil, heat it up, drop in your food, fry till golden, then drain.
How much oil do I need for a Presto fryer?
Most Presto fryers need about 6–8 cups of oil, depending on the model.
Can I use frozen food in a Presto fryer?
Yes, you can fry frozen food, but shake off ice crystals first.
How do I know when oil is hot enough?
The built-in light tells you, or you can drop a bread cube—it should brown in 60 seconds.
Is the Presto Cool Daddy better than the Fry Daddy?
Cool Daddy has a lid and better safety; Fry Daddy is smaller and simpler.
Read related Post:
- Ninja SP351 Review
- presto 05420 frydaddy electric deep fryer review
- How To Clean Presto Deep Fryer
- How Much Oil For Presto Deep Fryer
- How To Clean Presto Deep Fryer
- Ninja AF101 Air Fryer Toxic
- how to use hamilton beach deep fryer

Hi, I’m Rob Newaz Khan. I share practical, experience-based guidance on kitchen appliances such as air fryers and coffee makers. My content is built around real home use, common user questions, and manufacturer best practices, with the goal of helping readers use their appliances safely, fix everyday issues, and make better decisions in the kitchen.