I learned how to remove blade from Vitamix blender the hard way, during a normal clean-up after making a smoothie. My trusted Vitamix suddenly had a blade problem, and I knew I had to fix it myself. At first, the Vitamix blender blade would not come off, and that moment felt frustrating and risky. After figuring out a safe method through experience, I realized many people face the same issue but feel unsure where to start. In this guide, I’ll show you a calm, safe, and beginner-friendly way to remove the blade without fear.
Why You Might Need to Remove a Vitamix Blender Blade
Sometimes, a Vitamix blender blade won’t come off, even when you twist the base the right way. This usually happens after long use, when food dries and hardens near the blade seal. The first time this happened to me, I thought the container was ruined. It was not. A Vitamix blender blade stuck like this is very common.
Another reason is deep cleaning and bad smells that do not go away. Even with regular washing, tiny bits of food can hide under the blade. I noticed this when my smoothies started to smell strange, even though the jar looked clean. Removing the blade was the only way to clean it fully.
You may also need to remove the blade if it is worn or leaking. Over time, seals can weaken and let liquid slip through the bottom. I realized this when I saw drops under the container after blending. Learning how to remove blade from Vitamix blender early can stop bigger damage later.
All of these issues are normal with long-term use of a Vitamix. Once you know why blade removal is needed, the process feels less scary and much more doable.
How Vitamix Blade Assemblies Are Designed
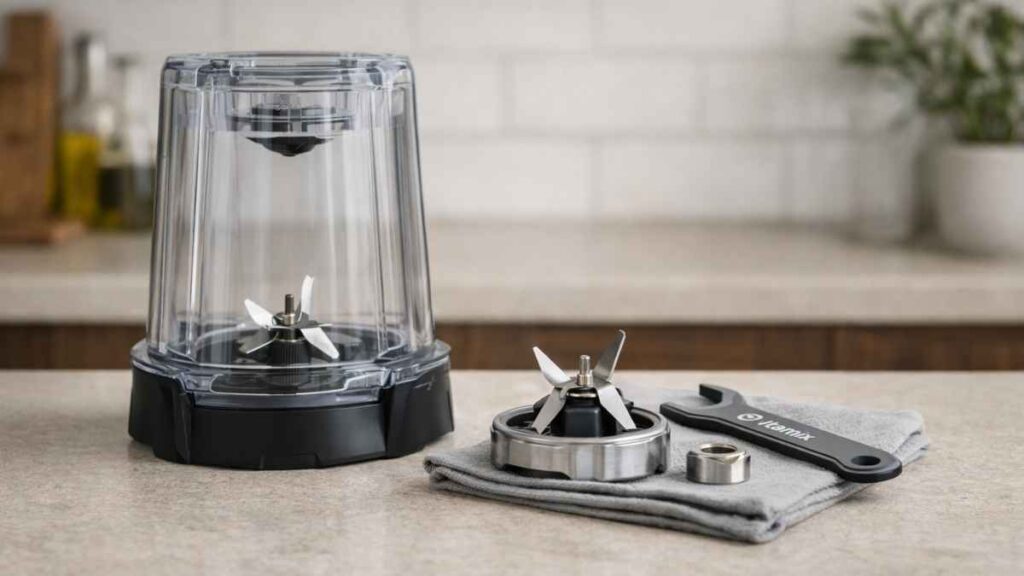
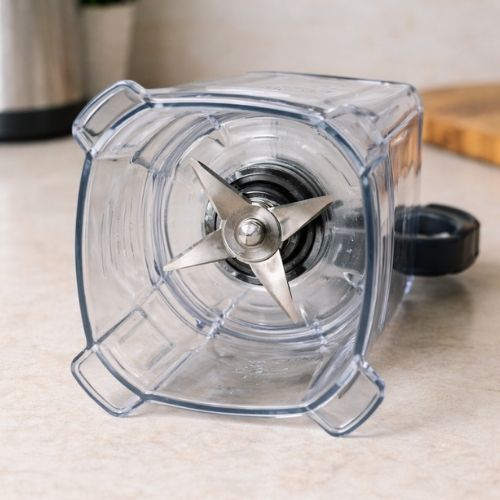
A Vitamix blade assembly is built as one solid unit that sits inside the container base. The blades, shaft, seal, and bearing all work together as a single piece. This design keeps blends smooth and powerful. It also helps prevent leaks during normal use.
The blade assembly is separate from the container body. The container holds your food, while the blade unit locks in from the bottom with a special nut. I did not realize this at first and kept trying to twist from the top. Once I understood the parts, everything made more sense.
This is also why blades do not twist out like other blenders. Many cheaper blenders use simple screw-on bases. A Vitamix uses a tighter system to handle strong motors and thick blends. That strength is great for smoothies, but it means blade removal needs the right steps.
When I learned how the design works, my fear went away. Knowing what moves and what stays fixed makes the process feel calm and controlled. Understanding the design is the first real step to removing the blade safely.
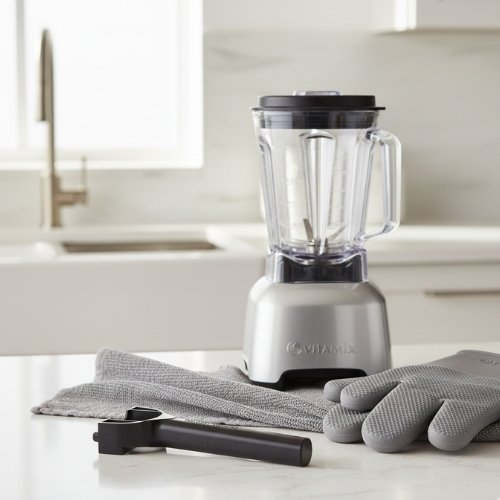
What You Need Before Removing the Blade
Before you start, having the right items nearby makes the job safer and less stressful. When I tried this without preparing, everything felt tense. Once I slowed down and gathered a few basics, the process felt calm and controlled. You do not need many tools, just the right ones.
- Vitamix Retainer Nut Wrench
This is the safest tool for the job. It fits the nut under the container and turns it without slipping. When I used it, the blade loosened easily with less force. It is the best option for working on a Vitamix container. - Towel or thick gloves
The blade is very sharp, even when it is not moving. A towel or gloves protect your hands and give you a better grip. I always wrap the blade area before touching it. This small step removes a lot of fear. - Long flathead screwdriver (last resort)
This can work if you do not have the wrench. I used it once, and it did loosen the nut. Still, it felt risky and required slow, careful pressure. Use this only if nothing else is available and go gently.
Having these items ready turns blade removal from a stressful task into a manageable one. Preparation really does make all the difference.
How to Remove Blade from Vitamix Blender Safely (Step-by-Step)
The safe way to remove a blade is slow, steady, and simple. You do not need strength. You need control and patience. I follow these same steps every time, and they have never failed me.
Step 1 – Prepare the Container
First, unplug the blender from the wall. This removes all risk before you touch anything sharp. Empty the container and rinse it so no food gets in the way. Then let the bottom gear cool if you used the blender recently.
This step matters because heat and moisture make parts tighter. I once skipped the cool-down and felt the nut resist more than usual. Waiting a few minutes makes the job easier and safer.
Step 2 – Position the Container Correctly
Turn the container upside down on a flat surface. A towel under it helps stop sliding. This position gives you full access to the base and helps keep things stable.
This is the safest way to remove blade from Vitamix container without slips. When I tried holding it in the air once, it felt awkward and unsafe. Flat and steady always works better.
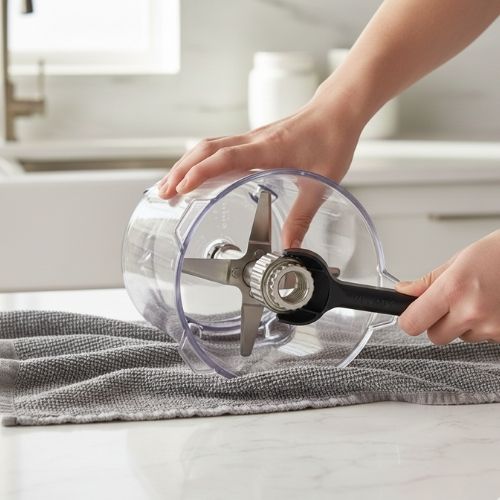
Step 3 – Loosen the Retainer Nut
Turn the nut counterclockwise, or lefty-loosey. That direction never changes. The key here is steady pressure, not force.
Using the official wrench is the safest option. It fits the nut cleanly and lowers the risk of cracks. When I use the wrench, the Vitamix blender blade removal feels smooth and controlled on my Vitamix container.
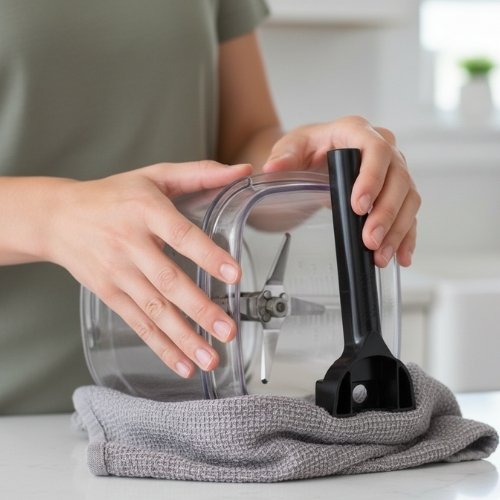
Without a wrench, a long flathead screwdriver can work. I used this once when I had no choice. It worked, but it felt tense and needed slow pressure. This method can damage plastic, so use it only as a last option during Vitamix blade assembly removal.
Step 4 – Remove the Nut and Blade Assembly
Once the nut is loose, unscrew it fully by hand. Place a towel over the blade before touching it. The blades are sharp, even when still.
Pull the blade straight out from the bottom. Do not twist it. This is the cleanest way to take blade out of Vitamix blender without stress. When it slides free, the hardest part is already done.
What to Do If the Vitamix Blade Is Stuck
When a Vitamix blender blade is stuck, the first rule is to pause. A tight blade usually means dried food or pressure around the seal. I have been there, staring at a base that would not move. Most of the time, this is normal and fixable.
A gentle reset often helps. Turn the container upside down and check that it sits flat. Make sure the nut lines up straight with the base. When things are slightly off, the blade can bind and refuse to turn.
Slow, even pressure works better than force. Try small movements back and forth instead of one hard push. I learned this after forcing it once and hearing an awful creak. That sound is your sign to stop.
Do not force the blade if it feels locked solid. Pushing harder can crack the container or strip the nut. If you see stress lines, hear popping sounds, or notice the base wobble, stop right away. These are signs the container may already be damaged.
If the Vitamix blender blade won’t come off after careful tries, step away for a few minutes. Letting things cool and relax can help more than strength. Calm hands and patience usually solve what force cannot.
Important Safety Tips Before Reinstalling the Blade
Before putting the blade back, remember this one rule: tight is good, too tight is not. Over-tightening can crack the container or damage the seal. I learned this after turning the nut just a bit too far and feeling instant regret. When you reinstall, snug is enough to remove blade from Vitamix blender safely and use it again without leaks.
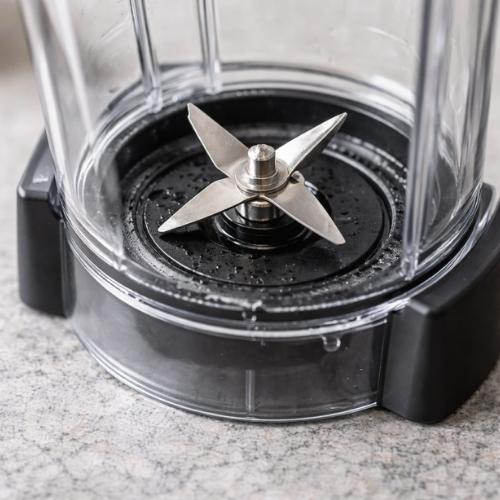
Always line up the flat sides before tightening. The blade assembly and container opening are shaped to fit only one way. If they are not aligned, the blade will sit crooked. When I rushed this step once, the base felt uneven right away, which was my warning sign.
A water leak test should never be skipped. Fill the container halfway with water and let it sit for a few minutes. If nothing drips, you are good to go. This simple test has saved me from messy surprises more than once on my Vitamix.
Taking a calm moment here makes a big difference. Reinstalling the blade with care protects the container and your counter. Slow and gentle always wins in the long run.
Common Mistakes I See People Make
- Using too much force
Many people push harder when the blade feels tight. I did this once and heard a scary creak. Force does not help and often leads to cracks. Slow pressure is always safer. - Holding bare blades
Vitamix blades are sharp, even when they are not moving. Touching them without a towel or gloves is risky. One small slip can cause a cut. Protection should never be skipped. - Skipping the leak test
Some people reinstall the blade and start blending right away. I always test with water first. This simple step has saved my counter more than once on my Vitamix. - Reinstalling a misaligned blade
If the flat sides do not line up, the blade will sit uneven. I ignored this feeling once and had to redo the whole job. Taking a few extra seconds here prevents stress later.
These mistakes are common and easy to avoid. Learning from them makes blade removal feel calm and controlled.
Vitamix container blade removal and safety guidelines
Final Thoughts – Is Removing a Vitamix Blade Worth It?
For me, removing the blade was worth it because the problem was small and clear. I needed a deep clean and a quick fix, not a full replacement. When you go slow and follow the steps, it can be a safe DIY task on a Vitamix that is out of warranty.
DIY blade removal makes sense when the container is in good shape and the blade only needs cleaning or reseating. If you see cracks, heavy leaks, or stripped parts, stopping is the smart move. In those cases, replacement is safer and saves money in the long run.
The key is knowing your limit. If something feels wrong, it probably is. Careful choices protect both you and your blender. Calm hands and clear thinking always beat rushing the job.
FAQs – Vitamix Blade Removal
Can you remove a Vitamix blade without a wrench?
Yes, you can remove a Vitamix blade without a wrench using a flat screwdriver, but it is risky. For safe Vitamix blender blade removal, the official wrench is the best option.
Why won’t my Vitamix blade come off?
A Vitamix blender blade won’t come off when food dries near the seal or the nut is tight. This is common. Slow pressure and correct alignment usually fix a stuck blade.
Is it safe to replace a Vitamix blade yourself?
Yes, it is safe to replace a Vitamix blade yourself if the blender is unplugged and handled with care. Using towels and the right steps helps remove blade from Vitamix blender safely.
Do all Vitamix containers use the same blade assembly?
No, not all Vitamix containers use the same blade assembly. Size and model matter. Always check your container type before Vitamix blade assembly removal or replacement.
Can removing the blade void the Vitamix warranty?
Removing the blade can void the warranty if your Vitamix is still covered. If it is out of warranty, blade removal is usually fine.
Read more Post:
- How To Clean Presto Deep Fryer
- Is Ninja AF101 Air Fryer Toxic
- How to Use Presto Deep Fryer
- how to use hamilton beach deep fryer
- How to Clean Hamilton Beach Air Fryer
- how to use cuisinart air fryer
- how to clean cuisinart air fryer
- ninja blender smells bad
- how to remove blade from ninja blender

Hi, I’m Rob Newaz Khan. I share practical, experience-based guidance on kitchen appliances such as air fryers and coffee makers. My content is built around real home use, common user questions, and manufacturer best practices, with the goal of helping readers use their appliances safely, fix everyday issues, and make better decisions in the kitchen.