The first time I searched for how to remove blade from kitchenaid blender, I honestly thought I was doing something wrong. The blade would not move, and I did not want to crack the glass or cut my hand. That is when I learned an important lesson about KitchenAid blenders—not every model is built the same, and blade removal depends on the design. After fixing stuck blades, tight base collars, and old gaskets, I now know what works and what to avoid. In this guide, I will show you how to remove a KitchenAid blender blade safely, step by step, without stress or guesswork.
Before You Start: Important Safety Notes
Before you touch anything, always unplug the blender. This sounds obvious, but it is the most important step. A blender can turn on by mistake, and that is not a risk worth taking. Power off first, every single time.
Wear thick gloves before you go near the blade. Blender blades are sharp like thin knives, even when they look dull. I learned this the hard way once, and I never skip gloves now. Gloves give you grip and protect your hands.
Do not force the glass jar if something feels stuck. Glass is strong, but it does not bend—it breaks. If you twist too hard, the jar can crack without warning. Slow pressure is safer than strength.
Blade edges are more dangerous than they look because they are hidden. When you reach inside a jar, your hand cannot see what it is touching. I always treat the blade like a sleeping snake. Calm, careful moves keep you safe when working with a KitchenAid blender.
Identify Your KitchenAid Blender Type First (Critical Step)
Before you touch the blade, look at your blender. This step saves time and prevents damage. KitchenAid blenders do not all work the same way. I learned this after trying to remove a blade that was never meant to move.
Classic KitchenAid Blenders With a Removable Blade Base
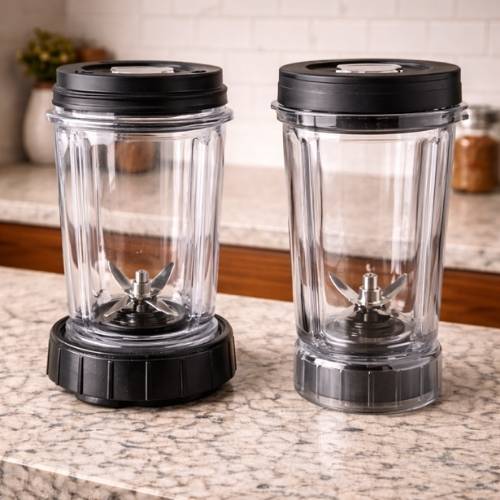
Older KitchenAid blenders often let you remove the blade. These models usually have glass or plastic jars. When you flip the jar over, you can see a threaded base at the bottom.
You can spot this design fast. The plastic base twists off by hand. A rubber gasket sits between the jar and the blade. If you see these parts, blade removal is safe and expected on your KitchenAid blender.
Modern KitchenAid Blenders With Integrated Blades
Newer models are built in a different way. The blade is sealed into the jar and does not come out. This is common on models like the K150, K400, and Pro Line.
This design is intentional. It adds strength and reduces leaks. If your jar has no twist-off base, stop here and do not force the blade.
KitchenAid Hand (Immersion) Blenders
Hand blenders can be confusing at first. The blending arm comes off the motor body with a twist. This part is meant to detach.
The blade itself stays inside the arm. It is fixed in place for balance and safety. Trying to remove it can cause damage or injury.
How to Remove Blade From a Classic KitchenAid Blender
If your KitchenAid blender has a removable base, this process is safe and straightforward. I have done it many times, and once you know the order, it feels calm and controlled. Move slowly and let the design work for you. Rushing is what causes cracks and cuts.
Step 1: Unplug and Invert the Jar
Always unplug the blender before you start. This removes all risk of the motor turning on by mistake. Once unplugged, turn the jar upside down and place it on a flat surface.
Flipping the jar gives you better control. The weight of the jar now works with you, not against you. This also keeps your hands away from the blade edge as much as possible.
Step 2: Remove the Blender Base Collar
Look at the bottom of the jar and find the plastic base collar. This is the part that holds the blade assembly in place. Turn it counter-clockwise to loosen it.
If it feels tight, use a dry towel for grip. Towels help your hands hold firm without squeezing too hard. This method works well for KitchenAid blender blade base removal without tools.

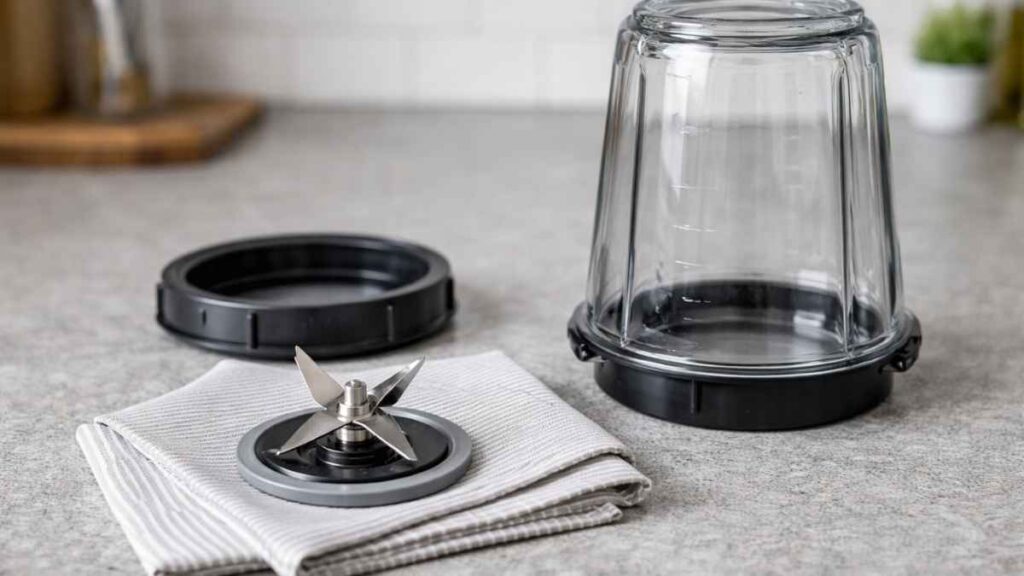
Step 3: Lift Out the Blade Assembly
Once the base collar comes off, lift the blade assembly straight out. The blade and rubber gasket usually come out together as one piece. This is normal and expected.
Set the blade assembly down on a towel with the sharp side facing away from you. This simple habit prevents small accidents. At this point, you have completed the main step to remove the blade assembly from a KitchenAid blender.
Step 4: Separate the Blade and Gasket (If Needed)
Only separate the blade from the gasket if you need to clean or replace the gasket. The rubber ring often slips off by hand with gentle pressure. If it resists, stop and reassess instead of forcing it.
If your goal is simple cleaning, there is no need to take them apart. Leaving the blade and gasket together reduces wear and keeps the seal strong. Sometimes, less work is the safer choice.
How to Remove a Stuck KitchenAid Blender Blade
If the blade will not come off, do not panic. This is very common, especially on older jars. In most cases, the blade is fine and the gasket is what is stuck. A calm approach works far better than force.
Gaskets seize over time because heat, moisture, and food residue act like glue. After years of use, the rubber grips the glass tightly. I have seen this happen even on well-cleaned blenders. The solution is patience, not strength.
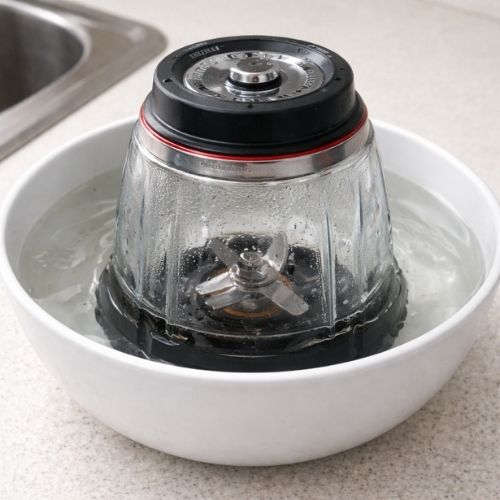
Start with a warm water soak. Place the upside-down jar in a bowl of warm water for about ten minutes. The heat softens the rubber and loosens the seal. In many cases, the blade assembly will turn free right after this step.
If it still will not move, use gentle leverage with care. Hold the jar steady and apply slow pressure to the base collar using a towel or rubber grip. Pliers can be used only on the base, never on the blade. Small, controlled movements protect both you and your KitchenAid blender.
What NOT to Do
Do not force the glass jar. Glass does not bend or warn you before it breaks. One hard twist can crack it and cause injury.
Do not hit the base with a hammer or hard object. Impact pressure breaks glass fast and removes control. This often turns a small issue into a costly mistake.
Do not twist the blade itself. The blade is sharp and not designed to handle force. Twisting it can damage the blade or cut your hand.
Quick takeaway:
If a KitchenAid blender blade is stuck, heat and patience solve most problems. If it still will not budge, stop and reassess. Replacing a gasket or jar is safer than risking injury.
Can You Remove the Blade From KitchenAid K150, K400, or Pro Line?
No, the blade does not come out on these models. The K150, K400, and Pro Line blenders are built with a sealed blade design. This is not a flaw or a trick—it is how they are meant to work. I learned this after trying to twist a blade that was never designed to move.
These models are different because the blade is molded into the jar base. This adds strength, reduces leaks, and keeps the jar stable at high speeds. Cleaning is done with water and soap, not by taking parts apart. If your jar has no twist-off base, blade removal is not part of normal care for a KitchenAid blender.
Professional repair is only needed if the blade is damaged or the bearing fails. At that point, special tools and skills are required, and most users cannot do this safely at home. In many cases, replacing the jar costs less and avoids risk. Knowing when to stop is part of using a blender the smart way.
How to Clean a KitchenAid Blender Blade Without Removing It
You do not need to remove the blade to clean it well. In fact, this is the safest way for models with fixed blades. I use this method often, and it keeps the jar fresh without risk. A simple routine works better than taking parts apart.
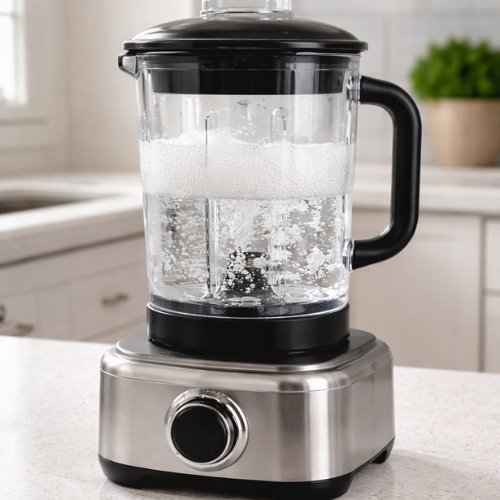
Start with soap and warm water. Add a drop of dish soap and one-third of warm water to the jar. Secure the lid and run the blender for 30 to 60 seconds. This lifts residue from the blade and sides on any KitchenAid blender.
If your blender has a self-clean or clean cycle, use it. This mode is designed for daily cleaning and blade safety. It spins fast enough to clean but slow enough to stay controlled. I use this after smoothies and it saves time.
For odors, vinegar or baking soda helps. Add warm water and a splash of white vinegar, or a teaspoon of baking soda, then blend briefly. Let it sit for a few minutes before rinsing. This removes smells without touching the blade.
Rinse well and air-dry with the lid off. Letting air move through the jar prevents trapped moisture. Clean blades stay sharp longer when they stay dry. Simple habits like this keep your blender safe and ready to use.
How to Take Apart a KitchenAid Blender Blade for Repairs (Advanced)
This level of blade removal only makes sense when something is broken. Think worn bearings, loud grinding, or leaks from the shaft. I only consider this when normal cleaning and gasket fixes do not work. For everyday care, this step is not needed.
You will need special tools to do this safely. Most repairs require a spanner wrench, locking pliers, and a way to hold the drive shaft steady. These tools help control force and prevent slips. Without them, damage is very easy.
One detail that surprises many people is the reverse thread. On some blade assemblies, the center nut loosens by turning clockwise, not left. This is done to keep the blade tight during normal use. Turning the wrong way can lock it tighter.
Most users should avoid this step because the risk is high. Sharp blades, glass jars, and strong force do not mix well. In many cases, replacing the jar or blade unit costs less and keeps you safe. Knowing when to stop is part of using a KitchenAid blender the smart way.
Common Mistakes People Make When Removing KitchenAid Blender Blades
Many people assume all KitchenAid blenders work the same way. I made this mistake early on. Some models allow blade removal, and some do not. Checking the model first prevents damage and stress.
Another common issue is ignoring reverse threading. Some blade parts loosen in the opposite direction than expected. Turning the wrong way can make the blade tighter. This small detail causes big frustration.
Skipping safety gear is also a problem. Gloves and towels may feel optional, but they matter. Blades are sharp, and glass breaks fast. Protecting your hands should always come first.
The biggest mistake is rushing. Blade removal is not about force. It is about control and patience. Slow steps keep both you and your KitchenAid blender safe.
If you are unsure whether your model allows blade removal, always check the KitchenAid blender jar and blade care instructions before attempting to disassemble any parts.
Final Thoughts: My Honest Advice After Working With KitchenAid Blenders
After working with many blenders over the years, one thing is clear to me. Most problems come from not knowing the model first. I made this mistake early on and learned the hard way. A quick check can save time, stress, and broken glass.
Always identify your blender before you try to remove the blade. Some blades are meant to come out, and some are not. Treat every jar like it has its own rules. This simple habit keeps you from forcing parts that should stay put on a KitchenAid blender.
Safety matters more than speed. Slow hands and calm steps protect you better than strength. Gloves, towels, and patience do more than force ever will. I remind myself of this every time I work near a blade.
Sometimes, replacement is the smarter choice. If a jar is cracked, a bearing is worn, or a blade will not budge after safe steps, stop. New parts cost less than injuries. Knowing when to quit is as vital as knowing how to start.
FAQs about how to remove blade from kitchenaid blender
Can you remove KitchenAid blender blades?
Yes, but only on some models. Older KitchenAid blenders with a twist-off base allow blade removal. Newer models have sealed blades that do not come out.
How do you remove a stuck blender blade?
Soak the upside-down jar in warm water for 10 minutes. This softens the gasket and often loosens the blade. Use slow pressure with a towel, not force.
Are KitchenAid blender blades replaceable?
On removable-blade models, yes. You can replace the blade assembly or gasket. On sealed-blade jars, the entire jar is usually replaced instead.
Why won’t my KitchenAid blender blade come off?
Most of the time, the gasket is stuck or the model has a fixed blade. If there is no twist-off base, the blade is not meant to be removed on a KitchenAid blender.
Is it safe to pry a blender blade loose?
No. Prying can crack the glass and cause injury. Heat, patience, and gentle grip are safe methods. If it still won’t move, stop and reassess.
Read more Post:
- How To Clean Presto Deep Fryer
- Is Ninja AF101 Air Fryer Toxic
- How to Use Presto Deep Fryer
- how to use hamilton beach deep fryer
- How to Clean Hamilton Beach Air Fryer
- how to use cuisinart air fryer
- how to clean chefman deep fryer

Hi, I’m Rob Newaz Khan. I share practical, experience-based guidance on kitchen appliances such as air fryers and coffee makers. My content is built around real home use, common user questions, and manufacturer best practices, with the goal of helping readers use their appliances safely, fix everyday issues, and make better decisions in the kitchen.