

You wake up and crave a rich, warm latte. But you want to stay right in your own cozy home! I have studied the best cafe tricks to show you exactly how to froth milk with a frother. We will look at the clear steps and the right milk to make thick, sweet foam. Grab your cup and let us make a great drink right now!
What You Need to Froth Milk at Home
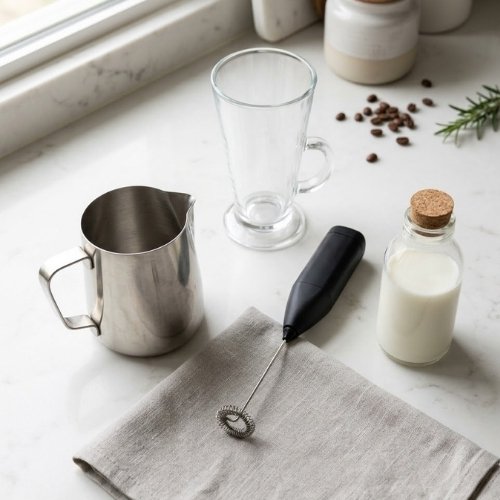
Before we start, let’s get ready. The right tools and ingredients make all the difference. With a handheld frother and a tall cup, you can make creamy foam at home in minutes.
Equipment
You need a handheld frother. These are small, easy, and quick to use. Any other frother works too. Use a tall cup or a stainless steel pitcher. It gives milk room to rise as it froths. Warm your milk first with a microwave or stovetop, but don’t overheat it.
Best Milk Types
The milk you pick changes the foam a lot. 2% or whole milk gives thick, creamy foam. For plant-based milk, oat, almond, or barista blends work well. Milk with more fat makes foam thicker and smooth. Using whole milk or barista oat milk gives the best results every time.
Step-by-Step Guide to Frothing Milk with a Frother
Here is the best way to make thick foam right at home. I use this fun routine every single day for my morning coffee. Learning how to froth milk with a frother is actually quite easy. Let us walk through the simple steps to make your perfect cup.
Step 1 – Prepare the Milk
To prepare your milk, always start with a fresh and cold batch. Heat the milk on the stove until it just starts to steam. Keep the heat under 150 degrees so the milk stays sweet. Hot milk that boils tastes burnt and will not hold bubbles well.
Step 2 – Position the Frother
To position the frother, place the whisk deep into a tall cup. Fill the tall cup no more than half full with your milk. The milk will double in size and needs a lot of room. I once filled my cup too high and made a huge mess!
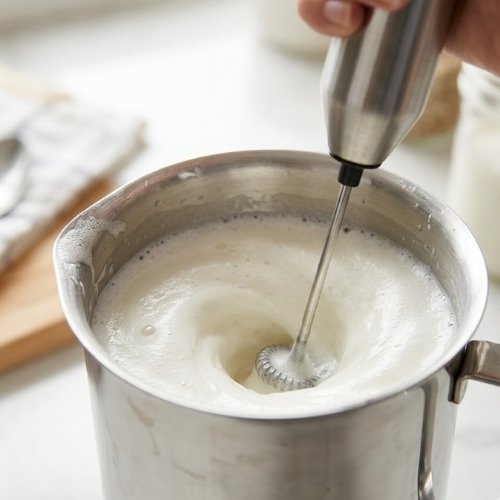
Step 3 – Create Foam (Aerate)
To create sweet foam, turn the tool on near the milk top. Keep the frother near the surface for two to four full seconds. You will see a thick layer of light bubbles start to form. This quick step pulls fresh air in to make the foam rich.
Step 4 – Texturize
To texturize the milk, push the wand deep and tilt your cup. This move makes the milk spin fast like a small water storm. The fast spin breaks big bubbles into a smooth and silky mix. This soft microfoam is exactly what you need to draw latte art.
Step 5 – Finish
To finish the job, let it spin for thirty to sixty seconds. Turn the tool off before you pull it out of the milk. This smart trick stops the hot milk from splashing all over you. Tap the cup on the desk twice to pop any large bubbles.

Tips for Perfect Froth Every Time
Getting great foam is more than just steps—it’s in small habits. Don’t overheat your milk. Hot milk burns and loses its sweetness. Keep it just steaming. This helps the foam stay creamy and smooth.
Clean your frother right away. Milk dries fast and can block the whisk. Rinse it in warm water or use a little soap. This keeps your frother working well every time.
Pick the right milk. Whole milk or barista oat milk makes thick, stable foam. Low-fat milk can collapse quickly. I like to tap the container twice after frothing. It breaks big bubbles and leaves smooth, silky foam.
Do these things, and your foam will be rich and creamy. Every cup will feel like a café drink.
“If you are a visual learner, you can watch my full video tutorial on frothing milk to see exactly how to make a great drink right now!”
Common Mistakes to Avoid
Even small mistakes can ruin your milk foam. The first is overheating milk. If it gets too hot, it scalds and tastes burnt. The foam will also fall apart. I always keep my milk just steaming to avoid this.
Another mistake is submerging the frother too deep at first. If the whisk is too low, it won’t pull in enough air. The foam will be thin and weak. Start just below the surface to trap air properly.
Finally, using low-fat or unsuitable milk can cause your foam to collapse quickly. Whole milk or barista-style plant milk works best. I’ve tried skim milk, and the foam just disappears fast. Choosing the right milk makes a huge difference.
By avoiding these mistakes, you can get thick, creamy, café-style foam at home every time.
Conclusion
Frothing milk at home doesn’t have to be hard. Start with fresh, cold milk, a good frother, and the right cup. Follow the steps: heat, position, aerate, texturize, and finish. Each small move builds creamy, café-style foam.
Don’t be afraid to experiment. Try different milk types, or play with how long you froth. Every cup teaches you something new, and soon your mornings will feel like a coffeehouse ritual right in your kitchen.
Give it a try today. Grab your frother, pour your favorite milk, and make a cup that feels special. Once you taste it, you’ll wonder why you ever waited to start frothing at home.
Frequently Asked Questions
How long does it take to froth milk with a frother?
It takes about thirty to sixty seconds to froth milk with a frother. Just hold the wand in your warm milk and let it spin. Soon, you will have thick foam for your nice warm cup!
Can you froth plant milk with a handheld frother?
Yes, you can froth plant milk with a handheld frother. Oat milk and rich almond blends work best for this. They have high fat that makes the foam thick and very sweet to drink.
How do I clean my tool after I froth milk with a frother?
You should clean your tool right after you froth milk with a frother. Just run the wand in a cup of hot water. Add a drop of soap to wash the old milk right off the wire whisk.
Why does it fail when I froth milk with a frother?
It can fail to froth milk with a frother if the milk gets too hot. Thin skim milk will also fall flat fast. Use warm whole milk and keep the wand near the top to fix this issue.
Related Post:

Hi, I’m Rob Newaz Khan. I share practical, experience-based guidance on kitchen appliances such as air fryers and coffee makers. My content is built around real home use, common user questions, and manufacturer best practices, with the goal of helping readers use their appliances safely, fix everyday issues, and make better decisions in the kitchen.