I still remember the first time I searched for how to remove gasket from ninja blender because a bad smell would not go away. The gasket was tight, wet, and honestly frustrating, like it was glued in place. After learning safe tricks through regular cleaning, I realized ninja blender gasket removal is simple when you know where to lift and how to do it gently. In this guide, I’ll show you how to remove a rubber gasket from a Ninja blender safely, even if the gasket is stuck in the lid. Follow along, and you’ll clean your blender with confidence—no damage, no stress, just results.
What Is the Gasket on a Ninja Blender and Why It Gets Stuck
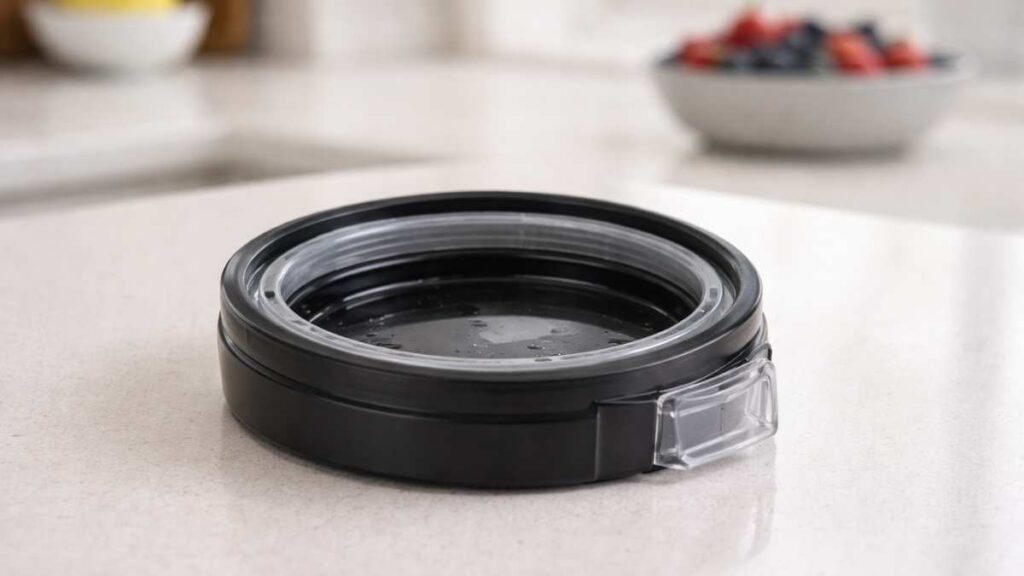
The gasket on a Ninja blender is a soft rubber ring. It sits in the lid or under the blade base. This ninja blender seal keeps liquids inside while blending. In simple words, it stops leaks.
Ninja makes the gasket fit very tight on purpose. The ninja blender O-ring presses hard against the plastic. This strong seal helps when blending smoothies and shakes. But that same tight fit makes people ask, why is my ninja blender gasket stuck.
Moisture is the most common reason the gasket will not come out. Water gets behind the seal and creates suction. It feels stuck, even when nothing is broken. This happens often after washing.
Food buildup is another cause. Small bits of fruit or powder dry under the gasket. Heat from blending can also make the rubber expand a little. When moisture, food, and heat mix, the gasket grips harder—but it can still be removed safely.
Where the Gasket Is Located on a Ninja Blender
Gasket in the Lid
The most common gasket is in the lid. It sits in a thin groove under the rim. This seal keeps liquid from splashing out while blending. That is why many people remove gasket from Ninja blender lid first.
From my experience, lid gaskets get dirty fast. Liquid hits the lid during blending and dries there. Food bits stick and stay hidden. This is often where bad smells start.
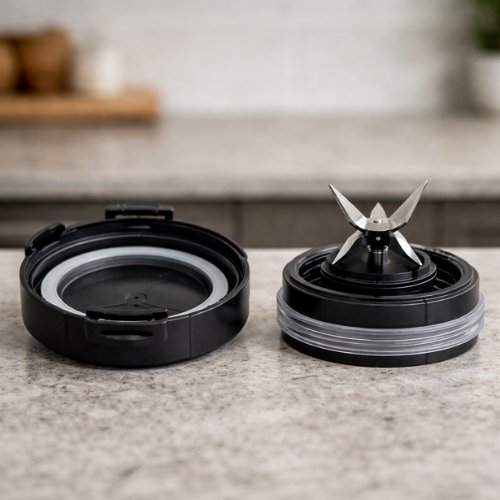
Gasket in the Blade Assembly
Some Ninja blenders also have a gasket in the blade base. This is part of ninja blender rubber gasket removal when leaks happen near the bottom. The gasket sits between the blade unit and the cup. It works like a washer to block leaks.
The key difference is location. Lid gaskets face splashes and air. Blade gaskets face pressure and weight. Both seals matter, but blade gaskets are easier to miss. Once you know where each one sits, cleaning feels simple.
Tools I Use to Remove a Ninja Blender Gasket Safely
The safest way to remove a Ninja blender gasket is to use simple tools with a gentle touch. I learned this after trying to rush it once and realizing force never helps. When you use the right tool, you can remove ninja blender gasket safely without stress. Think slow and light, not strong.
Best Safe Tools
Slightly curved dental pick
This is the tool I trust the most. The curved tip slides under the seal with ease. It lifts the edge without tearing the rubber. For me, this is the safest way to remove ninja blender seal with control.
Spoon handle or dull butter knife
A spoon handle works well if you do not have a pick. The rounded edge helps remove blender gasket without damage. I always avoid sharp knives because they can cut the rubber fast. Slow pressure is enough.
Tweezers for grip
Tweezers are useful after the gasket edge is loose. They help you grab and lift the seal by hand. I use them only for grip, not prying. This keeps the gasket in good shape.
Straw brush tip
The plastic tip of a straw brush is soft and safe. It hooks under the seal without scratching plastic. This tool is gentle and works well for beginners. It’s a smart option if you want a safe way to remove ninja blender seal at home.
Each of these tools works because they respect the gasket. The goal is not speed. The goal is control. When you treat the gasket gently, it comes out clean and goes back in without issues.
Step-by-Step How to remove gasket from ninja blender
Step 1 – Unplug and Disassemble
First, unplug the blender. This keeps you safe and relaxed. I always do this before touching any part. To start how to remove rubber gasket from ninja blender, take off the lid or unscrew the blade base. Once the part is separate, the gasket is easy to see and reach.
Step 2 – Loosen the Edge Gently
Next, slide your tool under the edge of the gasket. Do this slowly and with care. A small lift and light twist is enough to break the seal. This gentle move is the safest way when learning how to take out ninja blender gasket without tearing it.
Step 3 – Lift and Detach the Gasket
When one side pops up, stop using tools. Use your fingers to pull the gasket out the rest of the way. This is how to detach ninja blender gasket without stretching it. Think of it like peeling a sticker slowly, not ripping it fast.

Each step works best when you stay calm. Rushing adds force, and force causes damage. With patience, the gasket comes out clean and goes back in just as easily.
What to Do If the Gasket Is Stuck and Won’t Come Out
If your ninja blender gasket won’t come out, the first rule is patience. I have been there, holding the lid and wondering if I was doing something wrong. Most of the time, the gasket is not damaged at all. It is just holding on tight.
When a gasket is stuck in the Ninja blender lid, pause and reset your grip. Move your tool to a new spot and try again from a different angle. A small shift often breaks the seal. This works better than pushing harder.
Warm water can help more than force. Run warm water over the lid or blade base for a minute. Heat helps loosen dried food and reduces suction. This step alone often frees a ninja blender seal stuck in place.
If it still feels tight, stop and try again later. Rushing leads to tears or stretching. Think of the gasket like a tight jar lid. A little time and gentle moves work better than strength.
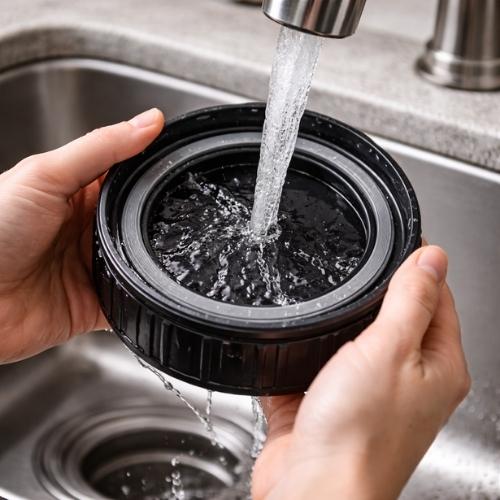
How I Clean the Gasket After Removal
The best way to clean the gasket is with warm, soapy water. I rinse it right after removal so food does not dry again. A soft brush or fingers work fine. This quick wash removes most residue fast.
If there is a smell, I use a vinegar soak. I place the gasket in warm water with a splash of white vinegar for 10 to 15 minutes. This breaks odor and kills hidden mold. It is simple and very effective.
Drying matters more than people think. I always air-dry the gasket and the groove fully before putting it back. Trapped moisture leads to smells and mold. A dry gasket seals better and lasts longer.
Regular cleaning brings long-term benefits. Odors stay away. Mold does not grow. The seal stays tight and leak-free. A clean gasket makes the blender feel fresh every time you use it.
When You Should Replace a Ninja Blender Gasket
You should replace the gasket if you see visible cracks. Even small splits can let liquid leak out. I learned this after chasing tiny drips that never stopped. A cracked gasket will not seal well, no matter how clean it is.
Stretching is another clear sign. If the gasket feels loose or does not sit flat, it is worn out. A stretched seal slips from its groove and causes leaks. When this happens, cleaning will not fix the problem.
Persistent leaks mean it is time for a new gasket. If leaks return after careful cleaning and drying, the seal has failed. I stop troubleshooting at this point and replace it. That saves time and frustration.
Replacement gaskets are easy to find through Ninja Kitchen. Using the right fit restores a tight seal. A fresh gasket brings back smooth blending with no mess and no worry.
How Often I Remove and Clean My Ninja Blender Gasket
I remove and clean the gasket more often when I make smoothies. Thick blends splash and leave residue fast. Fruits, seeds, and greens hide under the seal. In this case, I clean the gasket every few uses to avoid smell.
Dry blending is easier on the gasket. When I blend spices or dry oats, very little moisture gets trapped. I still check the seal, but I clean it less often. A quick rinse is usually enough here.
Protein shakes and dairy need extra care. Milk, yogurt, and whey stick and spoil fast. I learned this the hard way after one bad smell lingered for days. With dairy, I remove and clean the gasket almost every time.
For most people, a realistic rule is once a week. If you blend daily, check it more often. Think of the gasket like a sponge. Clean it before it smells, not after.
Common Mistakes to Avoid During Ninja Blender Gasket Removal
- Using sharp knives
Sharp blades cut rubber fast and can slip. I learned this the hard way once. Always use dull, rounded tools instead. - Pulling too hard
Yanking stretches the gasket and weakens the seal. Slow and steady pressure works better than force. - Reinstalling the gasket while wet
Wet gaskets trap moisture and cause smell or mold. Let both the gasket and groove dry fully before putting it back. - Rushing the process
Speed leads to damage. Treat the gasket gently, like a sponge, not a stuck bolt. Calm hands save time later.
Ninja blender gasket cleaning and care instructions
Conclusion:
Removing a Ninja blender gasket is safe when you do it the right way. I learned that patience and gentle tools matter more than strength. Once you understand how the gasket works, the fear goes away. It becomes a simple habit, not a struggle.
Routine cleaning makes a big difference. A clean gasket prevents smells, mold, and leaks before they start. I now check mine often, and my blender stays fresh. Small care saves bigger problems later.
If you are new to this, do not worry. Everyone struggles the first time. Go slow, stay calm, and trust the process. With practice, gasket removal feels easy and natural.
FAQs
Why does my Ninja blender gasket keep getting stuck?
My Ninja blender gasket keeps getting stuck because moisture and food get trapped under the seal. Heat can also tighten the ninja blender seal, making gasket removal harder.
Can removing the gasket damage my Ninja blender?
Removing the gasket will not damage your Ninja blender if done gently. Using safe tools helps remove the ninja blender gasket without damage or harm to the lid.
Is it safe to remove the gasket every time?
Yes, it is safe to remove the gasket every time if you clean it gently. Regular ninja blender gasket removal helps prevent smells, mold, and leaks over time.
Do all Ninja blenders have removable gaskets?
Most Ninja blenders have removable gaskets in the lid or blade base. These seals are designed to come out for cleaning and proper ninja blender gasket care.
What is the safest tool for ninja blender seal removal?
The safest tool for ninja blender seal removal is a curved dental pick or spoon handle. These tools lift the gasket gently and help remove blender gasket without damage.
Read more Post:
- ninja blender smells bad
- how to remove blade from ninja blender
- how to remove blade from vitamix blender
- how to remove cup from ninja blender

Hi, I’m Rob Newaz Khan. I share practical, experience-based guidance on kitchen appliances such as air fryers and coffee makers. My content is built around real home use, common user questions, and manufacturer best practices, with the goal of helping readers use their appliances safely, fix everyday issues, and make better decisions in the kitchen.