The first time I learned how to remove blade from ninja blender, it wasn’t calm or smooth—I had a cup stuck tight and sharp blades staring back at me. That moment taught me something important: Ninja blenders don’t all work the same, and blade removal depends on the model you’re using. Some Ninja blades lift out, some twist off, and some are not meant for blade assembly removal at all. Once you understand the difference, ninja blender blade removal becomes simple and safe, not stressful. In this guide, I’ll show you exactly how to take the blade out the right way—so you can remove a ninja blender blade safely and with confidence, even if it feels stuck.
Before You Start: Important Safety Rules (Read First)
Before anything else, always unplug the blender. I do this every time, even when I’m in a hurry. Power and sharp blades never mix. If the plug is out, you can focus on how to remove blade from ninja blender without fear.
Never grab the metal blades with your fingers. They are sharper than they look. I learned this early and never forgot it. Hold only the plastic shaft or base when doing ninja blender blade removal. This one habit keeps your hands safe.
Many people think Ninja blades are dull when they are still. That is not true. Ninja blades are razor sharp by design. Treat them with respect. Think of them like glass—one wrong move, and you get cut.
Hand position matters more than strength. Keep your fingers above the blade line and grip the plastic parts firmly. I imagine lifting a thorny plant by the pot, not the spikes. This makes it much easier to take the blade out of a Ninja blender safely.
If the blade feels stuck, stop. Do not force it. Twisting too hard can crack the cup or ruin the threads. A ninja blender blade stuck problem needs patience, not power. Slow steps protect both you and your blender.
Identify Your Ninja Blender Type First (Critical Step)
Before you try anything else, identify your Ninja blender type. This is the fastest way to avoid mistakes. I’ve seen many people struggle because they followed the wrong steps. When learning how to remove blade from ninja blender, the model always comes first.
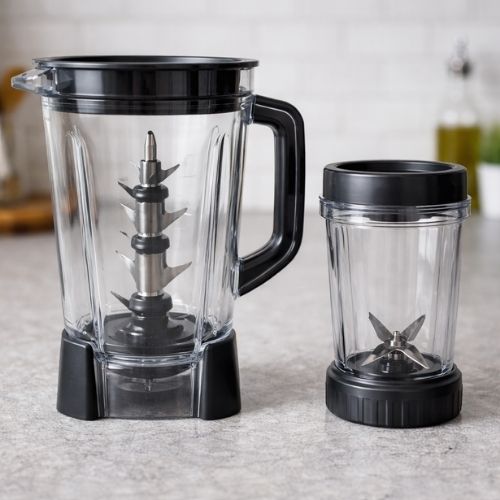
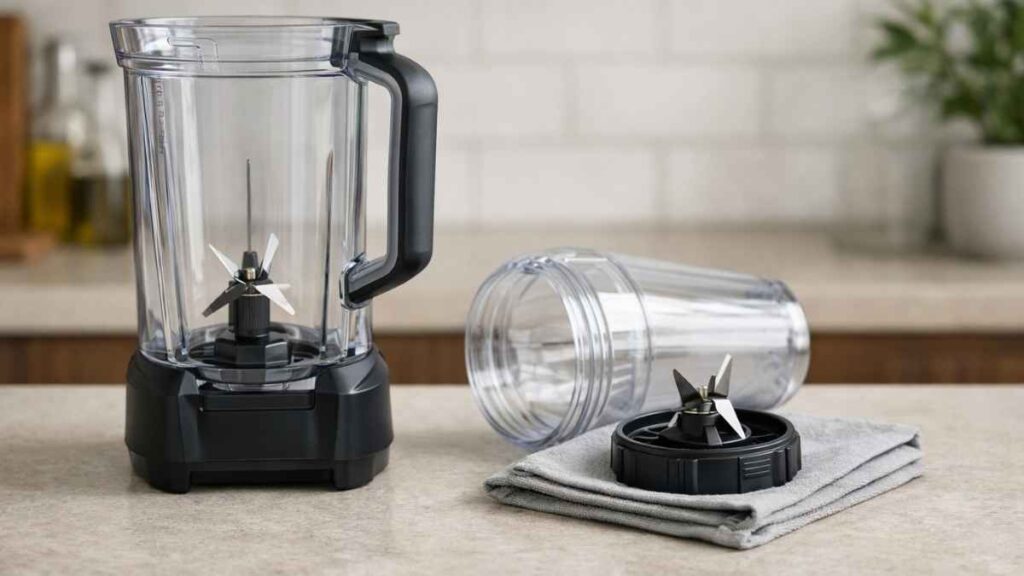
Large Pitcher Ninja Blenders (Total Crushing / Stacked Blades)
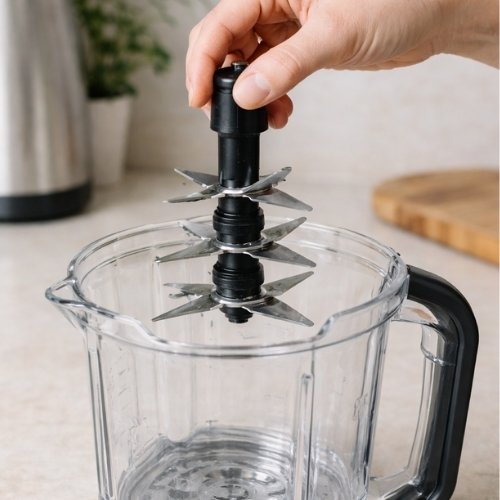
If you use a large pitcher, you likely have a stacked blade assembly. These are common in many Ninja pitcher models. The key thing to know is simple: the blade is not locked in place. It just sits there.
The blade assembly is held by gravity and a gear socket, nothing more. That means it can slide out when lifted straight up. This is why pitcher blades can fall out if you tip the container. Knowing this makes ninja blender blade removal safer and easier.
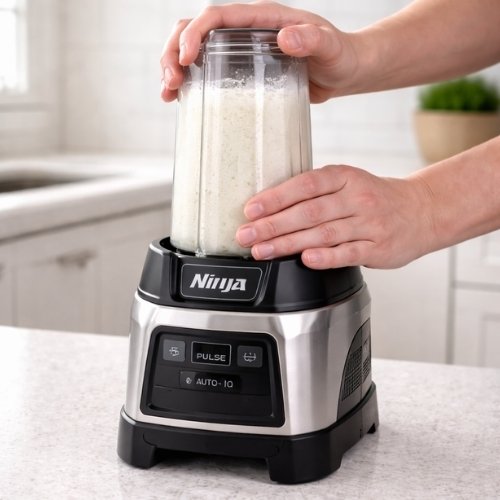
Single-Serve Ninja Blenders (Nutri Ninja Cups)
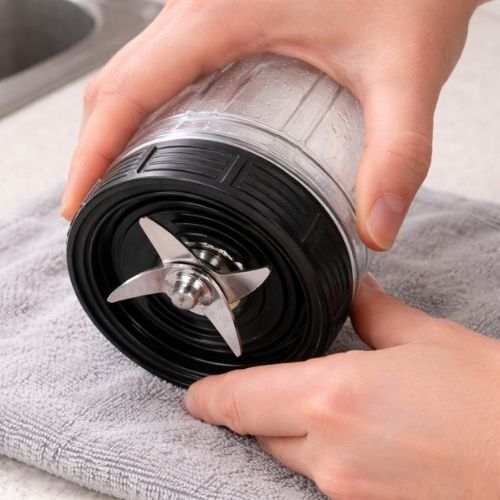
Single-serve cups work very differently. Here, the blade assembly is also the cup base. It screws on and off like a lid. This design is strong, but it can feel tight.
The threads and rubber gasket create a strong seal. That is why many people think the blade is stuck. In most cases, it isn’t. It just needs the right twist and patience when you remove the blade from a Ninja blender cup.
Once you know which type you have, the rest of the steps feel clear. This one check saves time, stress, and cuts.
How to Remove Blade From a Ninja Blender Pitcher
To remove a blade from a Ninja blender pitcher, start by taking off the lid. Press the release button and lift the handle until it unlocks. This gives you clear access and keeps your hands safe. Simple step, big difference.
Next, find the plastic blade shaft in the center of the pitcher. This is the only part you should touch. I never go near the metal edges. Holding plastic keeps control and prevents cuts during ninja blender blade removal.
Now grip the shaft firmly and lift straight up. Do not twist. Use steady pressure and let gravity work. In most Ninja pitchers, the blade is not locked. It slides out clean when lifted the right way.
If the blade resists, it is often due to liquid suction, not damage. Tilt the pitcher slightly and try again. A small angle breaks the seal. This usually solves the problem when learning how to take blade out of ninja blender pitchers.
Important note: pitcher blades can fall out if tipped. Always remove them on purpose and over a soft surface. I treat it like pouring hot tea—slow, aware, and in control. That habit makes removing a Ninja blender blade safe every time.
How to Remove Blade From a Ninja Blender Cup
To remove blade from ninja blender cup, turn the cup upside down after blending. I do this over the sink or a towel. It keeps things steady and avoids spills. This small step makes ninja blender cup blade removal feel controlled.
Next, hold the cup body, not the blade base. This matters more than it sounds. Gripping the blade base can make it tighter. Holding the cup gives you leverage and helps you remove a Ninja blender blade safely.
Now twist the blade assembly counter-clockwise. Use slow, even pressure. No jerks. In most Ninja cups, the blade base is threaded. It will loosen when turned the right way.
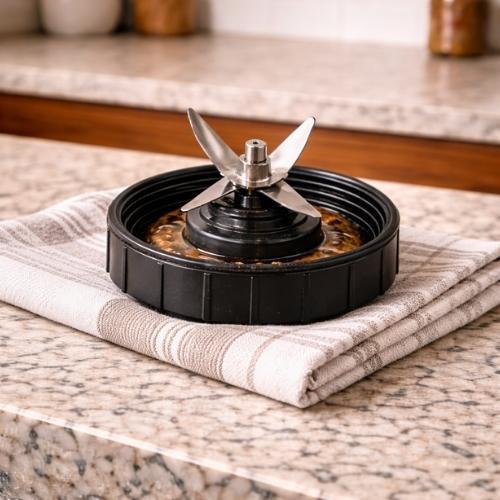
Once it loosens, lift the blade unit away. Keep it level and away from your fingers. This is the clean finish to remove blade from ninja blender cup without cuts.
If the cup feels harder than a pitcher, that’s normal. Pressure seals, gasket compression, and sticky food residue all play a role. Think of it like a tight jar lid. Patience beats force every time when a ninja blender blade feels stuck.
What to Do If Your Ninja Blender Blade Won’t Come Off
If your ninja blender blade won’t come off, don’t panic. This is very common and rarely means something is broken. In most cases, the blade is just tight, not stuck forever. Slow and steady steps work best when a ninja blender blade feels stuck.
Re-Seat and Twist Method (Most Effective)
Start by placing the cup back onto the motor base and locking it in. Press down firmly with one hand, then twist the blade counter-clockwise again. This helps the threads line up and break the seal. I’ve fixed many stuck blades this way, and it often works on the first try with Ninja cups.
Warm Water or Gentle Heat Method
If the blade still won’t move, gentle heat can help. Soak the blade base in warm, not boiling, water for five to ten minutes. Heat softens the rubber gasket and loosens its grip. A hairdryer around the plastic rim for a few seconds can also help when the seal is very tight.
What NOT to Do
Avoid using pliers on plastic threads, even if you feel tempted. Do not pry with knives or screwdrivers, and never force the twist past resistance. These actions crack cups and ruin threads. When removing a ninja blender blade, patience protects both your hands and your blender.
Can You Disassemble Ninja Blender Blades?
Many people ask if ninja blender blade assembly removal is possible. The short truth is simple: metal blades are not made for user disassembly. I learned this after trying to “fix” a noisy blade years ago. Ninja blades are built as sealed units for safety and balance.
Inside the blade base, bearings and seals are factory-installed. These parts keep liquids out and help the blade spin smoothly. Once opened, they cannot be reset at home. That’s why a blade may wobble, leak, or grind after tampering.
If a blade starts to shake, leak, or sound rough, replacement is safer than repair. This is why Ninja sells blade assemblies as complete units, not loose parts. Think of it like a car tire, not the engine. You replace it whole to stay safe and keep performance strong.
How to Remove the Top of a Ninja Blender (Lid Release)
To remove the top of a Ninja blender, look for the lid release button or handle lock first. Most lids unlock when you lift the handle or press the release point. I always pause here and check, because forcing the lid never ends well. This quick check answers how to remove top of ninja blender the safe way.
Next, lift the lid at the correct angle. Go straight up, not sideways. When the angle is right, the lid comes off smoothly. This small detail prevents jams and makes removal feel easy, not stiff.
Avoid forcing the lid if it feels stuck. Pushing or twisting too hard can warp the locking tabs over time. I’ve seen lids stop sealing well because of this. With Ninja blenders, gentle pressure and patience protect the lock and keep the lid working like new.
Common Mistakes People Make When Removing Ninja Blades
One common mistake is grabbing the metal edges. The blades look calm when still, but they cut fast. I’ve seen small slips turn into painful cuts. Always hold plastic parts when you remove a Ninja blender blade.
Another mistake is twisting the wrong direction. Pitcher blades lift straight out, while cup blades twist off. Mixing these steps causes frustration and stuck parts. Knowing the model first makes ninja blender blade removal smooth.
Many people also remove blades over hard surfaces. When a blade drops, it can chip or bounce. I always work over a towel or sink. This simple habit protects both the blade and the counter.
Some users confuse pitcher blades with cup blades. They look similar but work very differently. Treating them the same leads to force and damage. Each blade has its own safe removal method.
A quiet mistake is over-cleaning by removing blades too often. Ninja blades do not need daily removal. Extra handling wears seals and threads. Remove blades only when needed, and your blender will last longer.
Ninja blender blade safety and care guidelines
Final Thoughts: When Blade Removal Is Necessary—and When It’s Not
From real use, I’ve learned that blade removal should be done with a reason, not by habit. You don’t need to remove blades after every blend. Most cleaning can be done with soap and water while the blade stays in place. Knowing when to stop is part of knowing how to remove blade from ninja blender the right way.
I always choose safety over speed. Rushing leads to cuts, cracked cups, and stripped threads. Slow steps keep hands safe and parts working longer. Calm work beats fast work every time.
If a blade is bent, leaking, or making noise, replacement is the smart move. Trying to fix damaged blade assemblies rarely ends well. New parts cost less than injuries or broken containers.
Most important, you’re not doing it wrong. Ninja blades can feel tricky at first. With the right steps and patience, blade removal becomes simple and stress-free. Confidence comes from understanding, not force.
FAQs About Removing Ninja Blender Blades
Can you remove Ninja blender blades?
Yes, you can remove Ninja blender blades, but the steps change by model. Pitcher blades lift out, while cup blades twist off. Always unplug first to remove blade from ninja blender safely.
Why is my Ninja blender blade stuck?
A Ninja blender blade gets stuck due to pressure seals, food build-up, or tight threads. Warm water and slow twisting usually fix a ninja blender blade stuck issue without force.
Are Ninja blender blades replaceable?
Yes, Ninja blender blades are replaceable, but only as full units. Ninja sells blade assemblies as complete parts, not loose blades, for safety and proper balance.
Is it safe to remove Ninja blender blades for cleaning?
It is safe to remove Ninja blender blades at times, but not often. Frequent blade removal can wear seals faster. Most cleaning works fine with the blade left in place.
Do Ninja blender blades lock into place?
Ninja blender blades do not lock the same way on all models. Pitcher blades sit loose on a gear, while single-serve cup blades screw into the base.
Read more Post:
- How To Clean Presto Deep Fryer
- Is Ninja AF101 Air Fryer Toxic
- How to Use Presto Deep Fryer
- how to use hamilton beach deep fryer
- How to Clean Hamilton Beach Air Fryer
- how to use cuisinart air fryer
- how to clean cuisinart air fryer
- ninja blender smells bad

Hi, I’m Rob Newaz Khan. I share practical, experience-based guidance on kitchen appliances such as air fryers and coffee makers. My content is built around real home use, common user questions, and manufacturer best practices, with the goal of helping readers use their appliances safely, fix everyday issues, and make better decisions in the kitchen.