If you’ve just bought a Hamilton Beach air fryer and you’re wondering how to use a Hamilton Beach air fryer without messing up your first meal, you’re not alone. I still remember unboxing mine for the first time. I was excited to cook healthier food, but I also stared at the basket and buttons thinking, “Okay… now what?”After months of daily use, trial and error, and a few burnt batches along the way, I’ve learned what actually works.
In this guide, I’ll walk you through how to use Hamilton Beach air fryer step by step, share practical tips from my own kitchen, and explain how it compares to using a Hamilton Beach deep fryer. Whether you’re brand new or just need a refresher, this guide will help you cook with confidence in 2026.
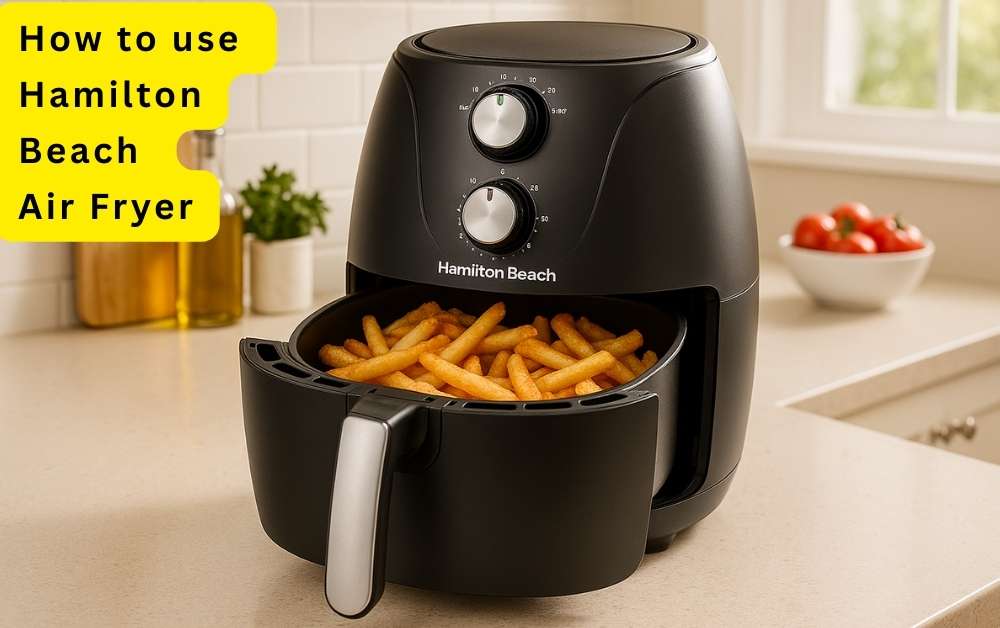
How Do You Use a Hamilton Beach Air Fryer?
To use a Hamilton Beach air fryer, place food in the basket in a single layer, set the temperature and time, shake or flip halfway through cooking, and remove food carefully once done. Preheating for 3–5 minutes improves crispiness.
Getting Started with Your Hamilton Beach Air Fryer
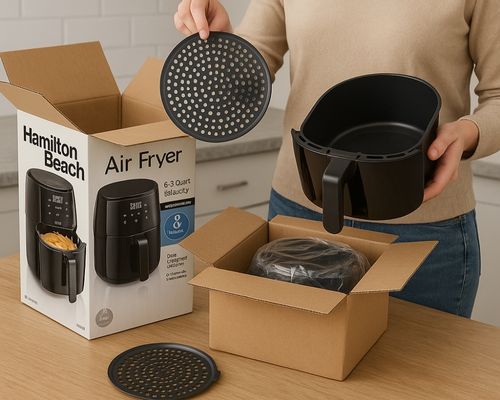
Unboxing and Assembling
When I opened my Hamilton Beach air fryer box, I was relieved by how simple everything looked. Inside, you’ll usually find:
- The main air fryer unit
- A removable basket
- A crisping tray
If you’re wondering how to assemble a Hamilton Beach air fryer, here’s the easy version: slide the crisping tray into the basket, then slide the basket into the unit until it clicks.
👉 In short: Insert tray → place basket → you’re ready.
Before cooking, I always wash the basket and tray with warm soapy water. It removes that factory smell and makes the first cook feel cleaner. Compared to learning how to assemble a Hamilton Beach deep fryer, this is much easier—no oil tanks, no heating coils, no mess.
Pro tip: Keep the box for a few weeks. I didn’t, and moving the fryer later was harder than it needed to be.
Safety Basics You Should Know
Air fryers heat fast, and the basket gets very hot. Always place your fryer on a flat, heat-safe surface with space around it for airflow. I once put mine too close to a wall, and it trapped heat more than it should have.
👉 Quick safety rule: Never block the air vents.
Many people also ask how to reset a Hamilton Beach fryer. If your unit won’t start, unplug it, wait 5–10 minutes, then plug it back in. This simple reset has saved me from thinking my fryer was broken more than once.
Beginner do’s and don’ts:
✅ Wash basket before first use
✅ Use parchment or liners if needed
❌ Don’t spray oil directly on nonstick coating
❌ Don’t submerge the main unit in water
How to Use Hamilton Beach Air Fryer (Step-by-Step)
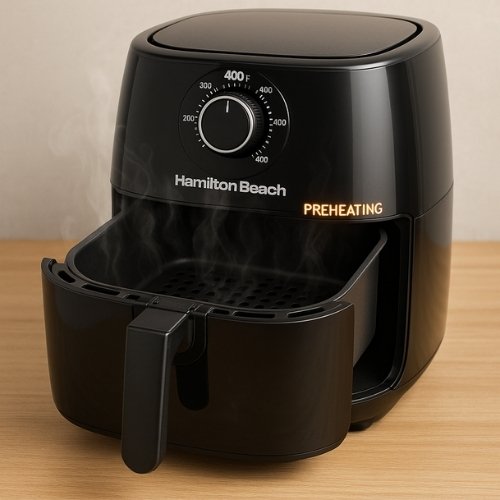
Step 1: Preheating (When It Matters)
Do Hamilton Beach air fryers need preheating? Sometimes.
For fries, wings, or frozen foods, I always preheat for 3–5 minutes. For reheating leftovers, I usually skip it. The first time I skipped preheating fries, they came out soft. Once I started preheating, the crisp improved instantly.
Step 2: Loading the Basket Correctly
This is where most people go wrong. The proper way to load a Hamilton Beach air fryer is to spread food in a single layer. Overcrowding blocks airflow and leads to uneven cooking.
I learned this the hard way with fries stacked too high. The top browned, the bottom stayed limp. Cooking in batches fixed everything.
Think of it like this: air needs room to move, just like people in a hallway.
Step 3: Setting Time and Temperature
Setting the controls is simple. Whether your model has dials or digital buttons, just match the recipe.
Reliable starting points I use:
- Fries: 400°F | 15–18 min
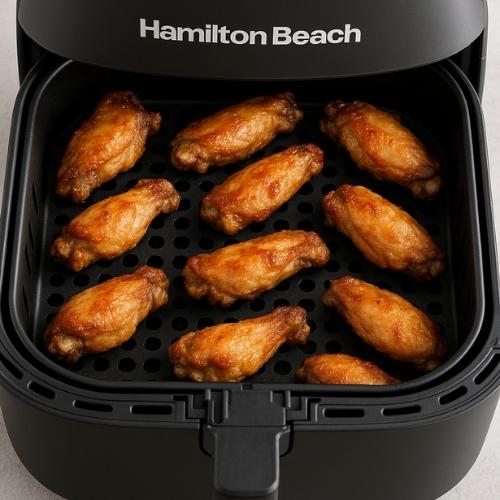
- Chicken wings: 375°F | 20–25 min
- Fish: 350°F | 12–15 min
- Vegetables: 375°F | 10–12 min
These aren’t strict rules, just solid guides. Thickness and portion size always matter.
Step 4: Mid-Cook Shaking or Flipping
Halfway through cooking, pause the fryer, pull out the basket, and shake or flip the food. This step alone can double your crispiness.
I once skipped shaking sweet potato fries. The bottom layer stayed pale. Now I never forget—it’s like stirring a pan.

Step 5: Removing Food Safely
Once the timer beeps, pull the basket out using the handle. Use silicone tongs or a spatula to remove food.
I tried tipping fries straight onto a plate once. Bad idea. A heat-safe mat and tongs make things safer and cleaner.
How to Use a Hamilton Beach Deep Fryer (If You Own One)
I own both an air fryer and a deep fryer, and they serve different moods. The Hamilton Beach air fryer is my weekday hero. The deep fryer comes out on weekends.
Key Difference
- Air fryer → hot air circulation
- Deep fryer → hot oil immersion
Step-by-Step: Hamilton Beach Deep Fryer
Step 1: Fill Oil Correctly
Fill oil between the MIN and MAX lines. Never overfill. I did once, and cleanup wasn’t fun.
Step 2: Heat the Oil
Set the temperature and wait for the ready light. Rushing this step leads to greasy food.
Step 3: Load Basket Lightly
Half-full basket cooks better than a packed one.
Step 4: Lower Slowly
Lower the basket gently to avoid splatter.
Step 5: Drain Properly
Let food drain on the fryer hook before transferring.
Step 6: Drain Oil After Use
Let oil cool fully before straining or discarding.
Cleaning and Maintenance
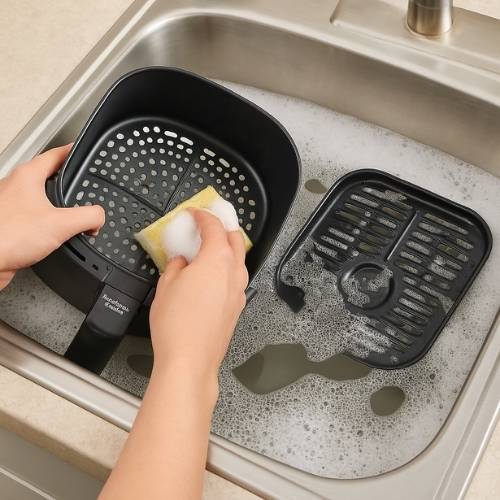
After Each Use
Cleaning right away saves time later. I rinse the basket as soon as it cools.
To clean a Hamilton Beach air fryer basket:
- Warm soapy water
- Soft sponge
- Dishwasher if allowed
Avoid metal scrubbers. I scratched mine once and learned my lesson.
Long-Term Care
If your fryer stops working:
- Unplug
- Wait 5–10 minutes
- Plug back in
For storage, I leave the basket slightly open so odors don’t build up. I also coil the cord loosely—tight wrapping damaged mine early on.
My Personal Tips from Daily Use
Fries, wings, and frozen snacks shine in this fryer. For wings, a light oil spray keeps them juicy. Frozen food cooks better than in an oven, especially when shaken halfway.
My biggest early mistake? Setting the temperature too high. Lower heat and a few extra minutes give better results every time.
Why do I stick with Hamilton Beach? It’s simple. No confusing menus. No gimmicks. Just reliable cooking that works day after day.
Common Issues and Fixes
Air fryer won’t turn on
→ Unplug, wait, reset
Food cooks unevenly
→ Basket too full, cook in batches
Smoke or odor
→ Clean tray and basket thoroughly
Most problems come down to airflow and cleanliness.
Conclusion about how to use hamilton beach air fryer
Learning how to use a Hamilton Beach air fryer is easier than it looks. Once you understand preheating, spacing food, and shaking midway, the results become consistent and reliable.
From quick fries to crispy wings, this fryer makes cooking faster and cleaner than traditional methods. With a little practice, it becomes one of the most useful tools in your kitchen.
My advice? Start simple, follow the steps, and adjust as you go. Before long, you’ll be cooking meals that taste better than takeout—with far less effort.
visit Official website instructions
FAQs on How to Use and Care for Hamilton Beach Air Fryer
How do you use a Hamilton Beach air fryer for the first time?
Wash the basket and tray, plug in the air fryer, preheat for a few minutes, then place food in a single layer and set the time and temperature.
Do you need to preheat a Hamilton Beach air fryer?
Yes, preheating for 3–5 minutes helps food cook evenly and come out crispier.
How to use Hamilton Beach deep fryer safely?
Fill with the right amount of oil, set the temperature, wait for the ready light, and always lower food slowly with the basket to avoid splatter.
How to reset Hamilton Beach fryer if it stops working?
Unplug it, wait 5–10 minutes, then plug it back in to reset the fryer.
Can you cook frozen foods directly in Hamilton Beach air fryer?
Yes, you can cook frozen snacks like fries, nuggets, or wings directly—just add a couple extra minutes to the cooking time.
Read related Post:
- Ninja SP351 Review
- presto 05420 frydaddy electric deep fryer review
- Ninja SP151 Review
- How Much Oil For Presto Deep Fryer
- How To Clean Presto Deep Fryer
- Ninja AF101 Air Fryer Toxic
- How to Use Presto Deep Fryer
- how to clean cosori air fryer

Hi, I’m Rob Newaz Khan. I share practical, experience-based guidance on kitchen appliances such as air fryers and coffee makers. My content is built around real home use, common user questions, and manufacturer best practices, with the goal of helping readers use their appliances safely, fix everyday issues, and make better decisions in the kitchen.